
Guide briefing
Halo: Campaign Evolved PC Optimized Settings
A reproducible tuning path for PC players: start from the recommended preset, understand which settings cost performance, test Async Compute on your own hardware, and only then trade image quality for frame rate.
Before you start
- — PC version of Halo: Campaign Evolved.
- — Record a repeatable scene and its baseline frame rate before changing settings.
Measure one repeatable scene before tuning
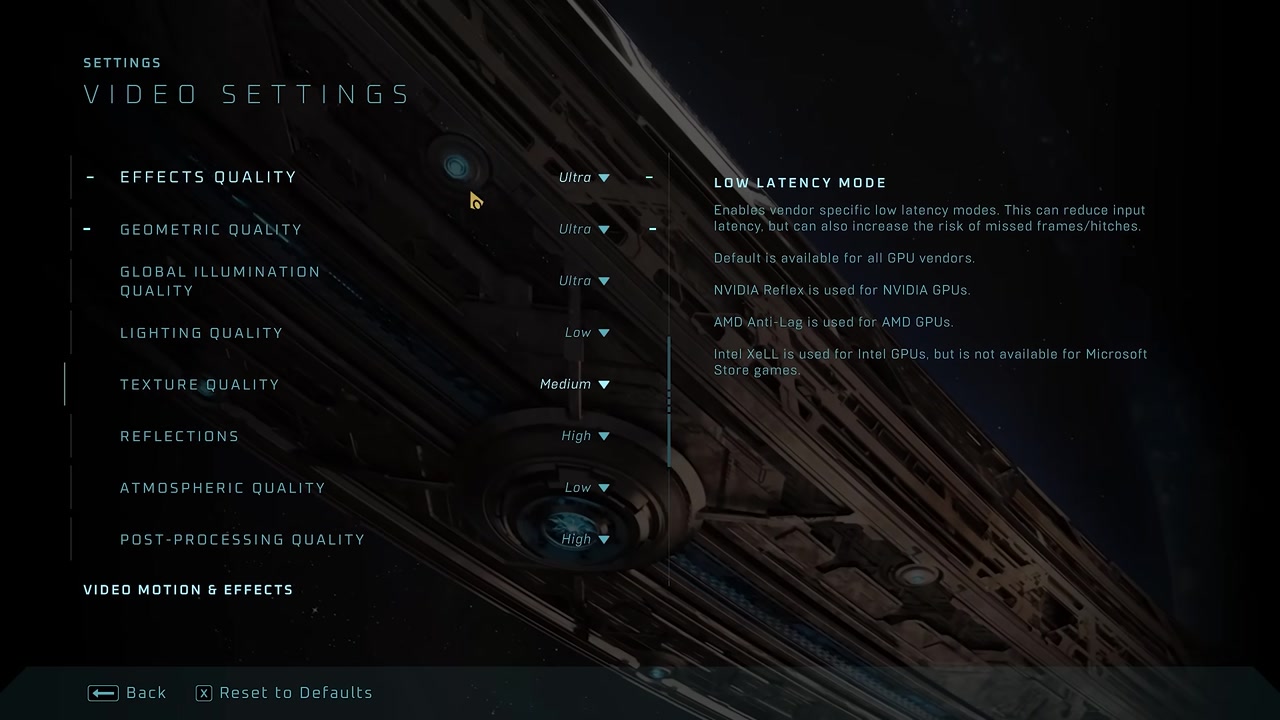
The graphics menu has limited scaling, so random changes can obscure which option actually helped. Use the same save point, camera direction, resolution, and upscaler mode for each comparison.
How it works
- Choose an outdoor or combat-heavy checkpoint and record the baseline frame rate and frame-time behavior.
- Keep resolution and DLSS or other upscaling mode unchanged while testing individual quality settings.
- Change one setting at a time, replay the same scene, and keep the change only when the improvement is visible or measurable.
Set Effects to Medium and Geometry to Low or Medium
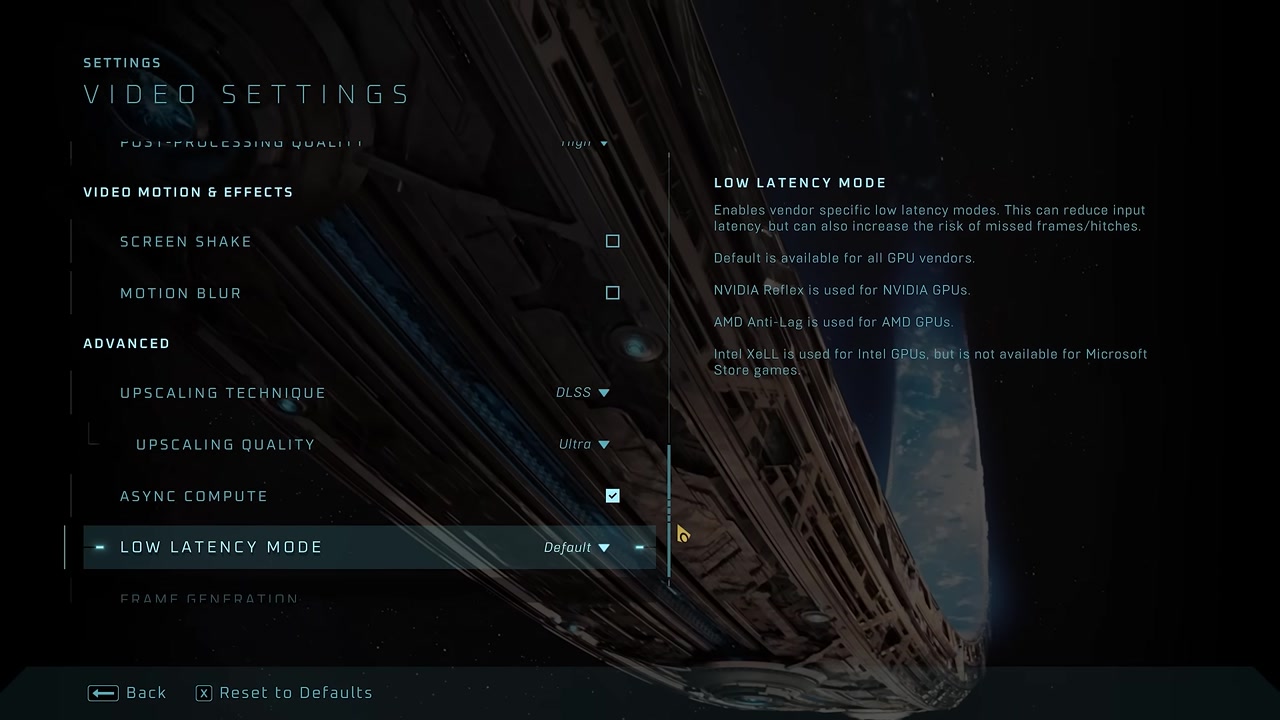
Effects Quality showed no clear visual or performance change in the tested scenes, while Geometric Quality mainly changes scattered rocks, grass, and decorative meshes. Geometry cost about five percent from Low to High or Ultra in the cited test.
How it works
- Set Effects Quality to Medium as a conservative default in case later patches make the option functional.
- Set Geometric Quality to Low for maximum savings or Medium when you want denser decoration.
- Do not expect Geometric Quality to solve foliage pop-in; the source test found that issue unchanged.
Use High Global Illumination
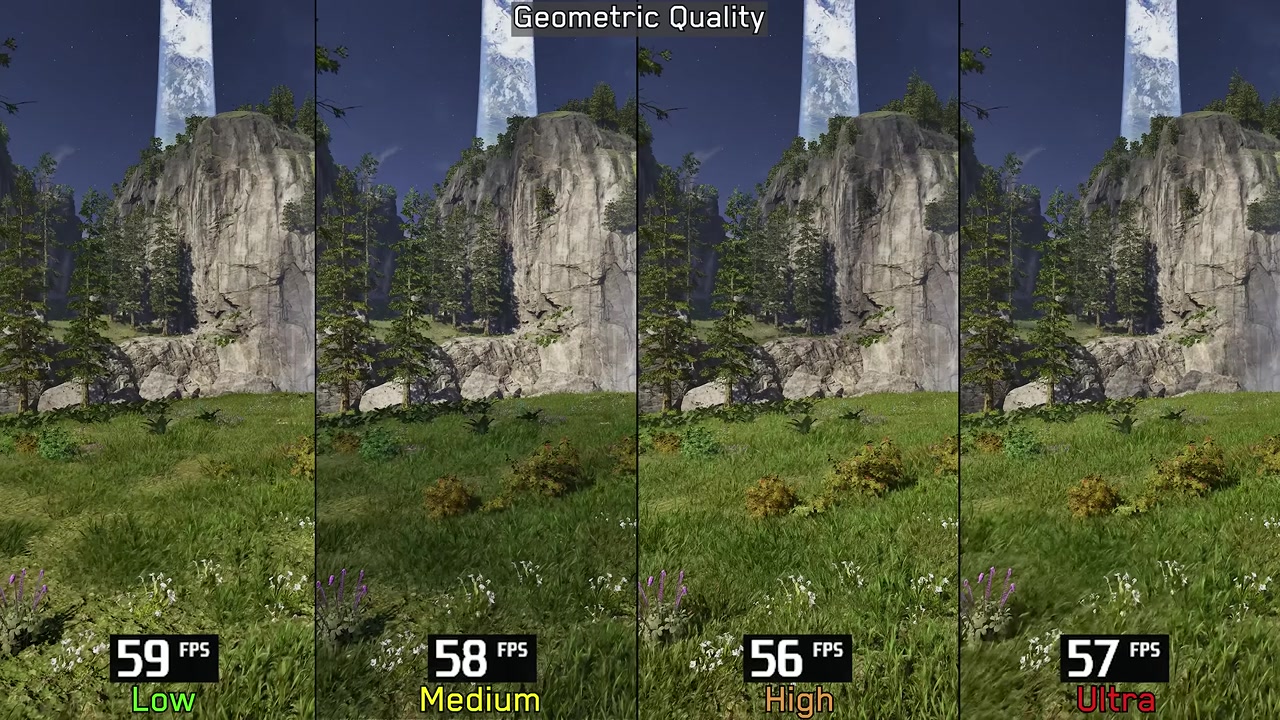
Global Illumination controls Lumen indirect lighting. Low through High remain relatively close, while Ultra improves bounce coverage and temporal stability at a more noticeable performance cost.
How it works
- Set Global Illumination Quality to High for the recommended balance.
- Compare shadowed interiors and indirect light rather than bright direct sunlight when checking the result.
- Use Ultra only when the extra bounce lighting is visible to you and the measured cost fits your frame-rate budget.
Choose Medium or High Lighting Quality
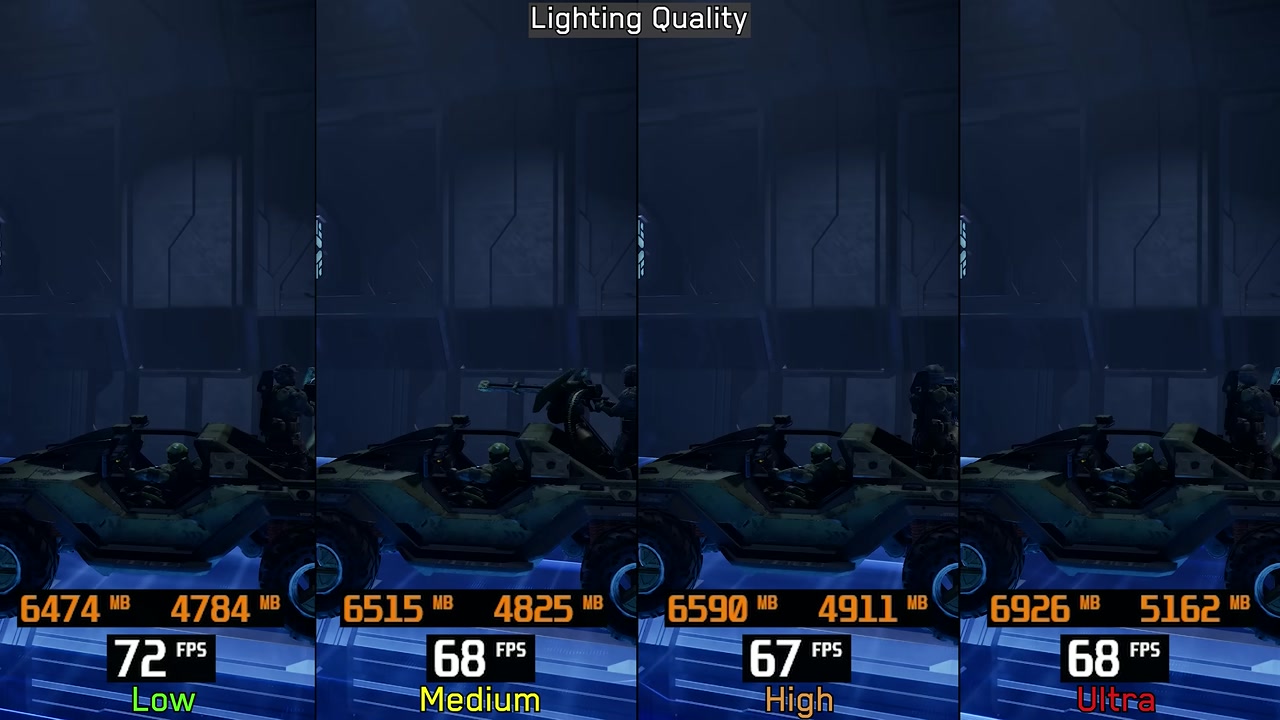
Lighting Quality affects virtual shadow maps, local shadow cleanliness, projected light, emissive noise, and volumetric definition. The source measured progressively higher cost and VRAM use through Ultra.
How it works
- Use Medium when frame rate or VRAM is tight; it already improves volumetric edges over Low.
- Use High as the visual sweet spot for cleaner local shadows and emissive lighting.
- Avoid Ultra unless softer sun shadows justify the additional performance and VRAM cost on your system.
Match Texture Quality to VRAM, not average FPS
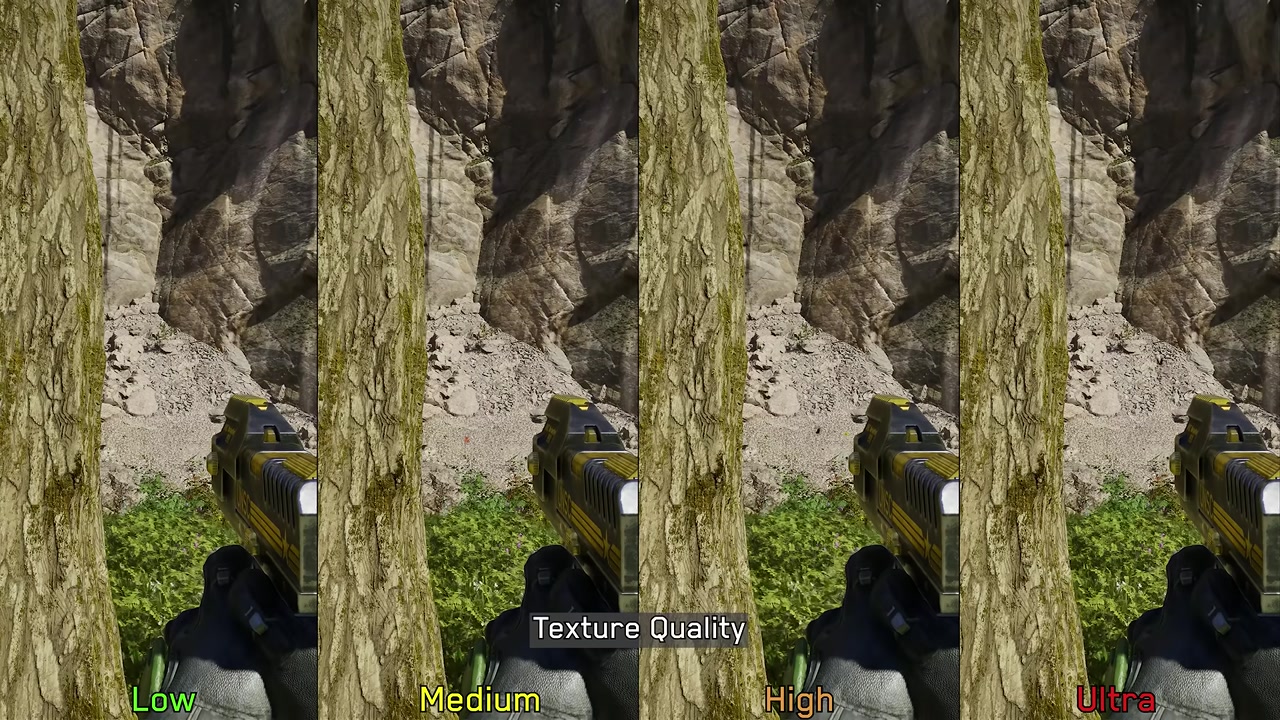
Texture Quality mainly changes the streaming memory budget. Lower settings take longer to load full-resolution textures, while the settled image can look similar after streaming completes.
How it works
- Use High on an 8 GB GPU at 1440p with upscaling and the optimized preset, then watch VRAM behavior.
- Drop to Medium if textures repeatedly stream late, VRAM is saturated, or other applications consume GPU memory.
- Judge the setting after textures finish loading rather than during the first seconds after entering a level.
Use Medium or High Reflections and Low Atmosphere
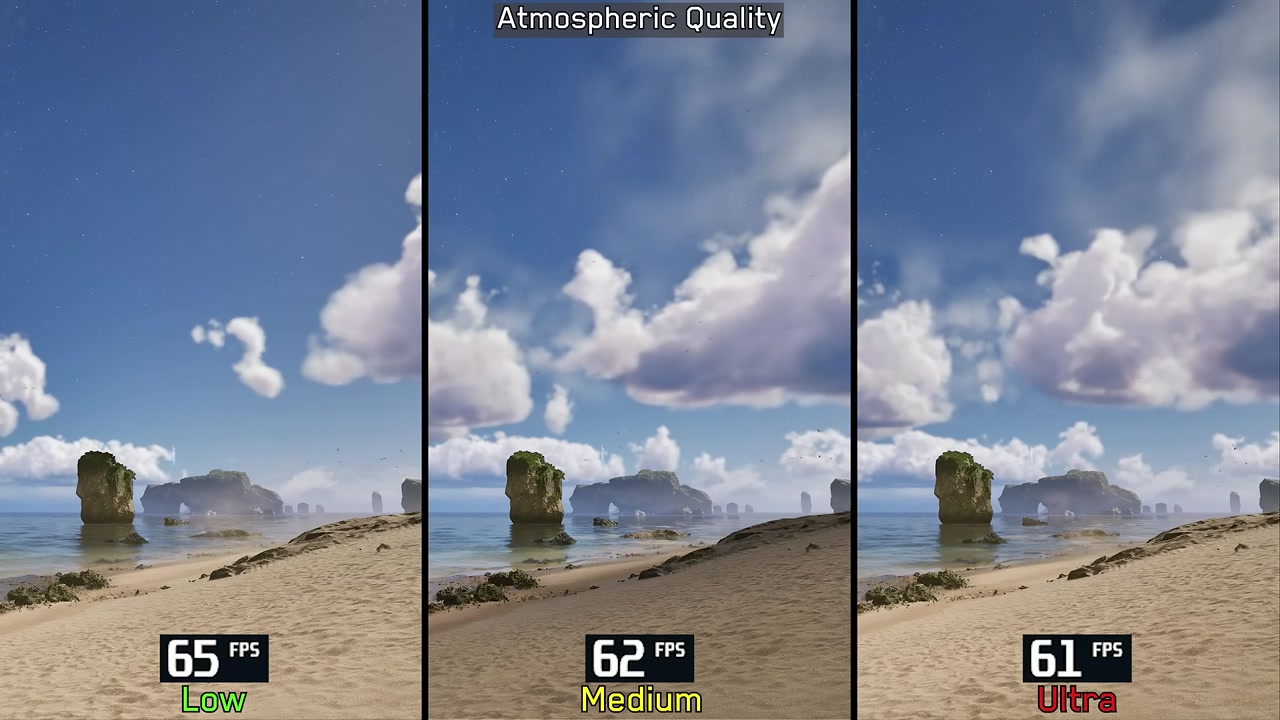
Reflections can become expensive in caves and glossy spaces, especially at Ultra. Atmospheric Quality reaches good cloud quality from Medium but incurred a sizable cost in the cited test, while Low remains the performance recommendation.
How it works
- Set Reflections to Medium; raise to High only after testing a reflective cave or interior.
- Avoid Ultra Reflections unless the measured cost is acceptable in the most reflective scene you can reproduce.
- Set Atmospheric Quality to Low for the optimized preset; use Ultra only when cloud and water-refraction quality matters more than the roughly ten-percent cited cost.
Use Low Post-Processing and benchmark Async Compute
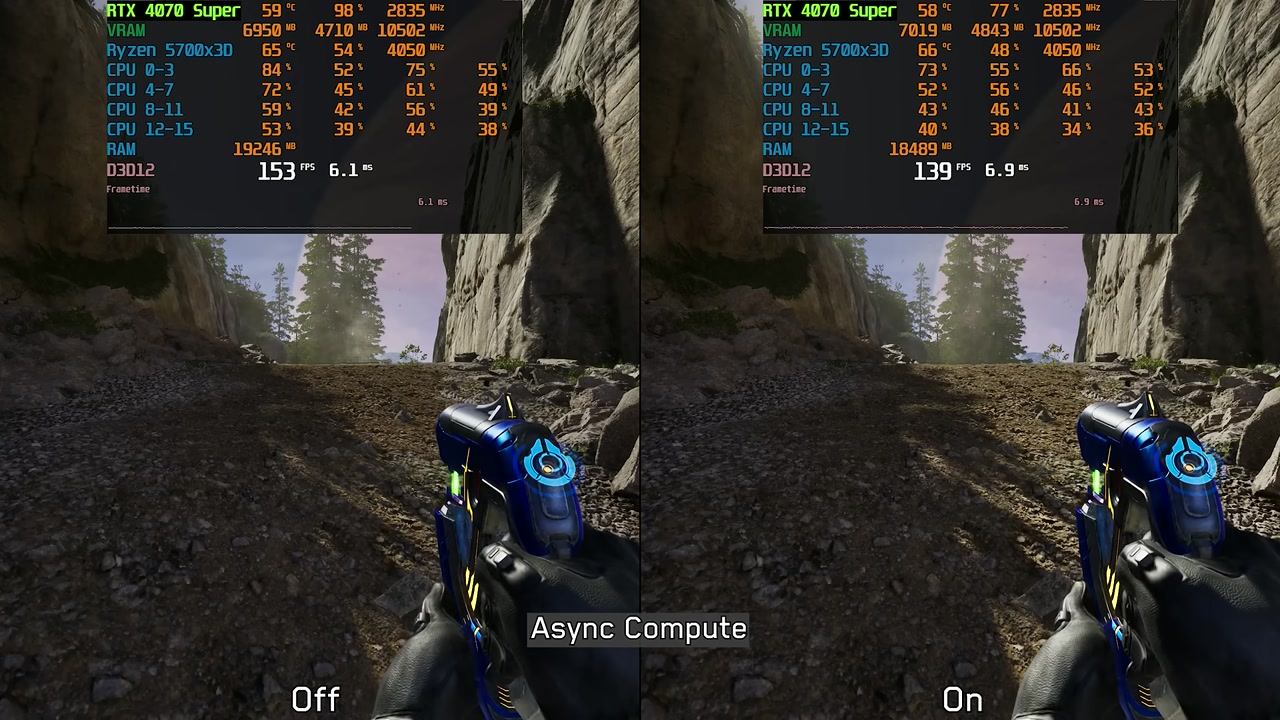
Post-Processing Quality produced little visible difference in the source test, while Async Compute helped when GPU-bound but could hurt when CPU-bound. Async Compute therefore needs a local A/B test.
How it works
- Set Post-Processing Quality to Low to recover the small measured cost without losing obvious image detail.
- Run the baseline scene with Async Compute On, then repeat it Off with all other settings unchanged.
- Keep On when GPU-bound performance or frame time improves; keep Off if GPU utilization or performance drops in a CPU-bound scene.
Source boundary: Low Post-Processing does not disable forced film grain or chromatic aberration in the tested build.
Apply the complete preset and verify the worst case
The cited optimized preset gained roughly 22–25 percent over Ultra in several 1440p scenes, but a demanding Warthog section still fell below 60 FPS on the test GPU. The final check must therefore use your hardest repeatable scene, not an easy interior.
How it works
- Apply: Effects Medium, Geometry Low or Medium, Global Illumination High, Lighting Medium or High, Textures High for a stable 8 GB card, Reflections Medium or High, Atmosphere Low, and Post-Processing Low.
- Choose an upscaler mode that meets your image-quality target and keep it fixed during the final comparison.
- Replay the most demanding route you know; if it misses target, lower Lighting to Medium, Geometry to Low, or the upscaler quality one step at a time.