
Guide briefing
Complete 52-Target Campaign Walkthrough
Language: en Hey everyone, Maca here playing Halo Campaign Evolved and welcome to my locations guide for all of the skulls and terminals available in the game. As soon as we gain control of the Master Chief for the first time, we can go to the corner of the cryo room and do a crouch jump onto the ledge to find the speed skull. In the bottom left corner of the screen, you can see the name of the mission, the closest rally point if you're looking to mop up through chapter select, as well as the name of the collectible we're going for. As we work our way through the ship, we will see the elite come around the corner here and you'll see that the wall is labeled B02L. In the next room here in the middle, you'll be able to find the magnified skull which will allow your assault rifle to have 60 bullets. Every mission in the game, by the way, will have three skulls and one terminal. For rally point Bravo, we'll start this section with a cutscene. As we leave, we'll get the magnum for the first time and before we continue on with the mission, return into the kind of cockpit area and then drop down to the front of the ship into the observation pen to find the perspective skull allowing you to play in third person. As we work our way through the mission, you'll come to this door labeled C04U. This is the window overlooking the cryo where we started the mission. And here, if you go forward towards our objective but hook around to the left, you'll find a little bit of a secret room with a terminal. Here, you just want to make sure you approach and interact with it to unlock it. The second mission of the game is named Halo and this is as rally point alpha becomes rally point Bravo. You'll get a warthog or you can go on foot if you want to do it the hard way. And you will go from one area to another using this kind of underground tunnel. About halfway through, you'll notice a little bit of a window to your right-hand side. Hop on out of your Warthog, turn on your flashlight, jump kind of through the window, and then immediately down to find a ledge. On this ledge, you can find a terminal named Forgotten. After coming out of the underground section, you'll begin rally point Charlie, and you'll be able to get the Grunt Funeral Skull by going to the closest to the left objective first. You can do them in any order. It's the one that's kind of up this hill through this mountain pass. This one will require you to do a little bit of a grenade jump. This is one of the only kind of skill-related skulls in the game. Most of them are fairly easy. But if you come to this pillar in the middle, you would be rescuing the Marines underground, but instead, if you take out the enemies so they don't bother you, and then jump up on this ledge and turn around halfway, you'll be able to jump up on this little edge and throw a grenade under your feet, jump into the grenade as it explodes for it to boost you up towards the skull. You can also do a crouch jump, but it's even harder to hit than the grenade jump in my opinion. If we go back to the beginning of the area as a reference point now, we can also grab the Give and Take Skull, where firing your weapon will drain your shield, but dealing damage to enemies recharges it. The easiest way to find this one is to just follow the creek in the middle of the area. When it splits left and right, go to the right-hand side. Continue to follow the creek until you end up in a bit of a cave with an overhead rock. Stop in the middle, and you'll find it on your left. The Floor is Lava Skull has potential to be pretty fun as you take continuous damage whenever you're touching the ground while using this skull. The easiest way to do this one is to go to one of the objectives here and it's going to be the one with the rocks in the middle, the Jackal snipers, and you'll have to come here in order to complete the mission anyways. The easiest way to grab the skull is to just kind of go up one of these smaller rocks in the middle and once you get to the top, you'll be able to do a sprint jump over to a ledge where some of the enemies will be sniping at you from. If you then turn towards the entrance we came from, you'll be able to find the skull sitting on a rock that you'll have to jump to and if you land on top of it, you can just grab it. On the mission Truth and Reconciliation, you'll fight your way through the beginning parts of the level until you reach this large gravlift. There will be a bunch of enemies here which I've already taken out, but if you sprint to the far side edge of this area, you'll be able to look off the edge of the cliff and down below, you can also listen for the audio cue of the skull. The Iron Skull is the one that is probably going to make Lasso the hardest as it's the skull that will force you to have to restart the level upon death. Shortly after entering the ship, you'll come through these doors and enter into this room. This is the only time in the guide where I'll recommend that you use the Acrophobia skull which is a skull that gives you wings allowing you to do certain jumps a lot easier. If you come to the edge of the room here, you will be able to actually crouch jump or grenade jump your way across these ledges, but with Acrophobia, you can basically just fly to the skull which is located on a pillar in the corner of the room. Shortly after, still on rally point Bravo here, you'll enter this room which you can't really mistake. A Covenant drop ship will exit through a window to space to your left-hand side. And what you want to do is you want to run diagonally to the opposite corner of the room where you'll find this locked door. Fight enemies and wait for enemies to spawn inside of this closet. When they do spawn, quickly use your chance here to run inside and grab the foreign skull. This door will close if you're not quick and you'll have to restart the level. As we near the end of the mission, we'll have to rescue Captain Keyes inside of his prison cell and there will be a couple of doors to take. We're going to ignore our main objective and instead take the door to your immediate right when you enter this kind of lobby area. And here you may have to fight some enemies along the way, but you'll enter a prison cell here where you'll be able to open up all of the cells by activating the device. And in one of them, you'll be able to find the terminal here. And you have to do this before you save Keyes, which ends the mission. Moving on to the Silent Cartographer, we can find the Bandanna Skull pretty early on which will give you infinite ammo and grenades. First, you'll want to just get through the beach section of the game, grab the Warthog, and go towards your main objective. Instead of stopping and going inside of the Forerunner structure, continue past it into the cave to find the skull. If playing through the mission normally, there's a good chance you'll keep your Warthog, come through this narrow tunnel, and you'll have to come to this little plaza area with two Hunters. I've taken them out so they don't distract us, but in the middle of this area you'll see the structure that you can climb from the far side preferably. And if you climb it and run all the way to the end of it, if you use your ears as well for the audio cue, you'll find the Acrophobia skull which will give you wings allowing you to double jump and fly if you need to. On your way to the objective where you have to disable the security override system, you'll come into this underground section past two hunters and this objective in front of us is our main objective. Let's temporarily ignore it and instead of interacting with it, keep running forward to the end of the walkway and behind the half wall you can find a terminal here which you want to access before you move on. In the final third of the mission after disabling the shields and returning back to the location we started at, we'll now be able to get access to the rest of the area. After you come down a ramp and into a room you'll notice two hunters. Get past those hunters to find this kind of staircase that curves around and instead of continuing around it, jump down the middle landing on the skull. The Hip Fire skull will disable all weapon zoom functionality by the way. The next mission is Assault on the control room and I'm going to assume that you grabbed the scorpion when given it. If you didn't, you won't be able to grab the I would have been your daddy skull. You'll come to this canyon with a bridge going across. Take the scorpion across the bridge and then go to the left. You may have to get past this shade turret and drive all the way to the very end of this walkway. We're going to use the scorpion as a platform to get to the skull. We'll get out of the scorpion and then jump on top of it being able to jump into the ice wall to find the skull. This is a pretty infamous skull that will change some of the dialogue in the game. If we continue through the level with the scorpion, you'll come up this ramp in like an ice tunnel. At the top of the ramp, there'll be a Covenant dropship with a bunch of enemies, a couple of ghosts, as well as some shade turrets off in the distance. I've eliminated all of those to get rid of that visual noise, and instead we're going to go to the left as you can go both to the left and to the right. From the left, you'll be able to find a door into the center structure. There's really no great reason to go into the structure as you don't have to for any of the objectives or anything, but if you're in here, you'll be able to find a staircase that leads to a balcony, and on that balcony, we can find a terminal, which you'll want to grab. You will then have to ditch your scorpion if you're still in it because the road becomes too narrow. Although, if you took the warthog, you could fit the warthog through that tunnel, and you'll see that our objective is to go into the structure on the right-hand side. Let's temporarily ignore that noticing the kind of three spines that make a bridge on the left. Go on top of the far left one, and here you'll find the angry skull, which makes enemies fire their weapons faster and more frequently. The cowbell skull, which is a fan favorite, happens during rally point echo. You'll come outside onto this bridge. If you hijack some of the banshees, you can get an achievement or trophy here, but if you actually jump down underneath the bridge onto the structure, you'll find this skull, which changes how the physics interact in the game by reducing the mass of objects, making them move more easily. On the mission 343 Guilty Spark, near the very beginning of the mission, we can find the fog skull, which disables the motion tracker. As you come around the first corner here, noticing the Covenant drop ship in the tree, instead of going forward, go up the ramp on the left. You'll end up at the base of a tree, and then you'll want to jump up the base of the tree to your right, just past some of the roots and branches, and on a rock you should find it sitting on top here. Once you're inside the structure, just keep following your main mission objectives, and you'll come across the paranoid marine. He's very hard to miss. Here you can grab the That's just wrong skull, which increases enemy awareness by eliminating this marine. He'll drop it once you do that. As you play your main objective will become escape, and you'll return to one of the first rooms that we entered when we entered into this indoor section, but now you'll have access to a light bridge that will get you across to a previously locked door. As you come around the corner, you may see the unfortunate fate of some of the marines, but instead of continuing forward, hook around the wall to find the terminal on the other side. This one is named Tangent 2. At the very end of the mission, you'll be asked to extract at this waypoint, and you have to make sure you grab the skull before taking out all of the enemies, or else the mission will end early. Instead of going to the waypoint, go to the right of the building, and then just kind of keep going into the woods. You can use the little notch on the compass as the direction I'm traveling, and you'll notice that in the corner there is a tall rock with a tree branch that's leaning against it. You can use this tree branch to walk across the gap onto the rock to find the They Come Back skull, which makes reanimated flood enemies more dangerous. On the mission The Library during the first rally point, you will reach a door that is not possible to open, and you're going to have to use the access tunnels to get across, and your objective will change to take the elevator into the lower chambers. After you exit the access tunnel, go up the pillar on your right-hand side to find the Tilt skull. After taking the elevator, you'll eventually reach this door that Guilty Spark will try to unlock, and a bunch of enemies may spawn as well. As he's using this door, what you can do is turn around 180° and on the opposite wall, you'll find the Pop skull. This will require you to go up the ramp and then do a crouch jump and another crouch jump to land on the skull and pick it up. This will cause flood to explode if shot in their weak point. From the skull location, hold out until the door is opened, and your objective is technically to go to the right. Instead, open the door to the left, and here you'll be able to shoot the small flood sack to release some enemies, but also open up a path into the next room. You may have to crouch to get on through, and around the corner here on the right-hand side, you'll find a terminal named Tangent 3. We are now nearing the end of the mission. We've taken the elevator even further down to rally point Charlie if you're using chapter select and directly in front of you after taking out some of the enemies, you can go down this ramp and find the famine skull tucked away to your left. The famine skull makes it so that weapons dropped by enemies will have half ammo. The mission to betrayals has some really easy things to find and some tricky ones to find. We'll start with easy at the very beginning of the mission immediately when you spawn, run behind yourself to find a terminal called alone. After you exit the building, you'll be asked to go all the way to the ground floor where the game wants you to commandeer a banshee to reach the upper landing. Immediately when you grab the banshee though, don't go to the checkpoint, instead fly back to the building we came from and up the spire. As you reach this little light source, if you time it correctly and come out of the banshee, you'll be able to land on the spire and pick up the tough luck skull. You may want to restart the checkpoint afterwards if you lost the banshee like me though. You'll take out your first of three conduits and then at the beginning of rally point Charlie if you so desire to go through chapter select, you'll exit out of the structure and you'll notice these three pillars in front of you which may be familiar from the assault on the control room mission we did earlier. Run across the middle pillar directly in front of you, go down the ramp and this one can be a little bit hard to see as it's kind of scattered amongst some flood areas. It doesn't really stand out too well, but pick it up before you move on. Later on in rally point Charlie, we'll be running on foot and there'll be a couple of hunters fighting flood tank, which I believe is a new enemy type in this remake. And we're going to need to get a banshee to fly up to the next conduits, which we're still at one out of three. Instead of going towards the objective, go right up the spire right next to us and land on this platform in the middle. There will be some enemies here, which I'll take care of very quickly. But in the middle of this spire, there's also a switch. You want to activate this switch, which is not mandatory to complete the mission, but the switch will open up a door in the direction we're facing when pressing that button. So, ignore your main objective and now fly towards the platform on the opposite side of this canyon. Drop out of your banshee and then enter into this room and there'll be a lot of enemies in here. This might get fairly difficult on something like the legendary difficulty, so you might want to come back through chapter select if you are struggling. Now, what you want to do is start taking out all of the enemies and once you do, if you take out all of the enemies in the first room, you'll be able to activate a switch that opens up a door into a hallway. There will be even more enemies in this hallway and if you take out all of these enemies, you'll be able to activate a switch at the end of the hallway that opens up yet another door. And now in this final room, if you take out all of the enemies in this room, it will spawn the mythic skull kind of in the center of the room in this pillar structure and it can be a little bit hard to see without your flashlight, but only after all the enemies are taken care of can you pick it up. On the mission keys, as soon as the mission starts, we can get one of the more unique skulls in the game, which is called catch. The catch skull will make enemies throw and drop more grenades, and this does require you to play on heroic or legendary difficulty. Now, the reason this one's a little more unique is because it has pretty unique unlock criteria. You'll notice in the top right corner of the screen I have a little bit of a timer going, and this is because it requires you to do a little bit of a speed run. I'm not exactly sure how fast you need to go. I believe the cutoff is about 5 minutes, and I'm going to show you this little intro section in 2 minutes and 20 seconds flat. Also, what makes this a little bit easier is that I believe if you fail and have to reload the last checkpoint, it will kind of like restart the timer back to where it was. And for the most part, you can be avoiding most of the enemies. I also used my invis at a very specific time in order to avoid as much combat as possible. Because we are avoiding enemies, we won't actually be getting too many checkpoints, but one thing to notice is when you come around this corner, there's usually a rocket launcher that will hit right in the water, and that's why I'm dancing back and forth waiting for the rocket launcher, which for some reason just never came. Around this corner, feel free to take out these enemies with some grenades or jump on by if you can get lucky like me. And as you enter into the grav lift area, make sure you grab the overshield. It will save you if things get weird. Come around the corner and take out as many enemies as possible. You don't actually need to take them out, but they will damage you quite a bit if you don't. The only enemies that actually matter are the ones on the grav lift plate themselves. There'll be a a couple of specially marked covenant enemies, which are our priority, and then all we need to do is stand in the gravlift and take out enemies until the direction of the gravlift reverses. Now, the skull is actually directly above us and it will despawn if you take too long. But, as soon as you start floating up and towards the spaceship, start holding the button you would use to pick something up and you will catch it on your way up. If you don't get it, make sure you reload the checkpoint. Once in the ship, you'll go through some hallways and enter through this door which may seem like a familiar room from earlier on in the campaign. Look down and to your right, you'll notice an overshield. If you drop down towards that area, you'll find a little bit of a secret hallway where you'll jump over some items and find the blind skull in the corner. This skull will get rid of all of the hood elements and weapons on your screen. Continuing through the mission objectives, you'll enter into this large docking bay where we have been before in the campaign. Our objective is to ascend to the upper deck, but if we want to find the terminal, we actually want to do the opposite. Go through the door on your left from where we entered the area. Here, you'll find a ramp that goes downwards to the main floor. Taking out all of the hunters and enemies that spawn in here, halfway down the ramp on the right-hand side, you'll find a little pathway that leads to a terminal. The piñata skull happens near the end of the mission. You'll enter into a room which will start a cutscene. This is the room that Keys is in and after the cutscene, you'll spawn right next to him. And all you want to do is you want to just turn around and begin meleeing what remains of Keys. Eventually, I'm not sure if it's how many times you melee or where you melee, the piñata skull will appear. The final main line mission of the Halo 1 campaign is the Maw. Near the beginning of the mission, as we're working our way through the Pillar of Autumn, you'll enter into room B03L, which is also known colloquially as the mess room. You learn something new every day. On the right-hand side of this room, find the terminal before you move through. Surprisingly, the skull locations on The Maw are fairly easy. You'll enter what remains of the cryo room. Through the magic of editing, you'll take out all of the enemies. And in the far left corner, not far from where we found the first skull of the game, we will find the Stowed Reload skull, which allows you to backpack reload like in the original game. Later on in rally point Bravo, you will enter into the engine room, which has a left and right side. You can find the Boom skull, which increases the explosion radius by two times, on the right-hand side of the engine room. You'll want to make your way all the way to the very top, which I'll take the long way. You can kind of do a couple of grenade jumps and stuff to make it a little bit faster if you're feeling adventurous, but you'll make your way up to a console, which kind of opens up the like pistons of the engine. And right next to one of those consoles, you'll see a ledge. That ledge has a box on it, and we're going to jump down to that ledge right here, to the left of this console. On that ledge, underneath this box, there is like a weird invisible wall you might have to crouch under, but you'll be able to find the Boom skull here. Just get underneath that uh invisible wall if you need to. The final section of The Maw has us taking control of a Warthog and trying to escape the area before the finale of the mission. Just go along the main path and eventually you'll end up inside of a tunnel. You may notice a door on the right-hand side as you enter the tunnel, we can ignore that. And then a little bit later on, you'll notice a door to your left-hand side, which we will also ignore. But then we will come around a bend and in that bend you can find a shortcut on the right-hand side and we will want to take that shortcut. Halfway through the shortcut, you want to get out of your warthog and find the thunderstorm skull on the ground. Halo campaign evolved also has three bonus missions, all of which also have three skulls and one terminal each. In the first area of boarding action, which is the first bonus mission, after you clear the entire hangar bay, Johnson will try to meet you at the top where he, I believe, opens up a gravlift or a door for you to go through. Instead, go to the opposite side from where we entered. Here you'll be able to look to your right-hand side and drop down, accessing a door that we previously wouldn't have been able to go to, which leads to a bridge and that gets you the malfunction skull. Later in the mission, you'll come through a large three-story atrium and then this is the room afterwards. You'll notice that there is like a tube you'll kind of use to get across the room at the top, but instead in this room we can actually backtrack to the room we were in before. So from the entrance, go to the far side up the ramp and then go and run all the way to the beginning of the room, but now we are one floor higher. Exit on the left-hand side through the doorways and [music] in front of you a bunch of new enemies will spawn, which I've already taken out, so watch out for them. And on this third floor of the room we backtracked to, we can find the Johnny Ammo skull, seed skull, which will discard any remaining ammo in a clip when reloading. A decent chunk of the mission later, Johnson will use this console, and then you'll be told to go up this grav lift, and we were attacked from both doors on the right and the left. Instead of following him up the grav lift, make sure you go through this left door first, which does lead to a bit of a dead end, but gets you the lead head skull. This makes it so that you no longer get extra damage from head shots, and immediately after the lead head skull, you can follow Johnson up the grav lift that he activated earlier. And as soon as you do, instead of walking forward when you land, turn around and look over your left shoulder as accessing a door, and here, inside, finding terminal named The Path. The second bonus mission is named The Most Dangerous Game, and for the Temperamental skull, it actually happens in three parts. The first part happens when you come around this corner, noticing the Jackals sniping in front of you. Look up into the right to find the high value target, and make sure you crack its shield. The high value target is invincible, but just make sure you see that shield crack. And in the same play-through, in the next area, as you come around, you'll notice that there's a Wraith in the middle of the area, and at the far end of the area, behind the Wraith, you'll see the high value target again. And for [clears throat] a second time, part two is to crack its shield again before it runs away. You are able to use in-game modifiers to make this one easier if you need to, and we're going to put Temperamental on the back burner for a little bit. Once we've taken everything out, we can also grab the Recession Skull in this same area. To get the Recession Skull, when we entered, behind us there is this door with two explosives on the pillars inside of the purple flames. Shoot both of the explosives, which will open up the door revealing the skull inside as well as some armory crates. You'll then head inside of a structure, release a couple of prisoners, and work your way through this door noticing the windows on your left. And instead of going forward towards our mission marker, notice the door on your right hand side. Go through this door and find a terminal on the pedestal in this room. Now, all three parts of Temperamental have to be done in the same play through. As you exit out, you'll notice the high value target up and to the left of this area. Again, shoot him until you crack his shields, even though he's invincible and he'll eventually run away. Make sure you've cracked his shields in all three areas that he showed up. And then if you take out all of the enemies in this arena, the skull will spawn inside of the pillar in the center before you leave. Shout out to Day One, Green Skull, and War Dog for helping me figure this one out. After grabbing the Temperamental Skull in the very next room, as you enter, there'll be a ton of enemies. You can take them out if you want, but the skull will actually be kind of directly overhead as you enter. The easiest way I found to get to it was to go down the ramp and then use these rocks and then just jump up. I think you could use Acrophobia if you wanted to make it even easier, or you can use a grenade jump if you're really struggling. But inside of the purple flame on the outside of the door, you can grab this skull as your last one for this mission. The final bonus mission in Halo Campaign Evolved is named heavy burden. In the first rally point, you'll come to this bridge. Instead of going across the bridge, go to the far end and here you'll find a door that leads to a kind of side bridge that leads to nothing or does it? It leads to the eye patch skull. Rally point Bravo starts with a cutscene. After that cutscene, you'll end up with Johnson in this room with a giant hologram sphere in the middle and he'll immediately want to go back upstairs. Instead, run across the room and through the doors. Here you'll find an armory with a bunch of weapons, invisibles, and more. Which you should grab all of these things while you're here, but at the very back end of the room, there is a hidden terminal around the left corner, harmonious clarity. Grab that. This is your last terminal. You'll go through some hallways, exit out a door, and here if you look down into your left, you'll notice like three stories of enemies and platforms. If you drop down to the kind of middle platform in the middle of the area, on one of the rock pillars, you'll find a skull. This is actually grunt birthday party, a fan favorite. You may need to jump on the outside of the purple flame and then jump up onto the rock pillar and grab the skull while in the air. There are only two things left for you to do. One of them is to drop a like on this video and share it with a friend. And the second thing is to grab the final skull in the game named efficient. During rally point Charlie, you'll get on a platform. That platform will eventually stop and then you'll have to get back on the platform after you power it. I'm going to fast forward here a little bit, but the platform will go under a bridge and then enter into the next room. And this is where it can get a little bit tricky, but hopefully you'll grab it without too many issues. I'm going to take out some of the enemies on the left-hand side here, and this will be most easily done on the easier difficulties. Get a running start off the platform while it's moving and land on this area. Go to the far left corner and pick up the efficiency skull. You only have 5 seconds to get back to your platform if you want to do this in one continuous run. Hopefully, that is your last skull of the game, [music] and you unlock all of your achievements and trophies along the way. Thank you so much for watching. Drop a like on the video, share with a friend, and a special thank you to everyone on Patreon for supporting the show. Peace.
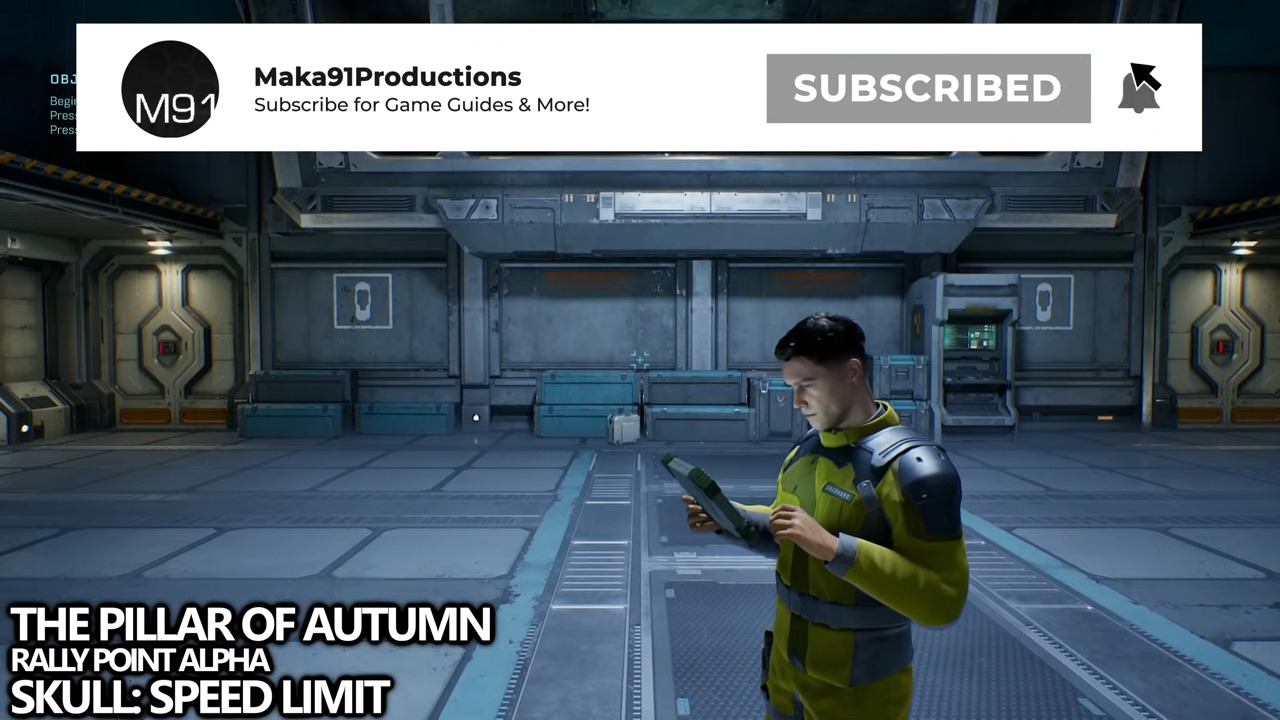
Target
Speed Limit
- Checkpoint
- Cryo chamber — mission start
- Landmark
- The two cylindrical tanks and the overhead catwalk behind the cryo bay.
Do this
- 1Turn toward the rear-left corner as soon as Master Chief is released.
- 2Use the tanks or nearby console to climb onto the catwalk, then follow it to the far end.
Confirmation
Speed Limit is recorded after the final step is completed.
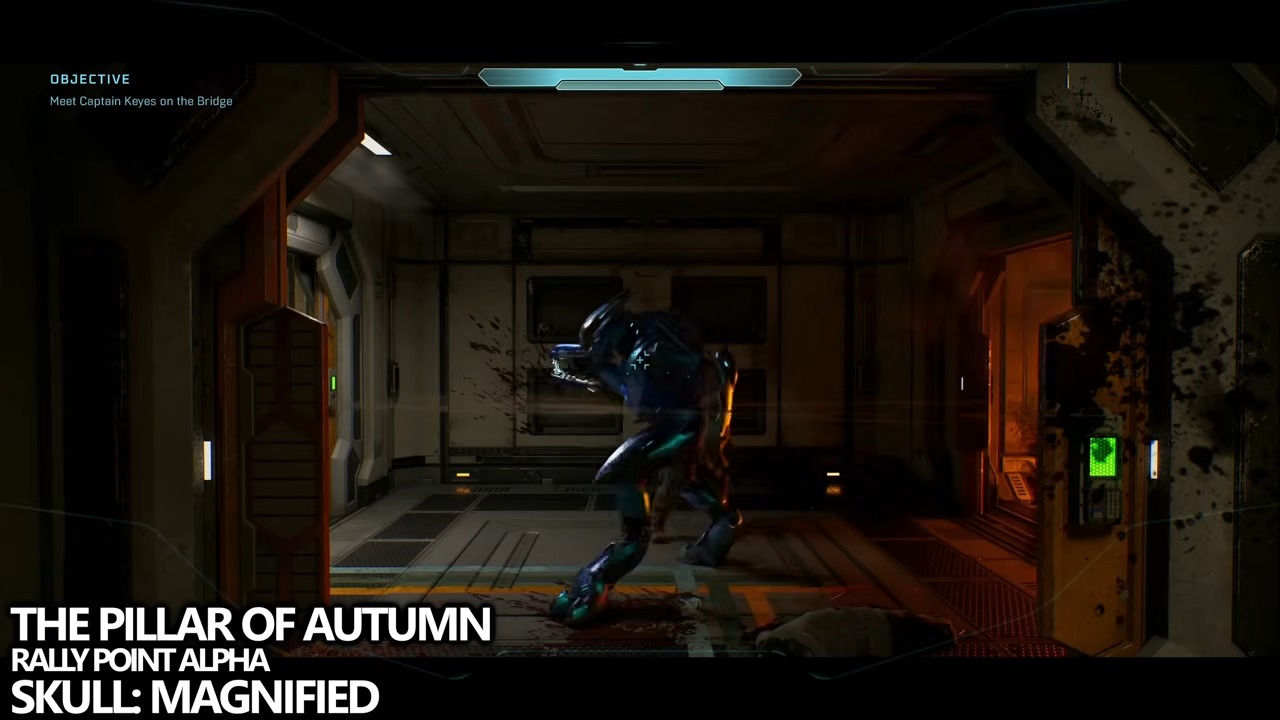
Target
Magnified
- Checkpoint
- Weapons locker approach
- Landmark
- The central locker bank immediately after the blue-Elite sequence.
Do this
- 1Enter the side room opposite the Marines before collecting your first weapon.
- 2Look above the center locker console and jump up to collect the Skull.
Confirmation
Magnified is recorded after the final step is completed.
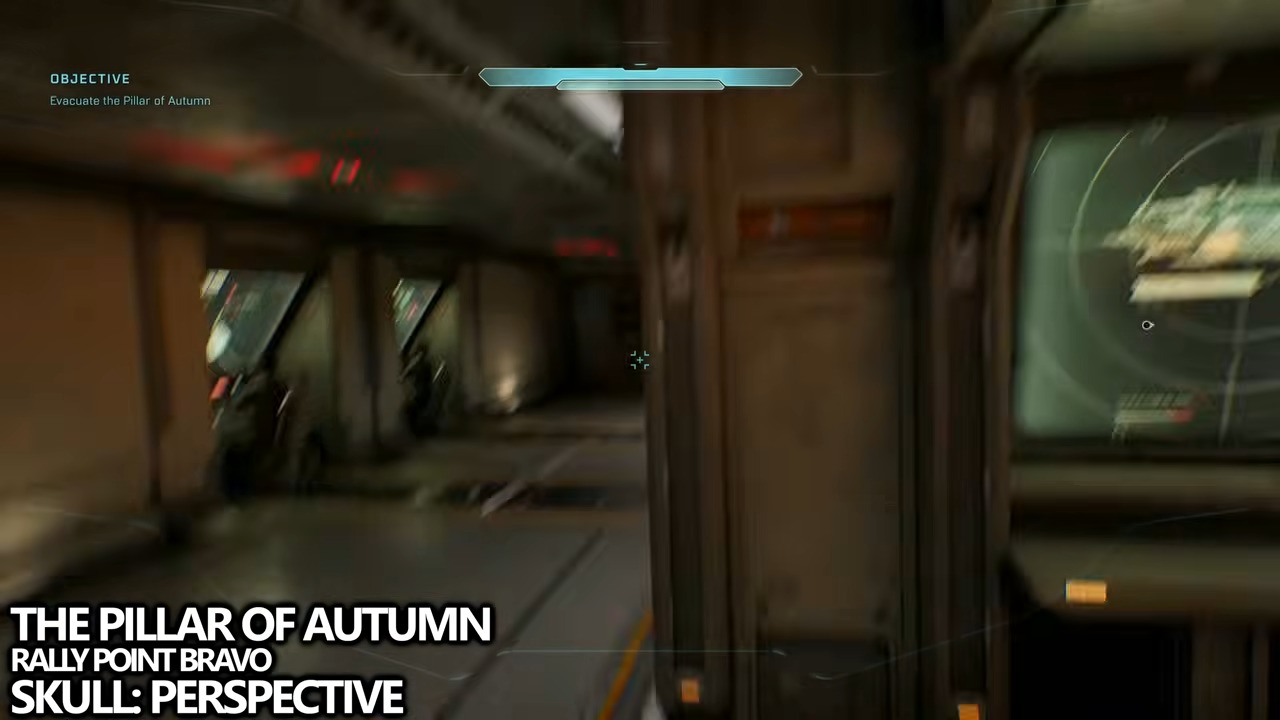
Target
Perspective
- Checkpoint
- Bridge — after meeting Captain Keyes
- Landmark
- The lower cockpit level beneath the two forward pilot stations.
Do this
- 1After the Keyes scene, turn back toward the front of the bridge.
- 2Drop to the lower cockpit deck and check beside the ladder under the pilot seats.
Confirmation
Perspective is recorded after the final step is completed.
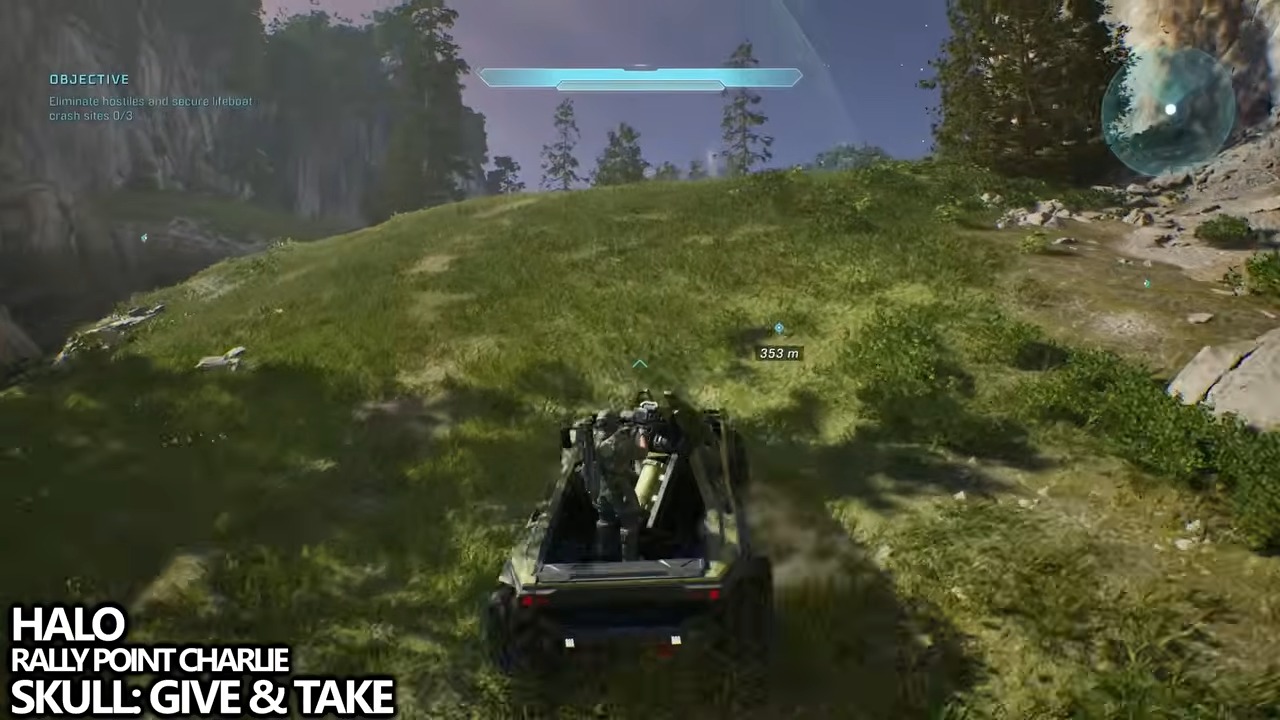
Target
Give & Take
- Checkpoint
- Lifeboat rescue valley
- Landmark
- The river cave in the central valley between the three rescue areas.
Do this
- 1Follow the river away from the central grassy rise until it enters a shallow cave.
- 2Search the large rocks beside the water inside the cave.
Confirmation
Give & Take is recorded after the final step is completed.
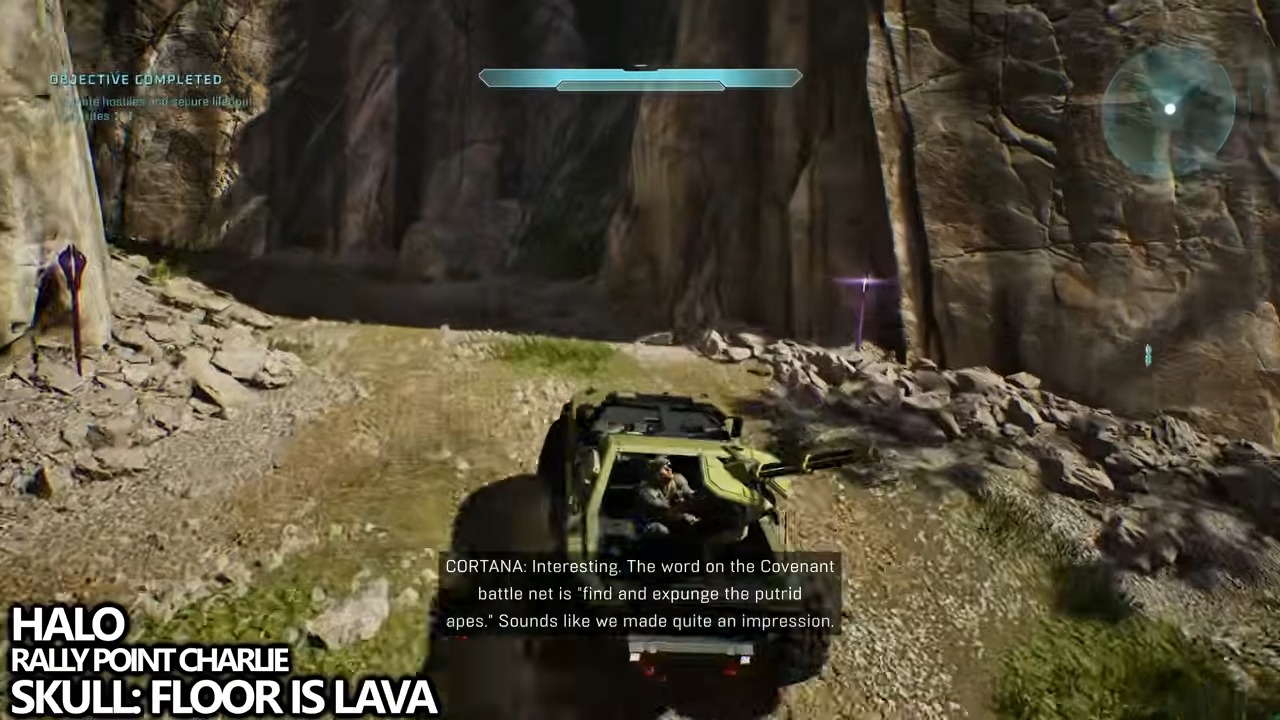
Target
Floor is Lava
- Checkpoint
- Rock-spire lifeboat site
- Landmark
- The smaller rock shelf below the tall formation overlooking the crashed pod.
Do this
- 1Climb the grassy center of the rescue area and face the lifeboat.
- 2Drop onto the lower rock shelf beneath the main formation to reach the Skull.
Confirmation
Floor is Lava is recorded after the final step is completed.
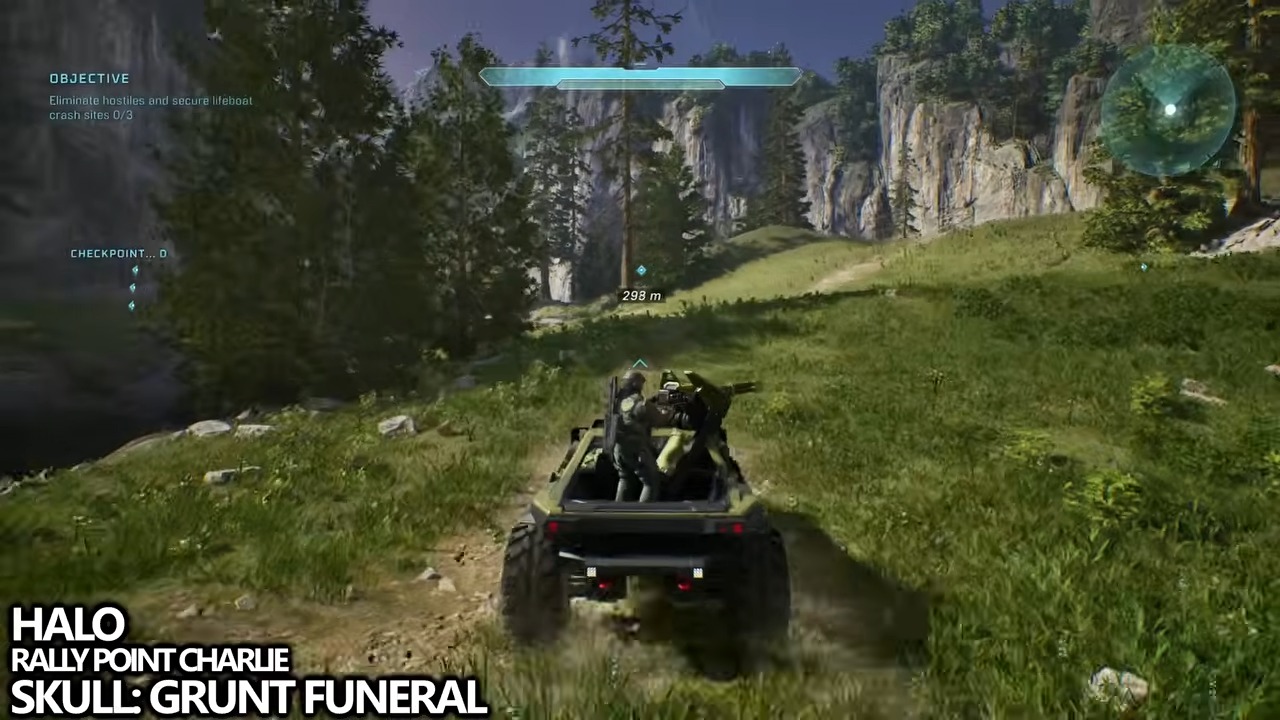
Target
Grunt Funeral
- Checkpoint
- Cliff-side lifeboat site
- Landmark
- The segmented metallic spire beside the underground rescue structure.
Do this
- 1Climb the near side of the metal spire until normal jumps stop gaining height.
- 2Use a grenade jump and turn in the air to land on the next segment where the Skull rests.
Confirmation
Grunt Funeral is recorded after the final step is completed.
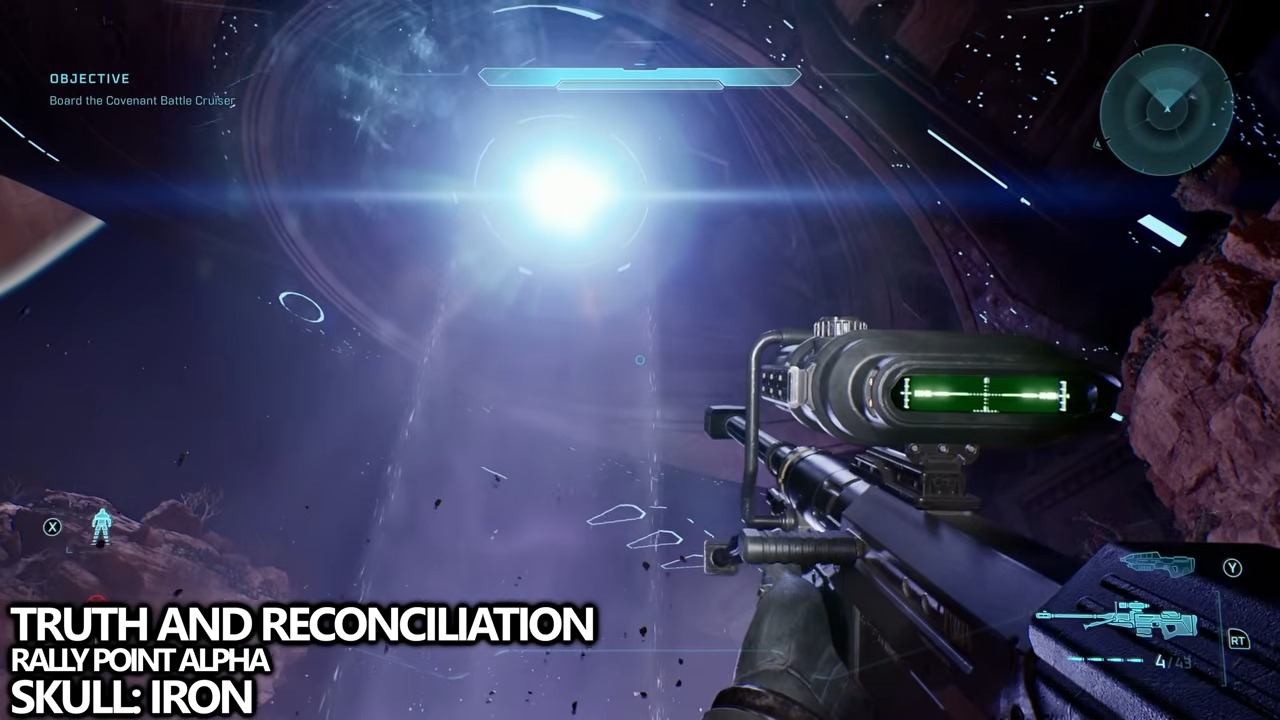
Target
Iron
- Checkpoint
- Gravity lift staging ground
- Landmark
- The cliff edge beyond the lift, marked by a small white ground light.
Do this
- 1Before entering the Covenant gravity lift, cross to the far side of the clearing.
- 2Stand at the white light, look over the edge, and step down to the narrow Skull ledge.
Confirmation
Iron is recorded after the final step is completed.
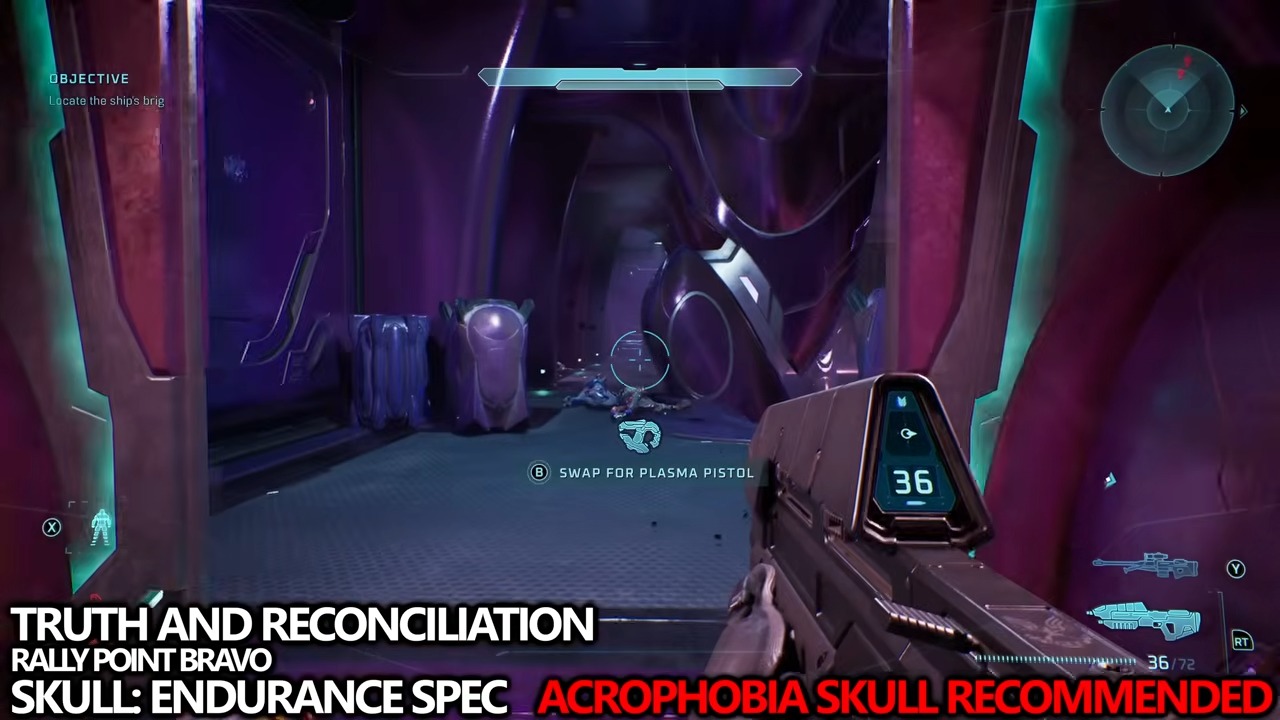
Target
Endurance Spec
- Checkpoint
- Upper Wraith room walkway
- Landmark
- Three narrow pillars above the room containing two Wraiths.
Do this
- 1On the upper floor, continue to the corner with the purple equipment box.
- 2Use the box to reach the pillars, then cross to the third pillar.
Confirmation
Endurance Spec is recorded after the final step is completed.
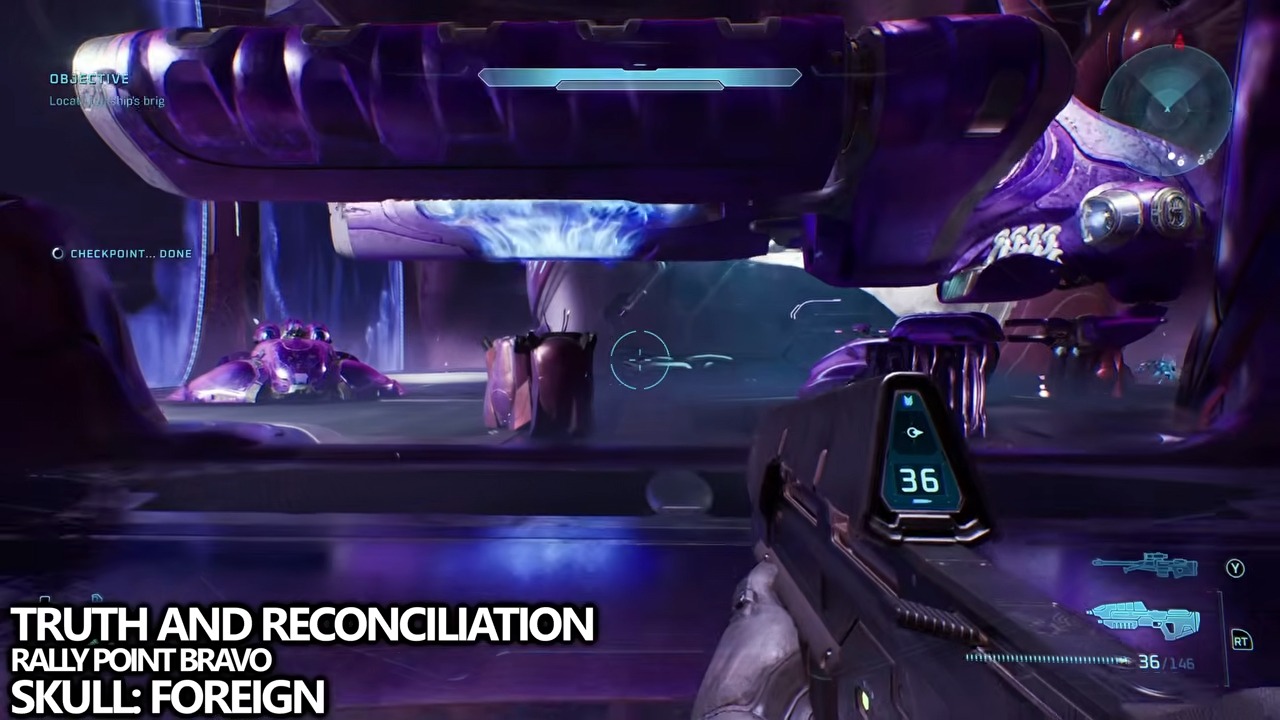
Target
Foreign
- Checkpoint
- First-floor hangar
- Landmark
- The locked door in the far-right corner of the large hangar bay.
Do this
- 1Move to the sealed corner door before finishing the encounter.
- 2When Covenant reinforcements open it, pass through before it closes and collect the Skull inside.
Confirmation
Foreign is recorded after the final step is completed.
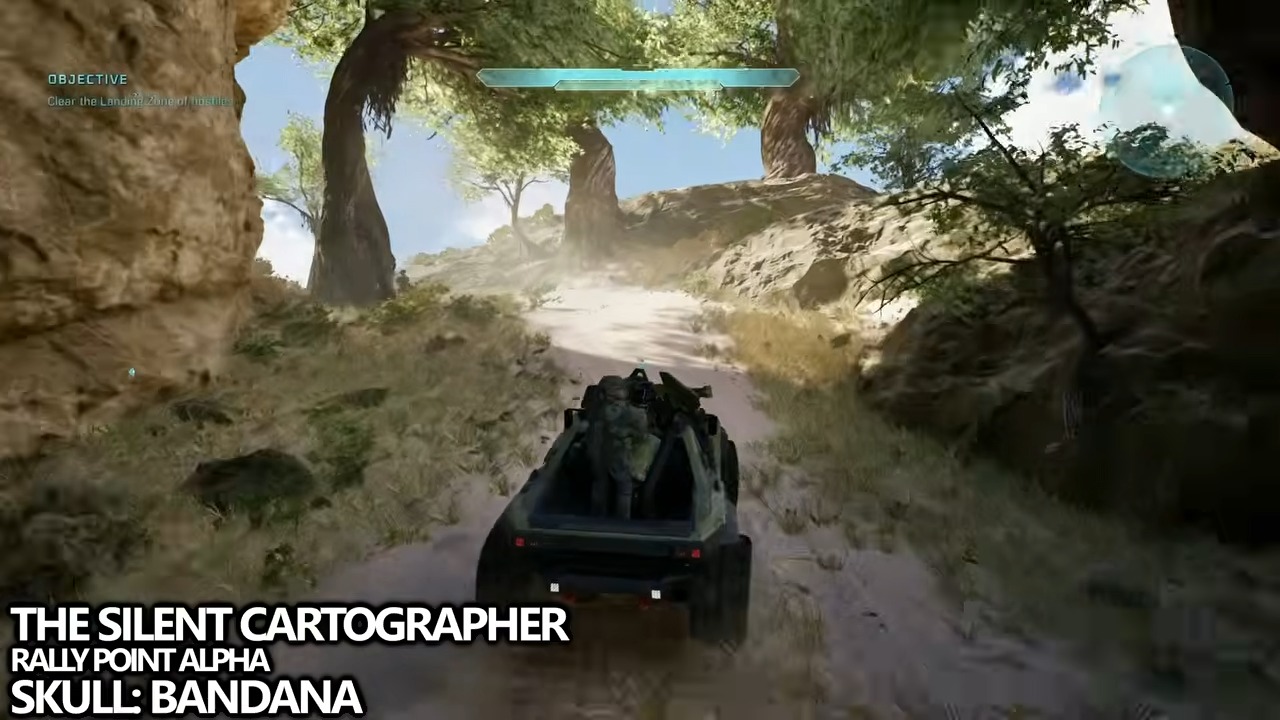
Target
Bandana
- Checkpoint
- First island facility
- Landmark
- The small cave just beyond the exterior wall of the first Warthog-accessible building.
Do this
- 1Drive past the side entrance instead of entering the facility.
- 2Continue into the nearby cave and follow it to the Skull at the back.
Confirmation
Bandana is recorded after the final step is completed.
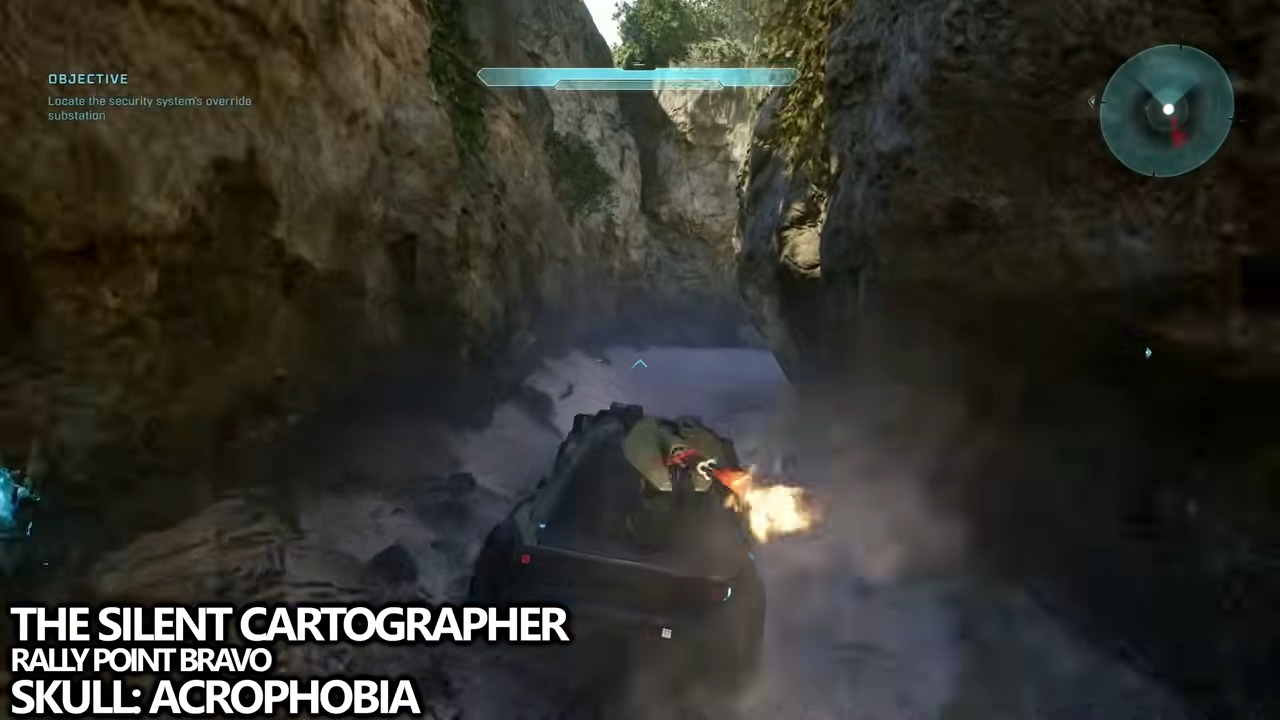
Target
Acrophobia
- Checkpoint
- Hunter arena
- Landmark
- The top of the central structure in the small outdoor Hunter encounter.
Do this
- 1Clear the Hunters so the arena is safe to climb.
- 2Use the sloped geometry around the center structure to reach its roof.
Confirmation
Acrophobia is recorded after the final step is completed.
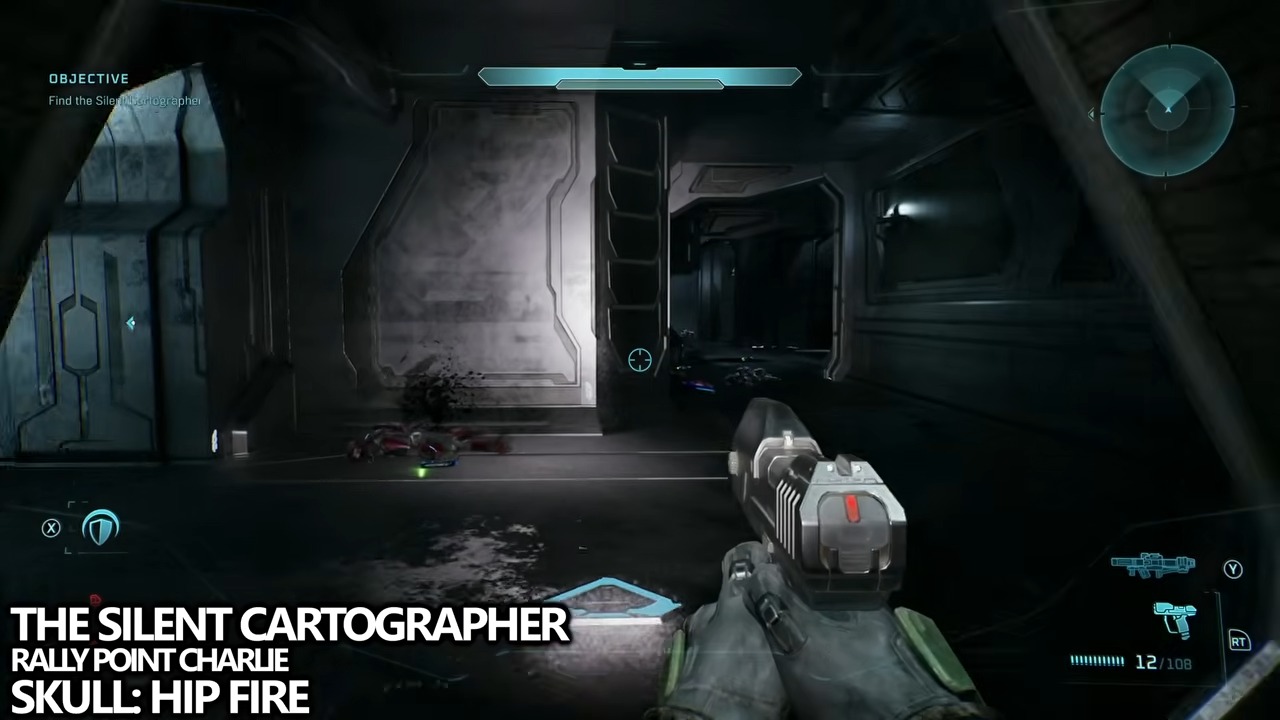
Target
Hip Fire
- Checkpoint
- Map-room ramp
- Landmark
- A narrow shelf inside the tall circular ramp, roughly one and a half floors above the bottom.
Do this
- 1Climb to the top of the spiral ramp and look down through its open center.
- 2Align with the lit shelf below, then make a controlled drop onto the Skull.
Confirmation
Hip Fire is recorded after the final step is completed.
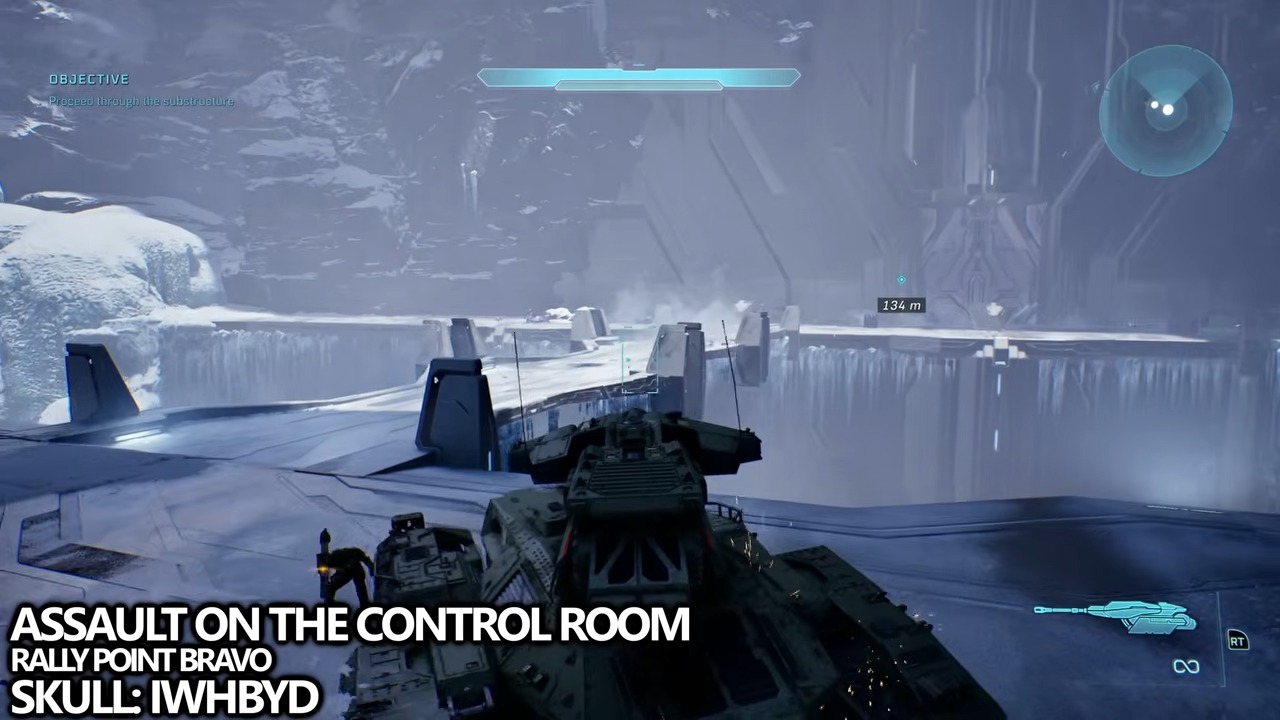
Target
IWHBYD
- Checkpoint
- Scorpion bridge section
- Landmark
- A small opening in the left snowbank after the first thin bridge.
Do this
- 1Cross the bridge with the Scorpion and turn toward the snow wall on the left.
- 2Use the tank hull as a step to reach the opening and collect the Skull inside.
Confirmation
IWHBYD is recorded after the final step is completed.
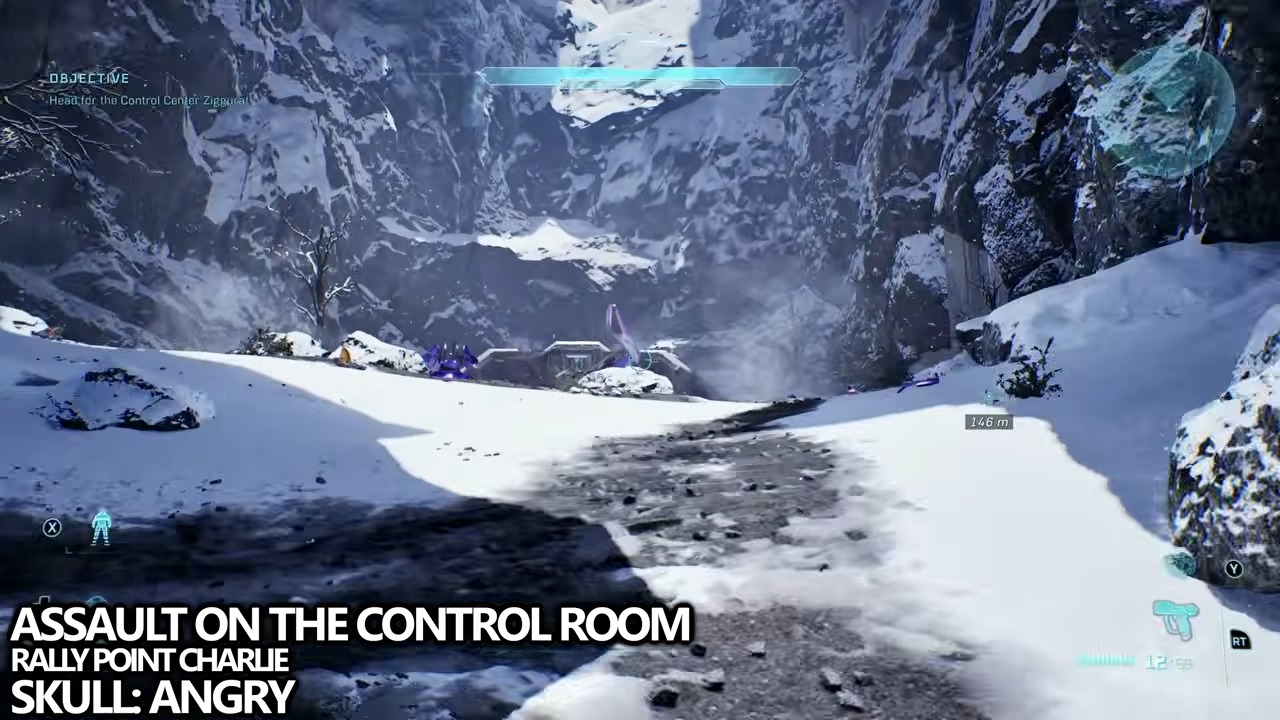
Target
Angry
- Checkpoint
- Post-tank canyon door
- Landmark
- The top of the metal arch closest to the canyon wall.
Do this
- 1At the doorway framed by three exterior arches, move to the wall-side arch.
- 2Climb the adjacent terrain and step onto the arch to reach the Skull.
Confirmation
Angry is recorded after the final step is completed.
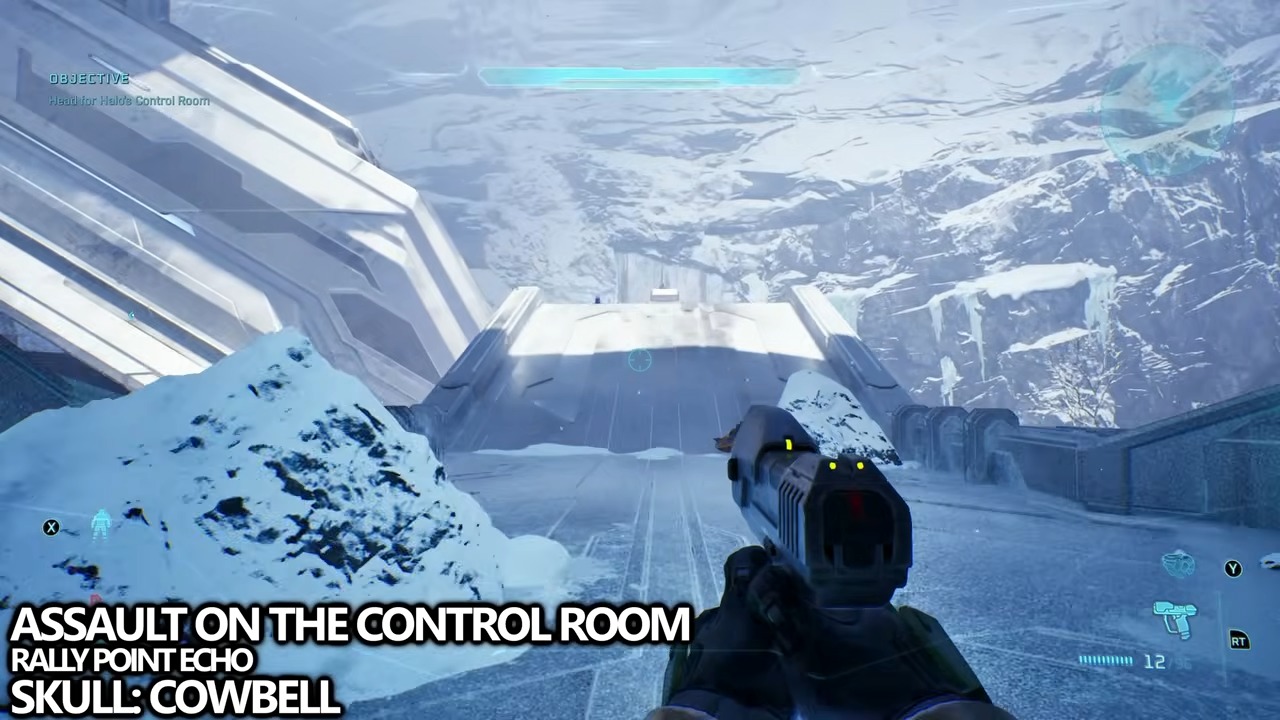
Target
Cowbell
- Checkpoint
- Control-room facility exterior
- Landmark
- The stone pile under the elevated bridge above the central metal ramp.
Do this
- 1From the ground-level Wraith area, drive a vehicle onto the center ramp or set up a grenade jump.
- 2Reach the high ramp, then follow it to the stones beneath the bridge.
Confirmation
Cowbell is recorded after the final step is completed.
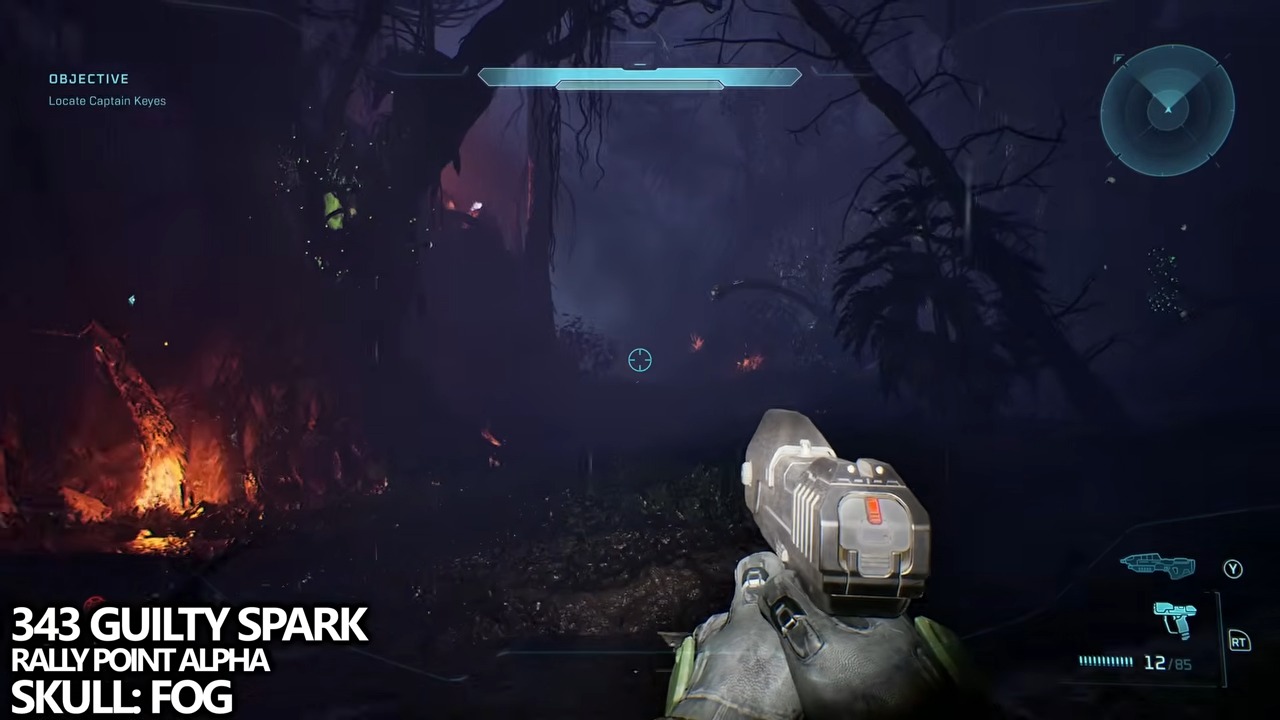
Target
Fog
- Checkpoint
- Opening swamp
- Landmark
- The rocks behind the long fallen log used to cross the forest path.
Do this
- 1Cross the long log, then immediately turn around.
- 2Climb the rocks above its starting end to find the Skull on top.
Confirmation
Fog is recorded after the final step is completed.
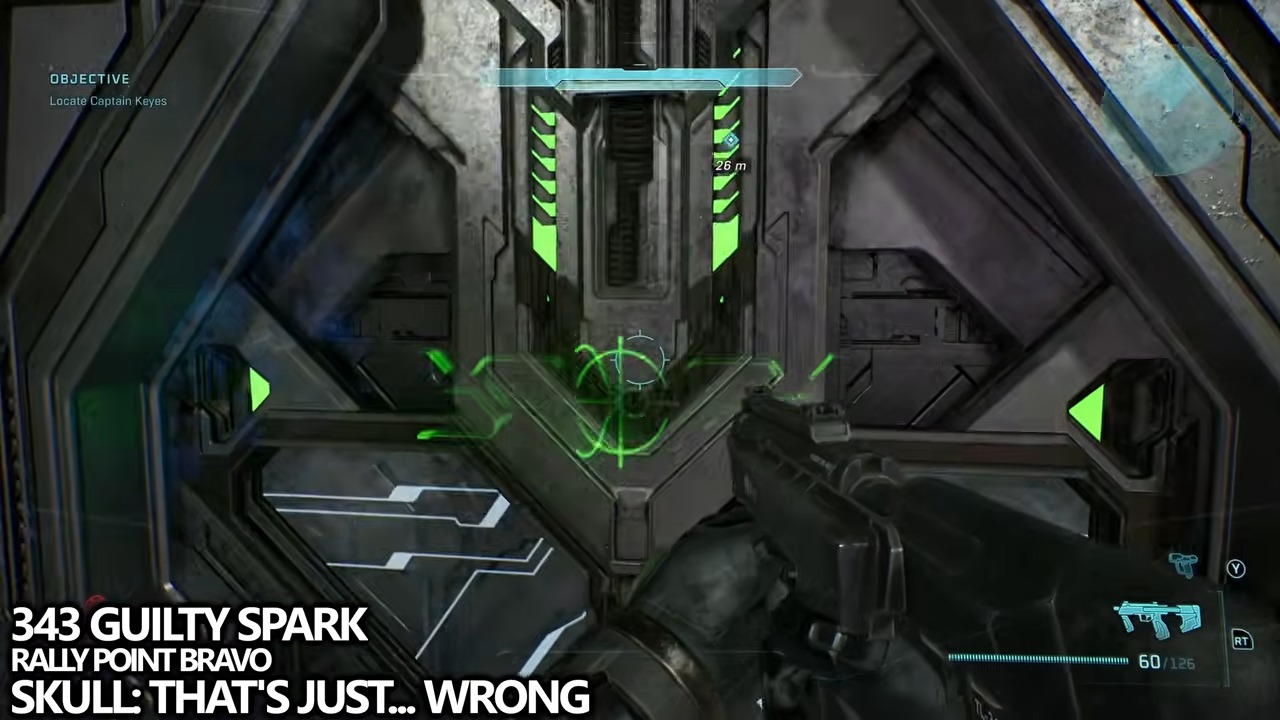
Target
That’s Just… Wrong
- Checkpoint
- Flood containment structure
- Landmark
- The frightened Marine who warns that he will not become one of the creatures.
Do this
- 1Find the isolated Marine after the first Covenant fights inside the structure.
- 2Defeat him and collect the Skull that he drops.
Confirmation
That’s Just… Wrong is recorded after the final step is completed.
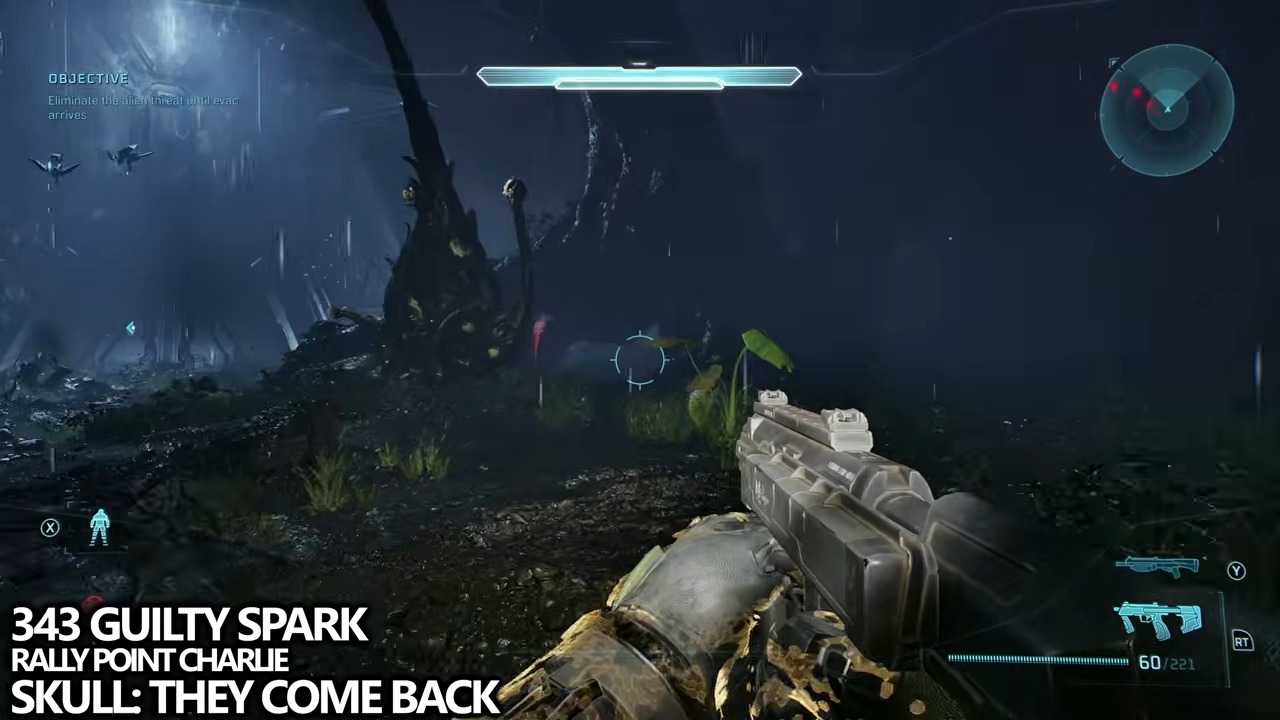
Target
They Come Back
- Checkpoint
- Evacuation approach
- Landmark
- A thin horizontal log to the right of the Sentinel-versus-Flood structure.
Do this
- 1Face the large metal structure at the evac zone and move right instead of approaching it.
- 2Cross the narrow log between the rocks and climb onto the Skull ledge.
Confirmation
They Come Back is recorded after the final step is completed.
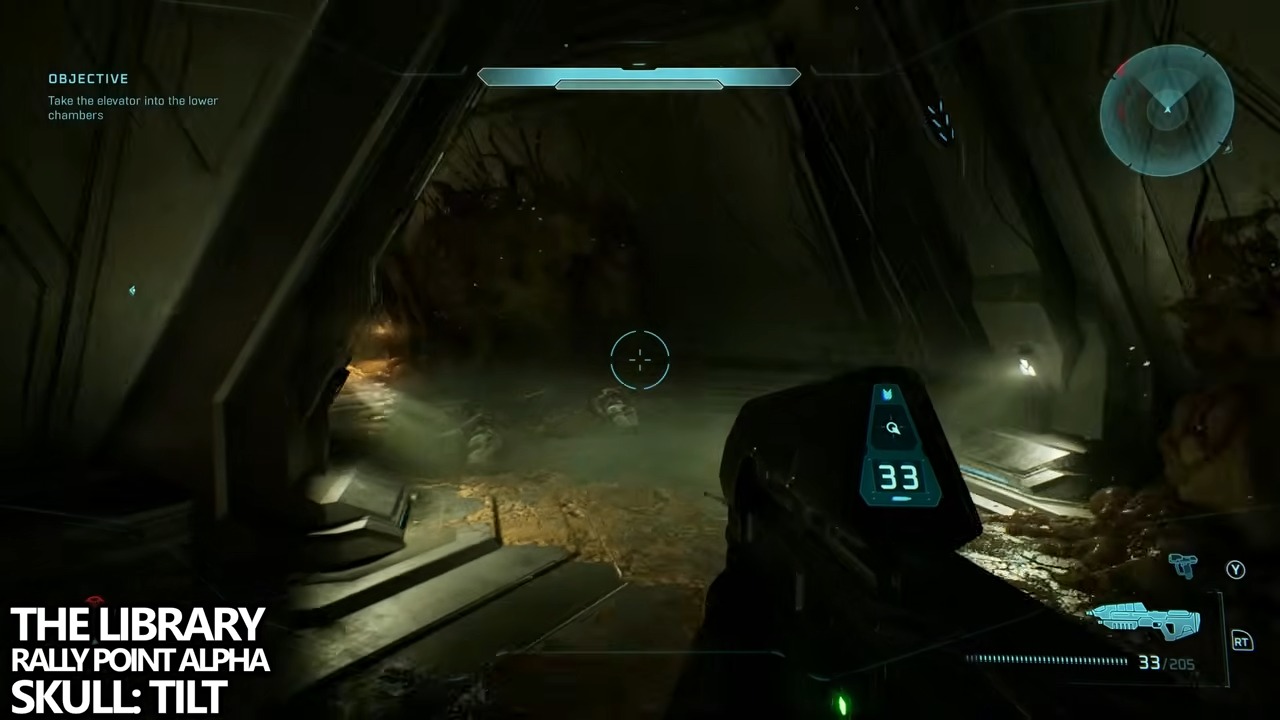
Target
Tilt
- Checkpoint
- First Sentinel/Flood clash
- Landmark
- The ramp opposite the objective arrow as you leave the tunnel.
Do this
- 1Exit the tunnel where Sentinels first fight the Flood.
- 2Ignore the left-pointing objective and take the ramp on the right to its top.
Confirmation
Tilt is recorded after the final step is completed.
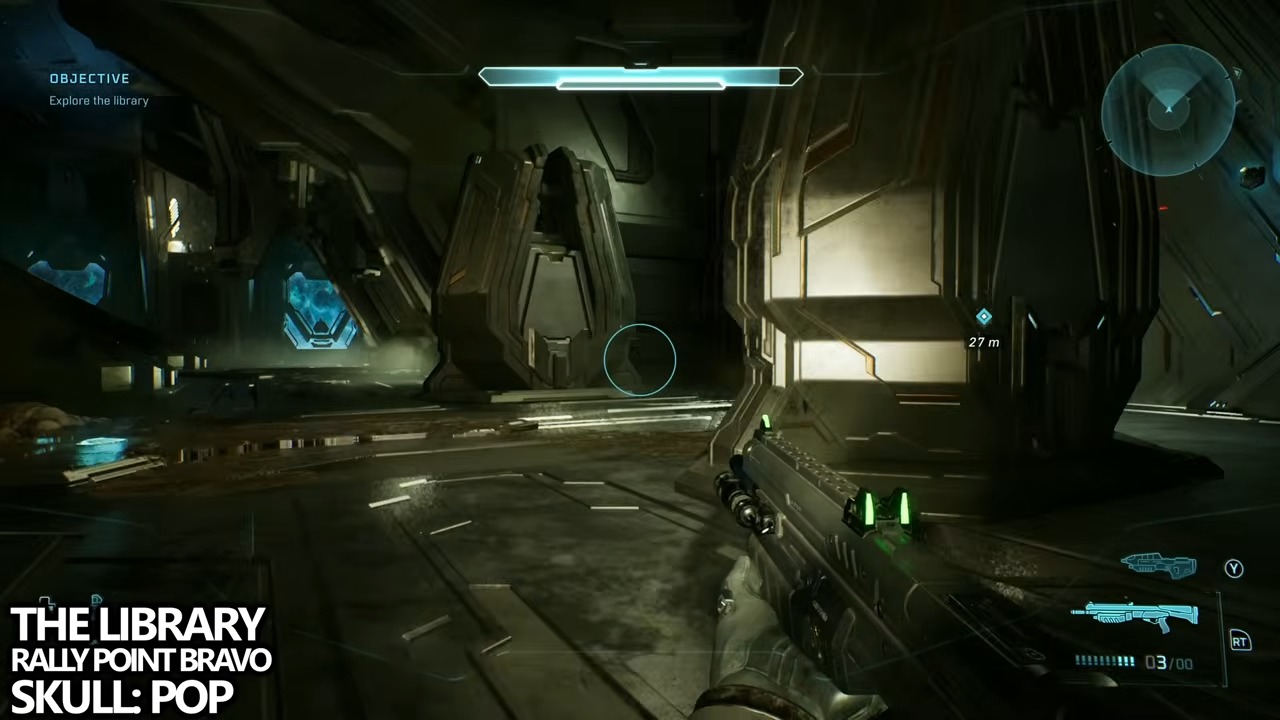
Target
Pop
- Checkpoint
- First elevator descent
- Landmark
- The center pedestal opposite the locked door Guilty Spark opens.
Do this
- 1At the door-defense encounter, turn completely around to spot the elevated pedestal.
- 2Take the side ramp and jump across the raised platforms to the center.
Confirmation
Pop is recorded after the final step is completed.
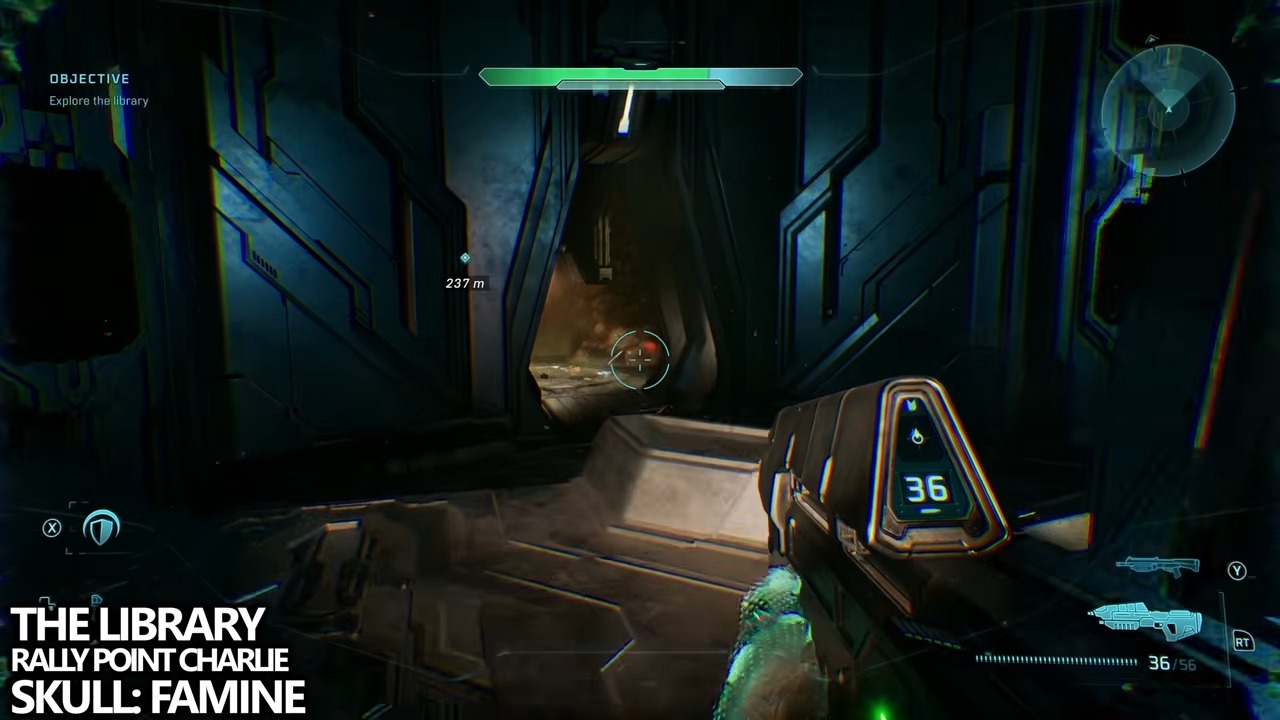
Target
Famine
- Checkpoint
- Fourth floor
- Landmark
- The first left-hand turn inside the short hall directly ahead of the floor entrance.
Do this
- 1Wait for the fourth-floor chapter title after arriving on the new level.
- 2Enter the hall straight ahead and take its first left to find the Skull on the floor.
Confirmation
Famine is recorded after the final step is completed.
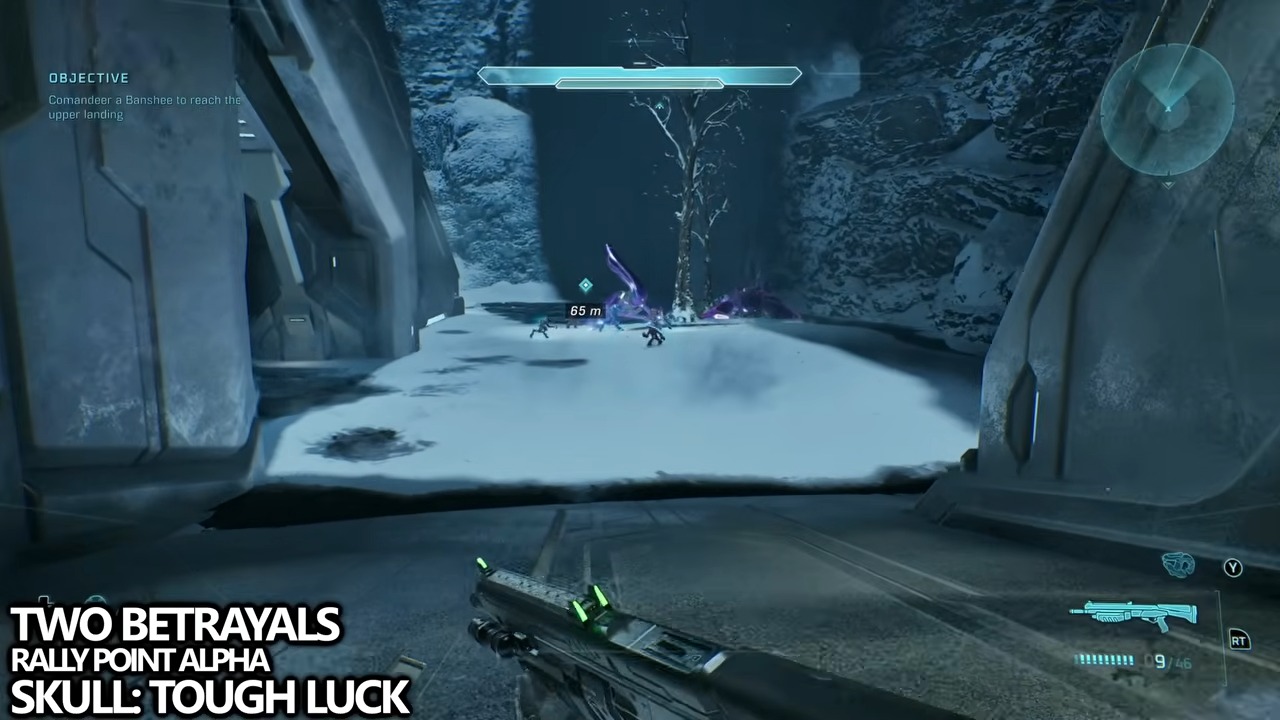
Target
Tough Luck
- Checkpoint
- Control room exit
- Landmark
- The platform surrounding the blue energy beam above the control-room structure.
Do this
- 1Take the first available Banshee after leaving the control room.
- 2Fly to the roof beam and exit carefully onto its narrow platform.
Confirmation
Tough Luck is recorded after the final step is completed.
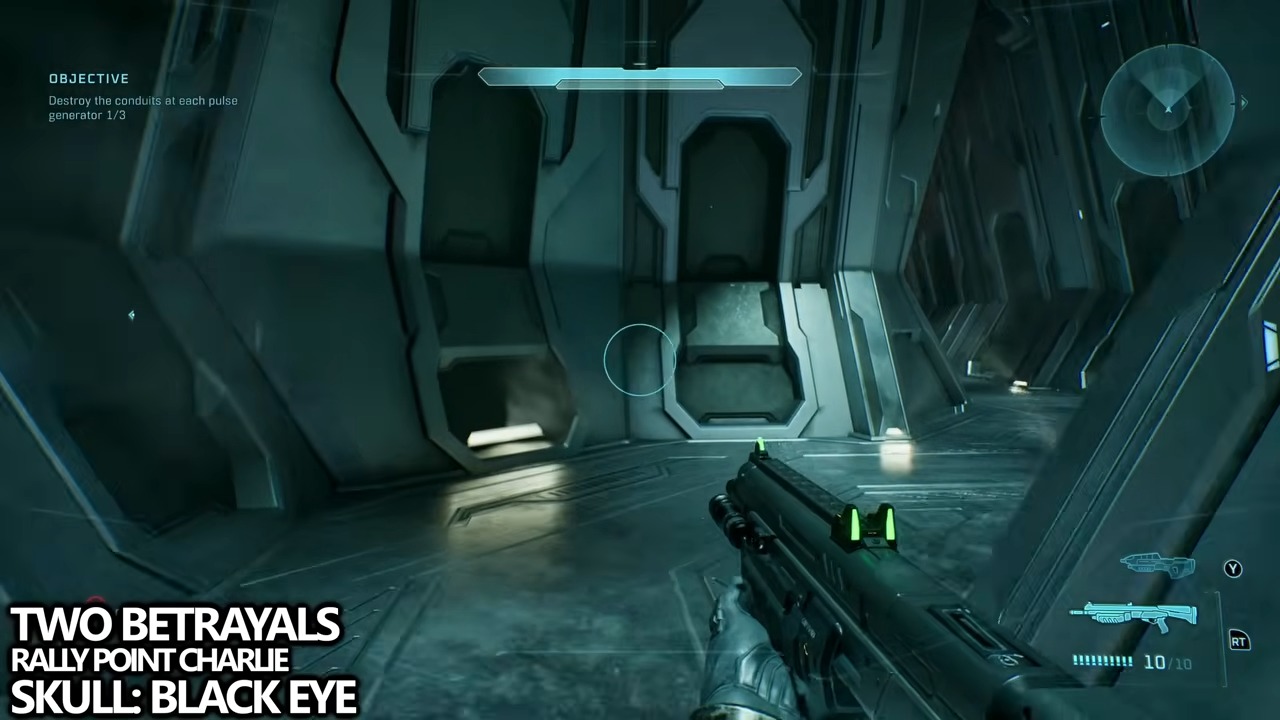
Target
Black Eye
- Checkpoint
- Second-generator canyon
- Landmark
- A short Flood-covered dead end beyond the three metal arches.
Do this
- 1After the elevator descent, cross the closest metal arch in the canyon.
- 2Enter the biomass-blocked recess at the far end and check the ground.
Confirmation
Black Eye is recorded after the final step is completed.
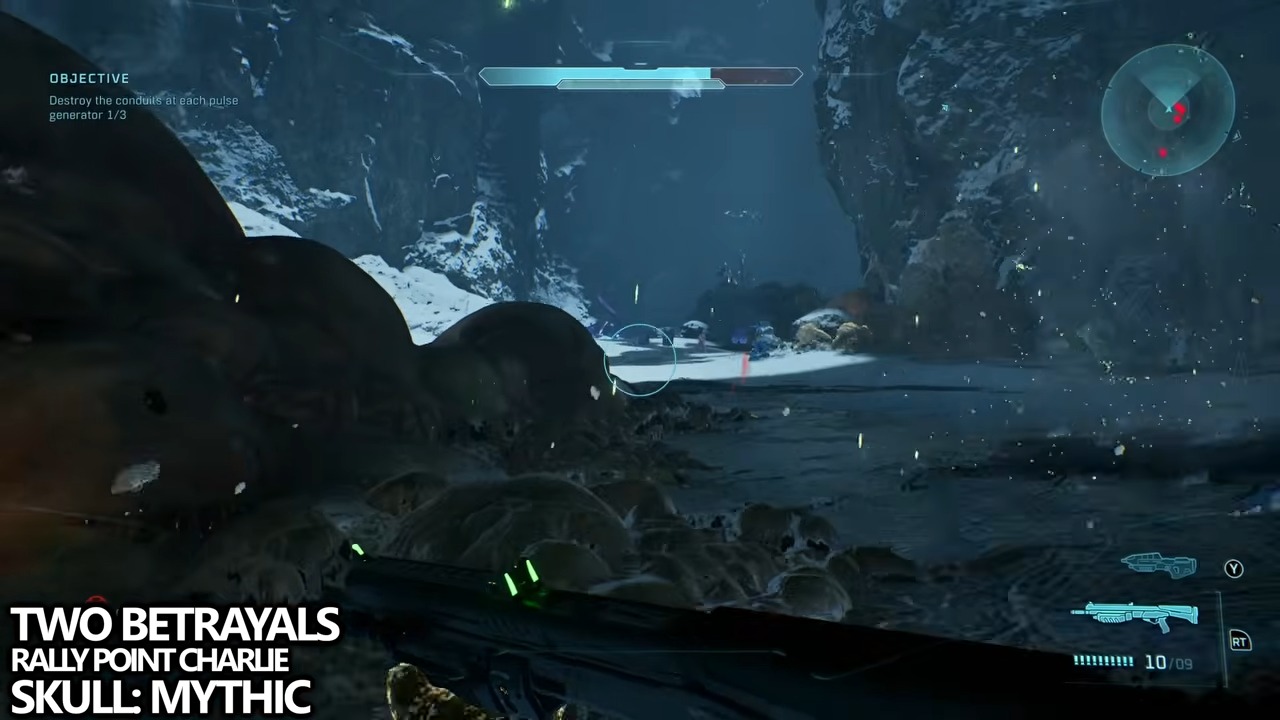
Target
Mythic
- Checkpoint
- Second-conduit ascent
- Landmark
- The locked combat route opposite the objective landing pad.
Do this
- 1Land on the center tower, activate its terminal, then fly to the newly opened opposite door.
- 2Clear all enemies in each of the three rooms; the Skull appears in the final room only after the last enemy falls.
Confirmation
Mythic is recorded after the final step is completed.
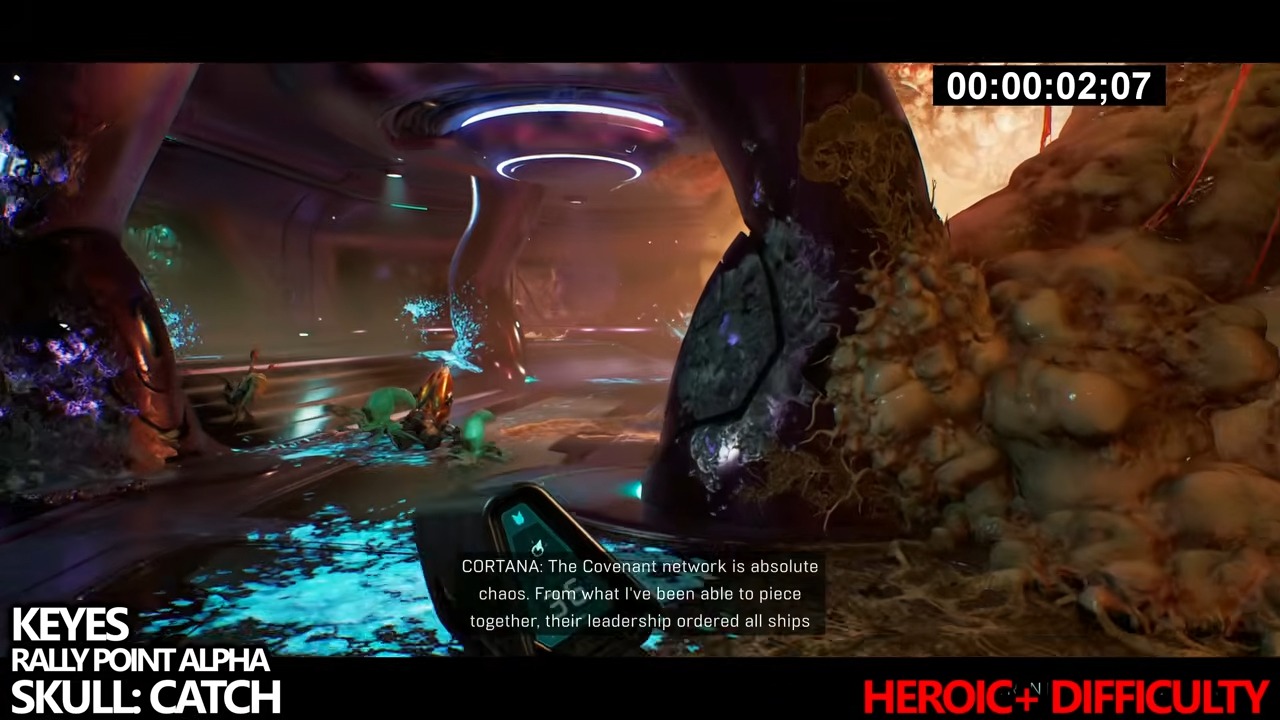
Target
Catch
- Checkpoint
- Opening run to the gravity lift
- Landmark
- The active gravity lift above the outdoor Flood-and-Covenant battle.
Do this
- 1Play on Heroic or above and move directly toward the lift, using the early camouflage and later overshield.
- 2Clear the Covenant guarding the lift, then hold the interact control while rising through the Skull.
Confirmation
Catch is recorded after the final step is completed.
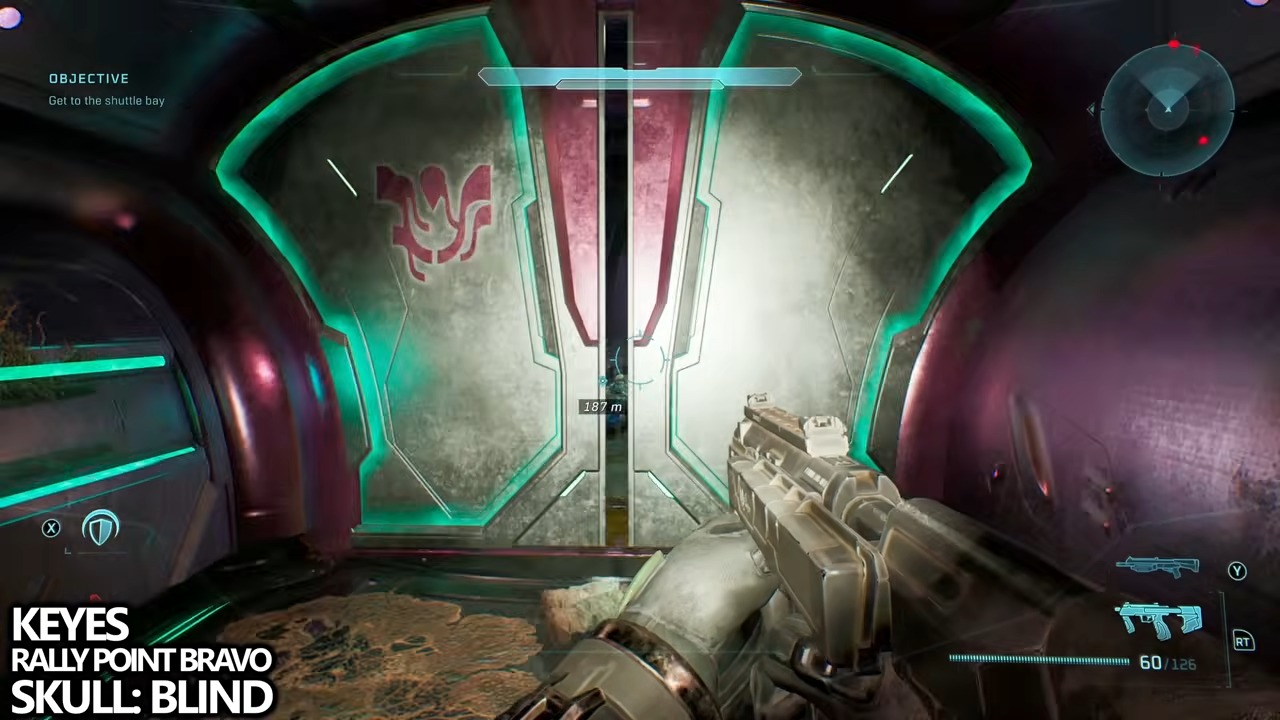
Target
Blind
- Checkpoint
- First vehicle bay after re-entering the ship
- Landmark
- The blocked hallway containing a stranded Wraith.
Do this
- 1Cross the vehicle bay to the corridor behind the Wraith.
- 2Push through the loose weapon crates and search the corner beside the sealed door.
Confirmation
Blind is recorded after the final step is completed.
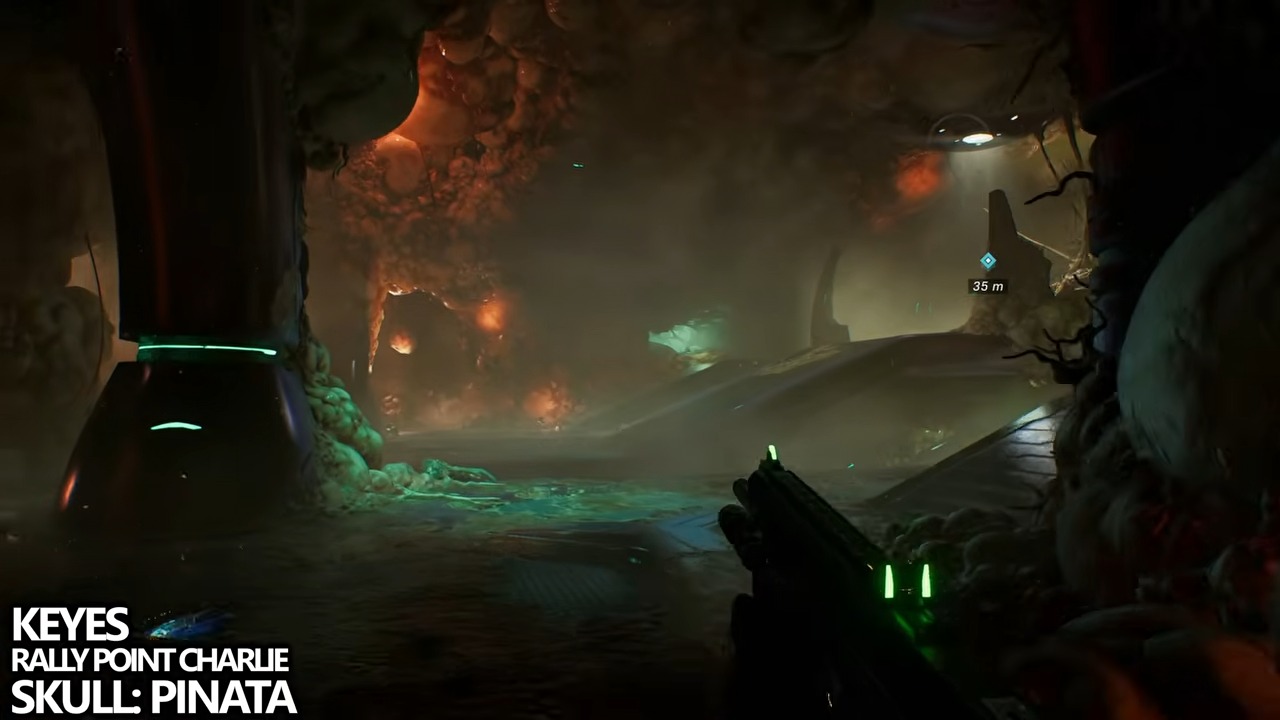
Target
Piñata
- Checkpoint
- Captain Keyes objective
- Landmark
- Captain Keyes after retrieving the command codes.
Do this
- 1Complete the command-code interaction, but do not leave the body.
- 2Crouch if needed and repeatedly melee until the Skull pickup prompt appears.
Confirmation
Piñata is recorded after the final step is completed.
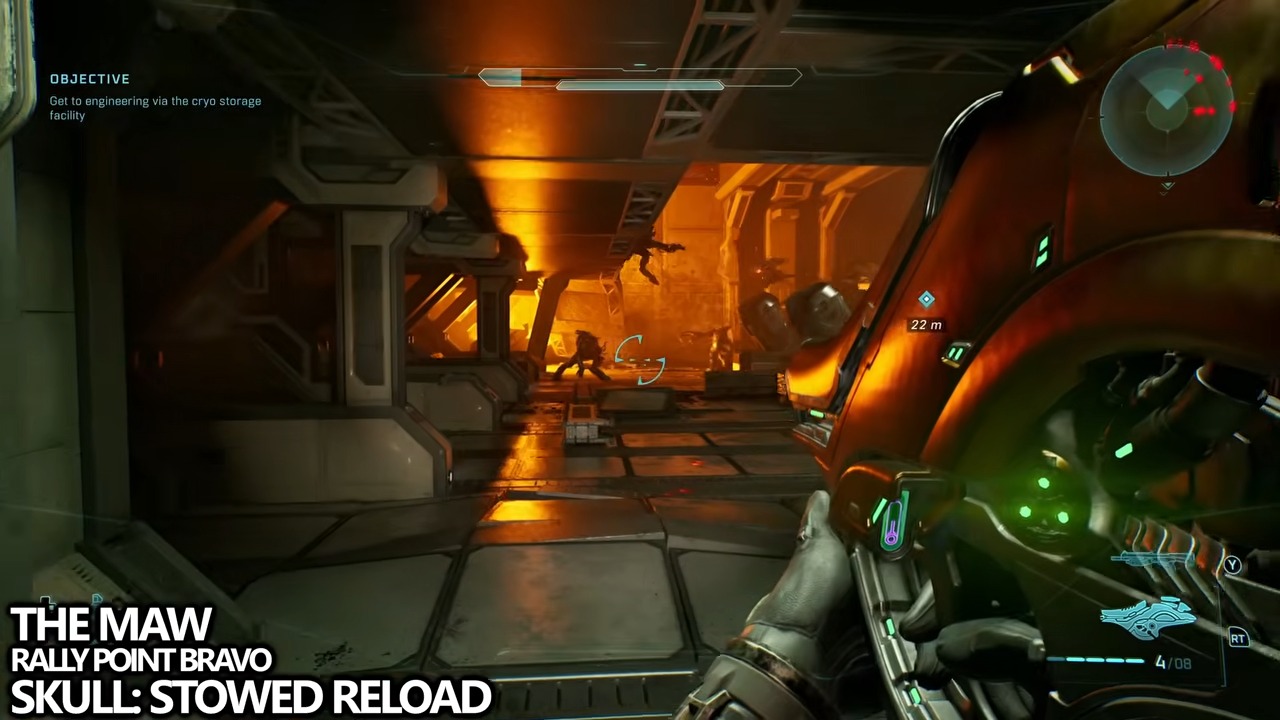
Target
Stowed Reload
- Checkpoint
- Return to the cryo room
- Landmark
- The small platform beside the large fire in the rear-left corner.
Do this
- 1On the bridge-to-engineering route, enter the damaged cryo room.
- 2Jump from the broken walkway to the corner platform beside the flames.
Confirmation
Stowed Reload is recorded after the final step is completed.
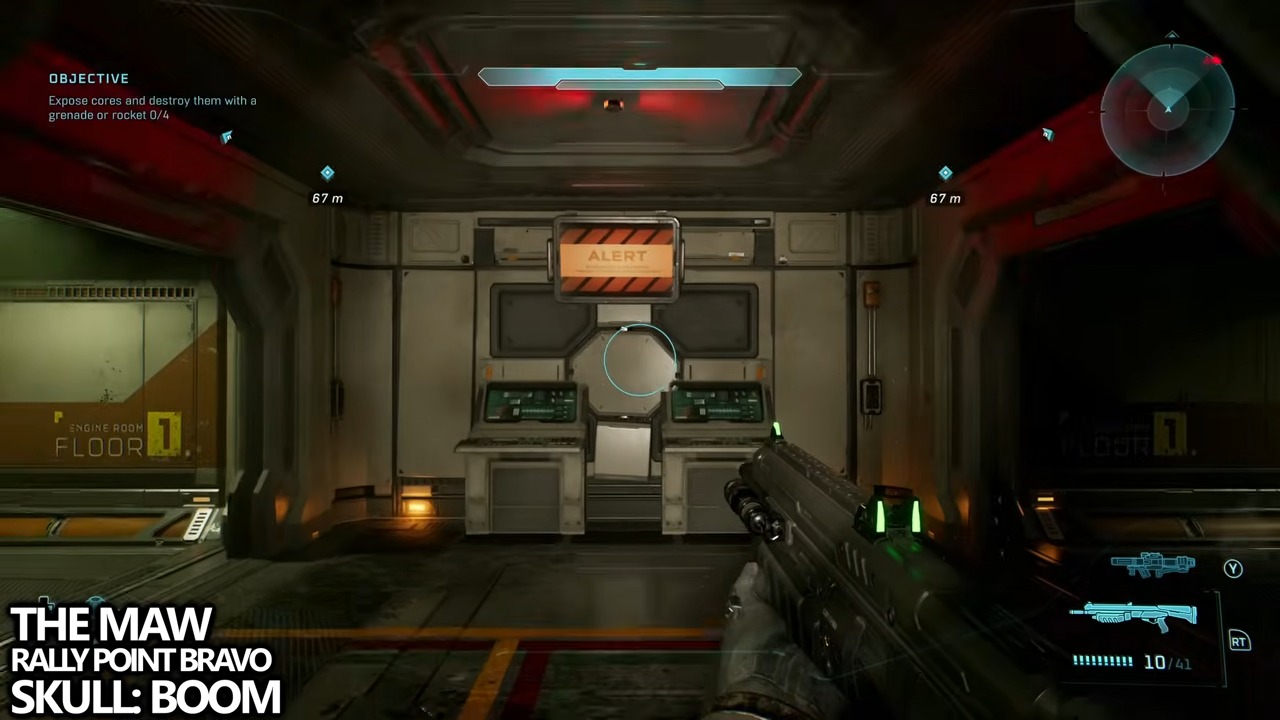
Target
Boom
- Checkpoint
- Engineering
- Landmark
- A narrow ledge below the second-floor jump platform on the room’s right side.
Do this
- 1Enter engineering and climb to the second floor on the right.
- 2At the platform used to reach the upper corridor, drop to the ledge beneath it and check the corner.
Confirmation
Boom is recorded after the final step is completed.
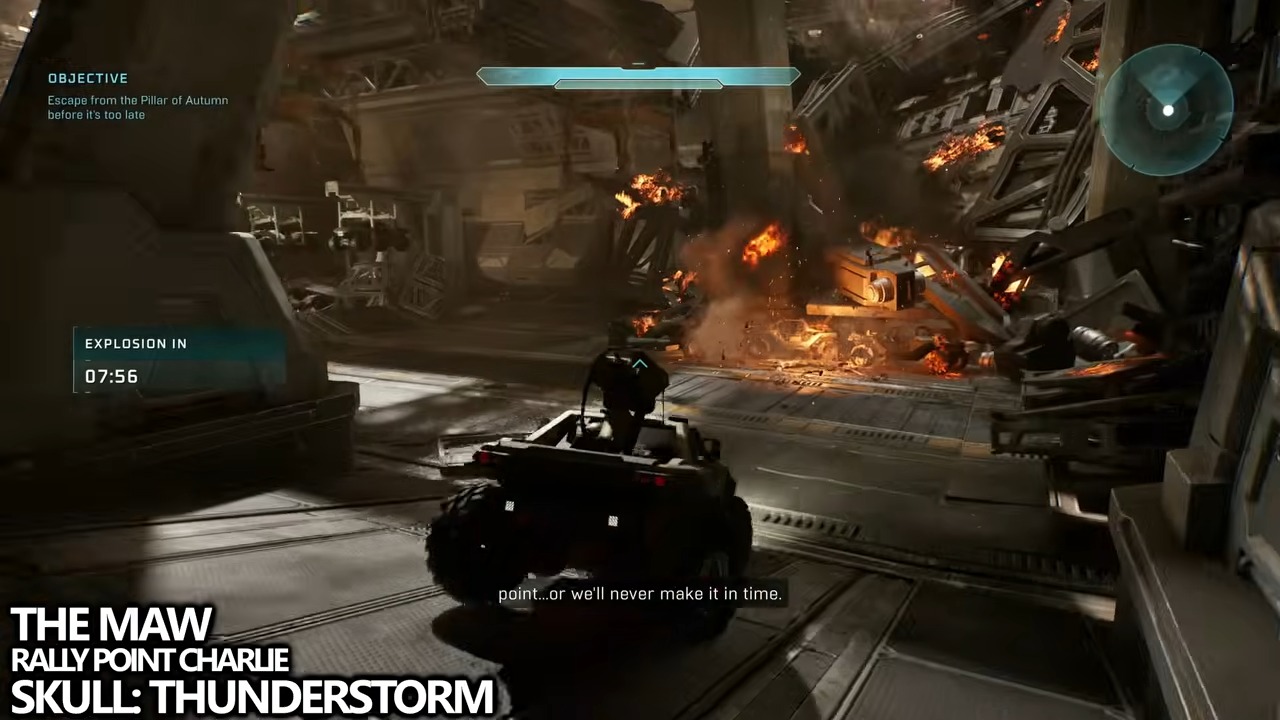
Target
Thunderstorm
- Checkpoint
- Warthog escape
- Landmark
- The second small bypass tunnel inside the early winding section.
Do this
- 1Count the shortcut openings as the Warthog enters the curved tunnel.
- 2Drive through the second opening and pass over the Skull in its center.
Confirmation
Thunderstorm is recorded after the final step is completed.
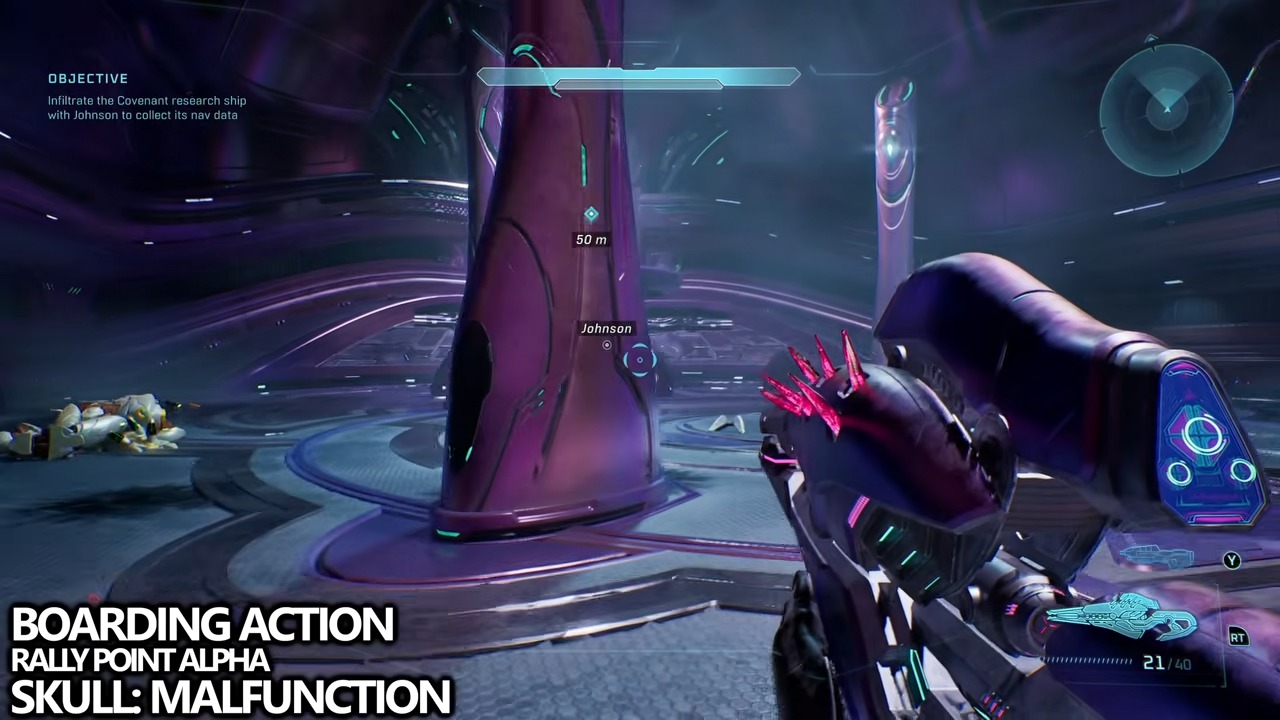
Target
Malfunction
- Checkpoint
- Gold-Hunter encounter
- Landmark
- The narrow bridge reached through the side route opposite Johnson.
Do this
- 1After defeating the two white-and-gold Hunters, ignore Johnson’s route.
- 2Take the opposite ramp and follow the newly open doors until the path reaches the Skull bridge.
Confirmation
Malfunction is recorded after the final step is completed.
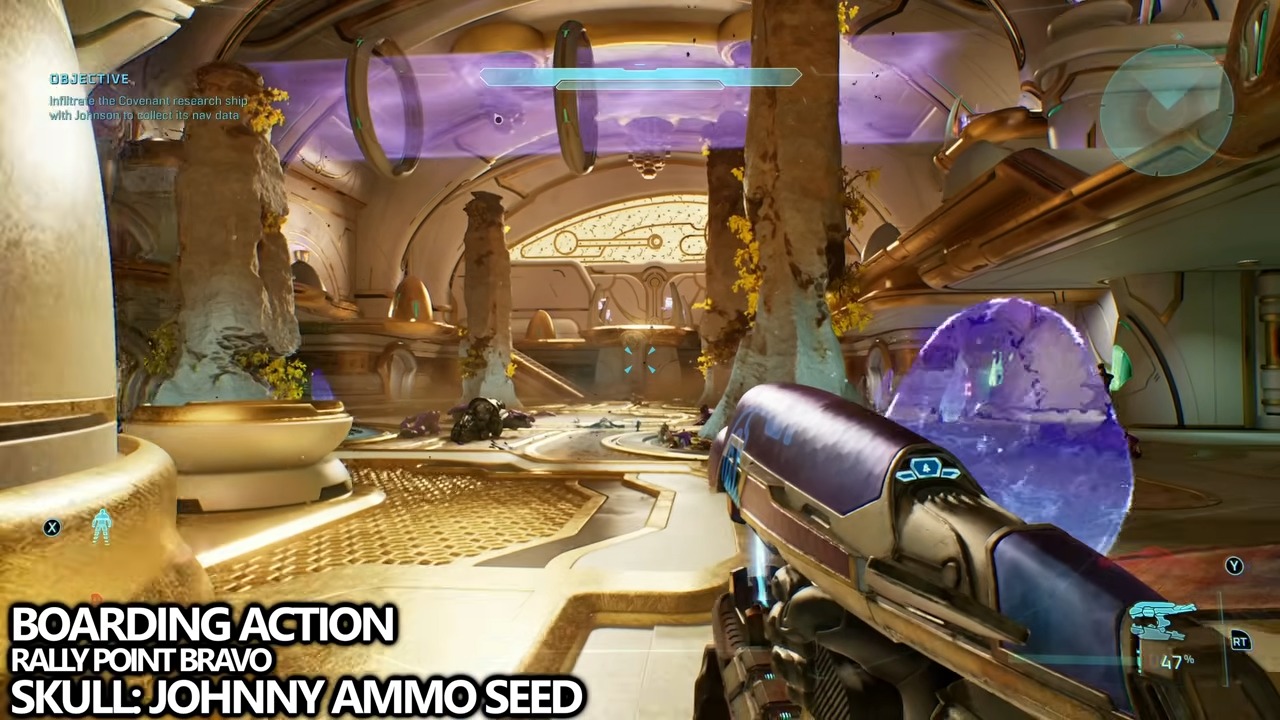
Target
Johnny Ammo
- Checkpoint
- Sand arena
- Landmark
- The curved third-floor ledge near the tree above the arena entrance.
Do this
- 1Clear the sand arena and climb to its second level.
- 2Backtrack toward the entrance on the upper route, defeat the Elites, and check the curved ledge.
Confirmation
Johnny Ammo is recorded after the final step is completed.
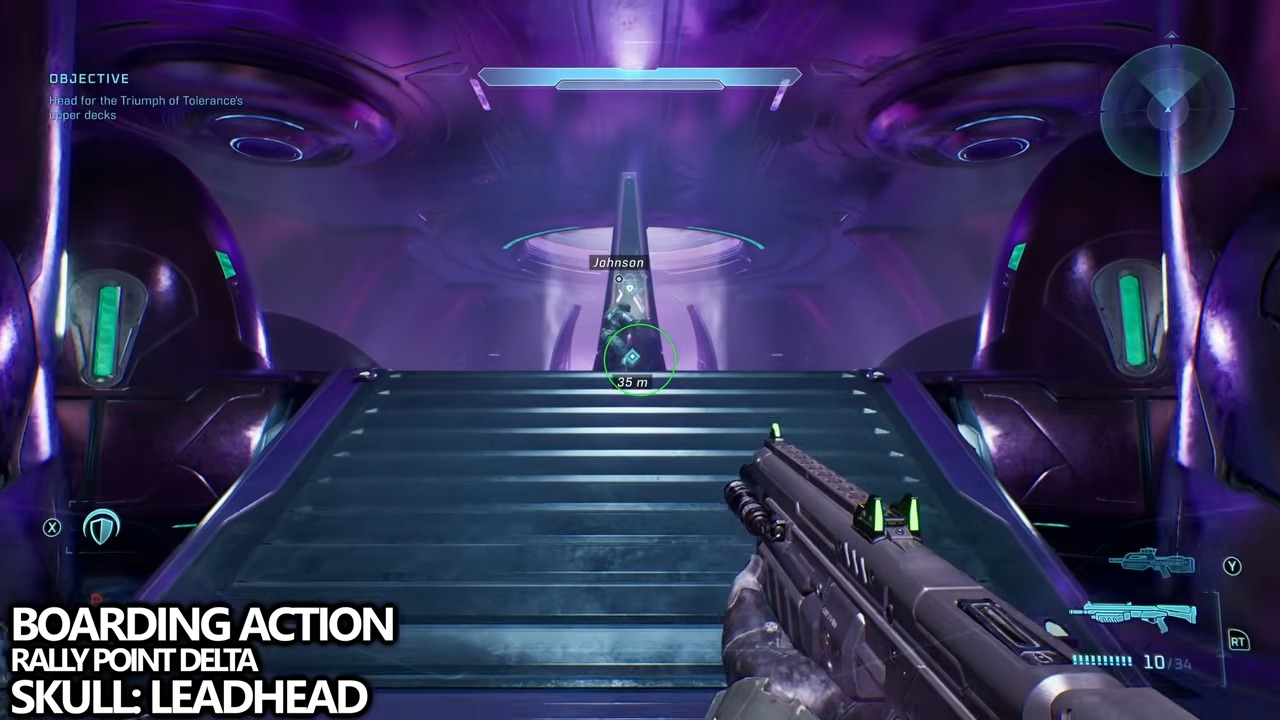
Target
Leadhead
- Checkpoint
- Bio-lab lift room
- Landmark
- The open side hallway immediately left of the central vertical lift.
Do this
- 1Finish the enemy waves until the objective directs you onto the lift.
- 2Before ascending, enter the left doorway and follow the hall to its end.
Confirmation
Leadhead is recorded after the final step is completed.
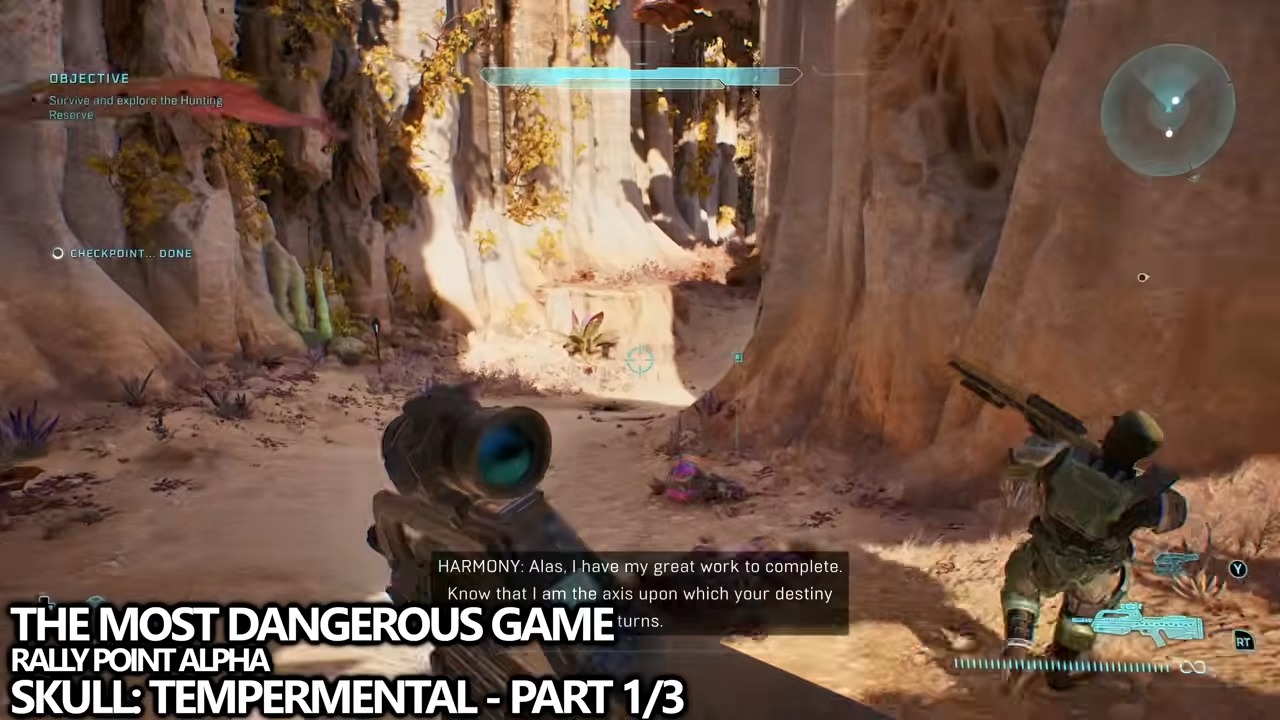
Target
Temperamental
- Checkpoint
- Three golden-Elite marks
- Landmark
- The central purple pylon in the first arena after the prison break.
Do this
- 1Tag—not kill—the fleeing golden Elite in the Marine-linkup arena, the Wraith bridge arena, and the first post-prison arena.
- 2After all three hits register, climb the central pylon in the post-prison arena and collect the spawned Skull.
Confirmation
Temperamental is recorded after the final step is completed.
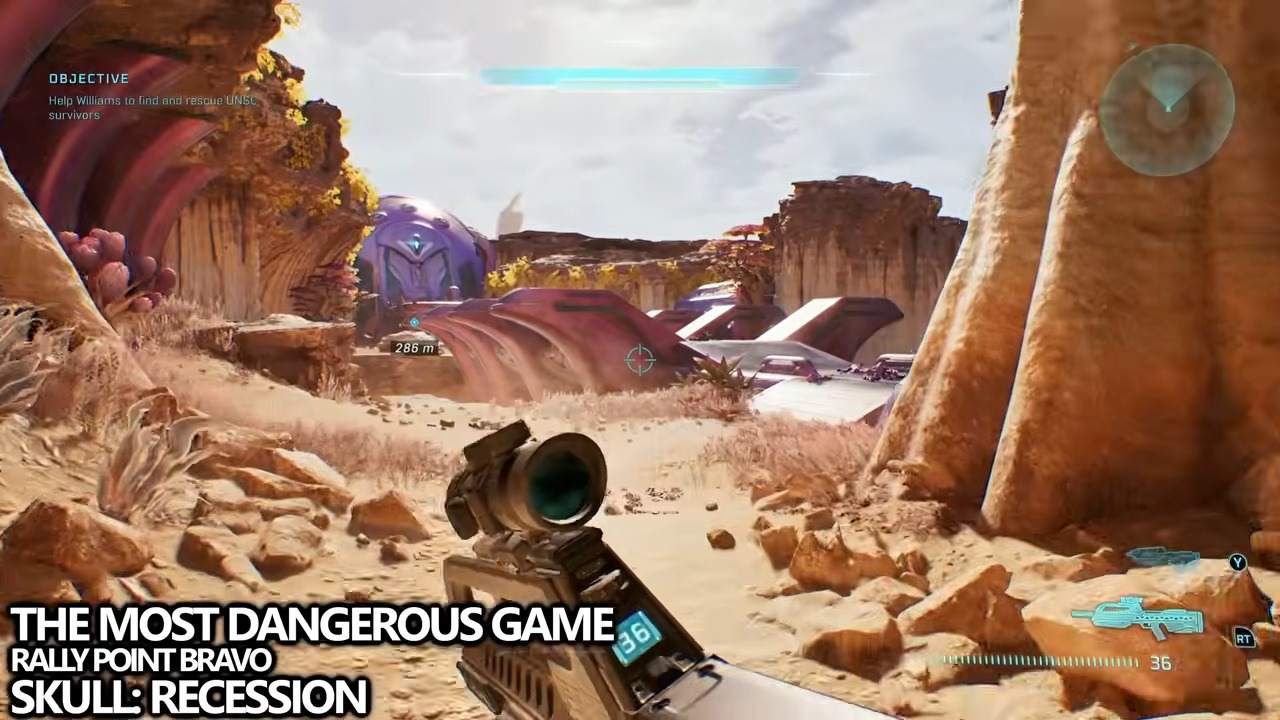
Target
Recession
- Checkpoint
- Early Wraith bridge
- Landmark
- The sealed room beneath two braziers at the end opposite the Wraith.
Do this
- 1At the long purple bridge, move to the large door opposite the Wraith.
- 2Destroy the explosive barrels on both sides to open the door and reveal the Skull.
Confirmation
Recession is recorded after the final step is completed.
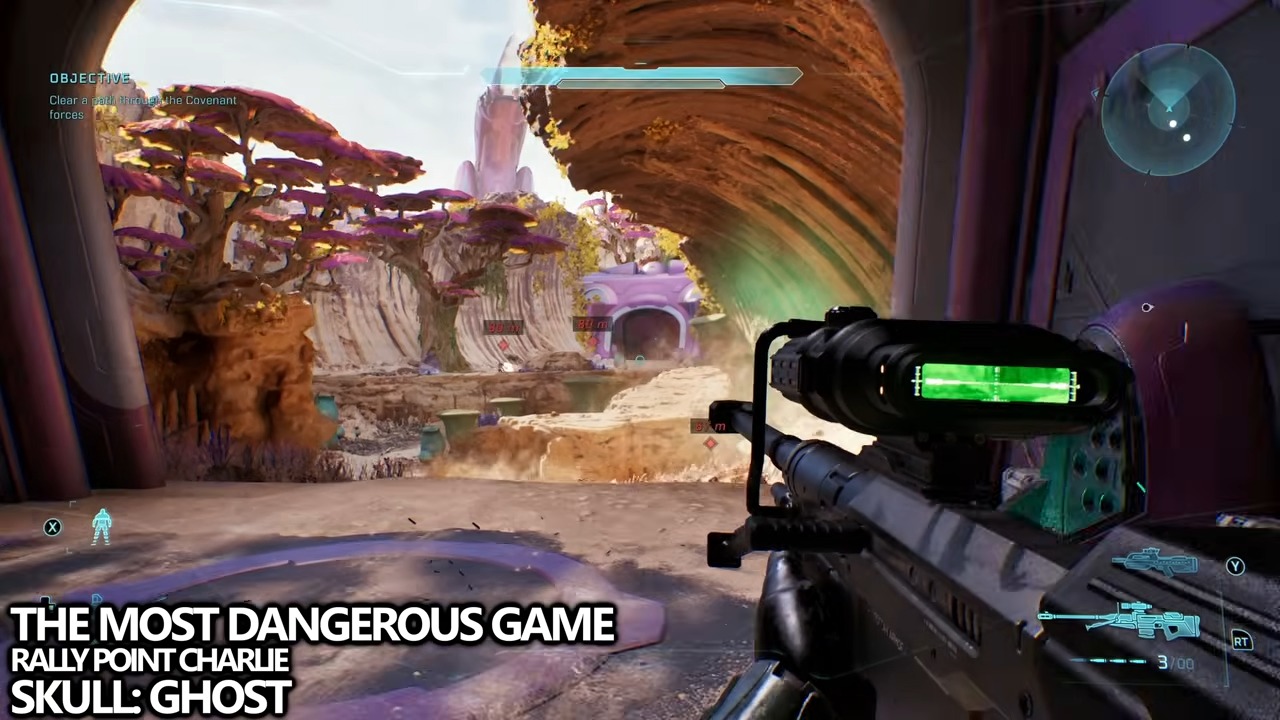
Target
Ghost
- Checkpoint
- Post-Banshee bridge arena
- Landmark
- The brazier above the doorway used to enter the arena.
Do this
- 1After clearing the arena, return to the entrance and collect the frag grenades near the fallen Marine.
- 2Grenade-jump up the adjacent rocks, then hug the wall while crossing to the brazier.
Confirmation
Ghost is recorded after the final step is completed.
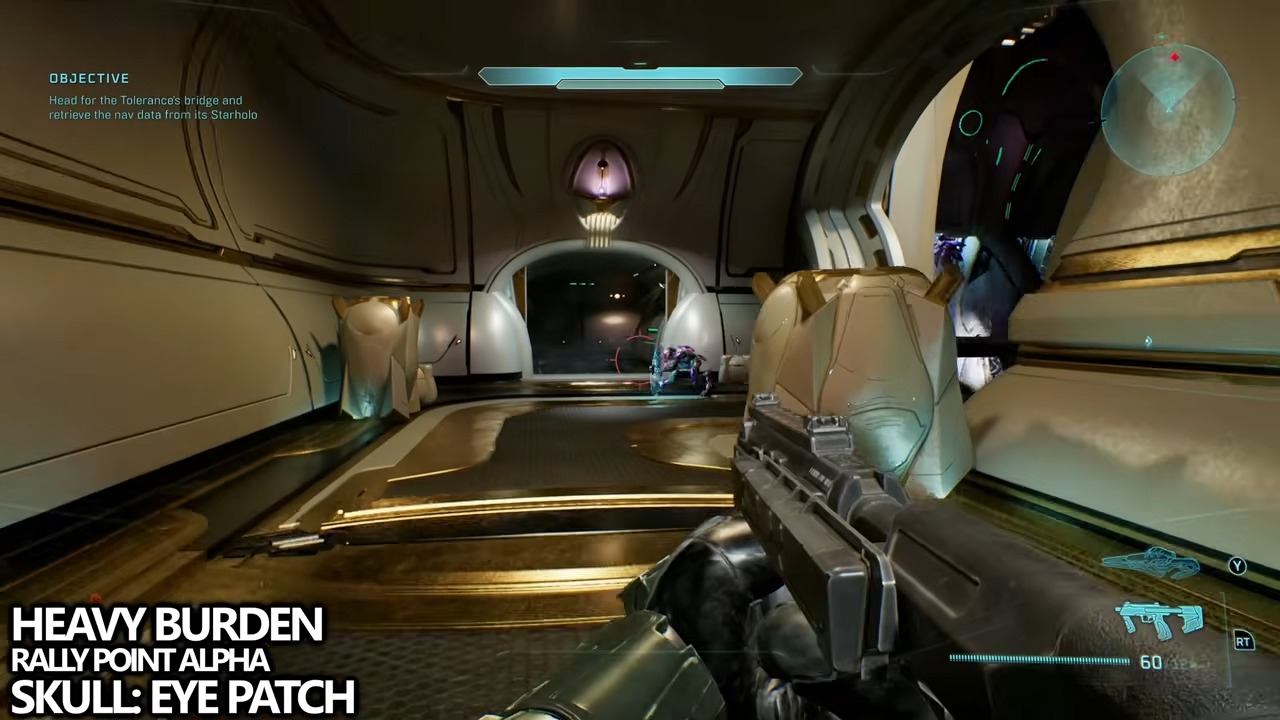
Target
Eye Patch
- Checkpoint
- Route to Tolerance’s bridge
- Landmark
- The side corridor beside the suspended bridge, ending at a locked door.
Do this
- 1Do not cross the suspended bridge when you reach it.
- 2Use the open side door on the entry side and follow the corridor to the Skull by the sealed door.
Confirmation
Eye Patch is recorded after the final step is completed.
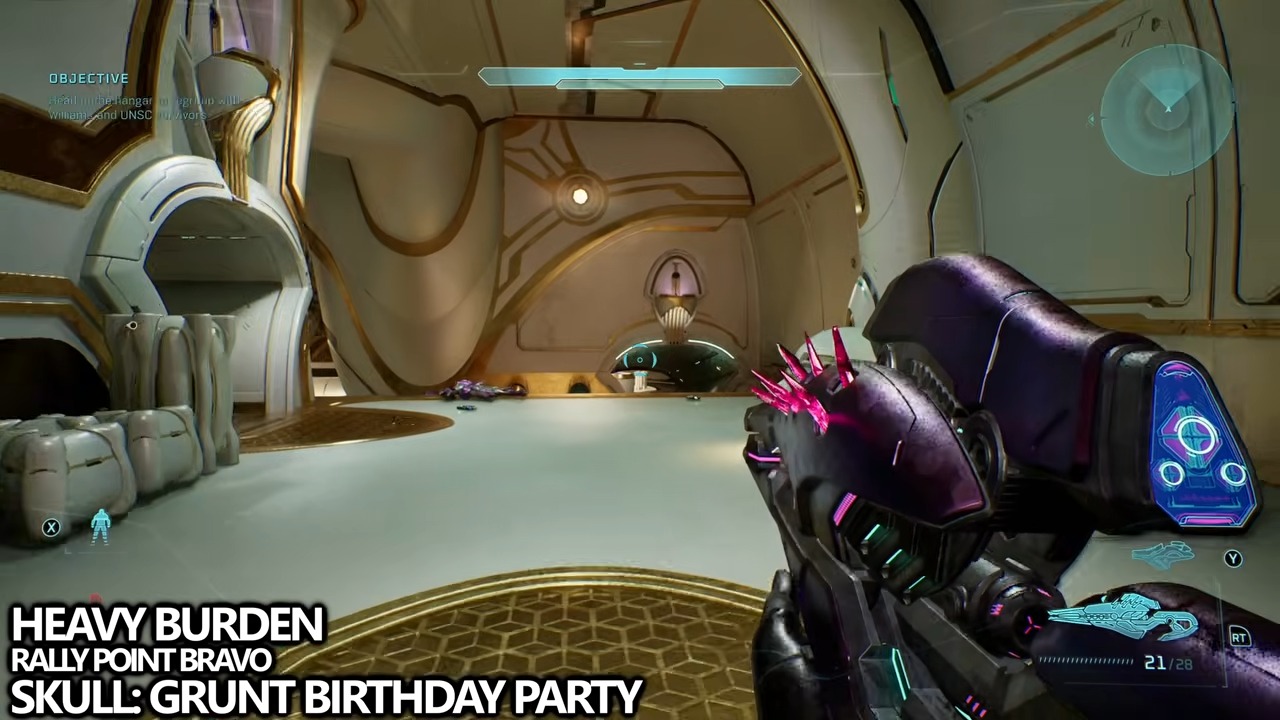
Target
Grunt Birthday Party
- Checkpoint
- Marine survivor regroup
- Landmark
- The yellow-foliage rock formation in the center of the multilevel room.
Do this
- 1Enter from the top floor and locate the purple brazier on the level below.
- 2Use the brazier as a step to reach the central rock and collect the Skull on top.
Confirmation
Grunt Birthday Party is recorded after the final step is completed.
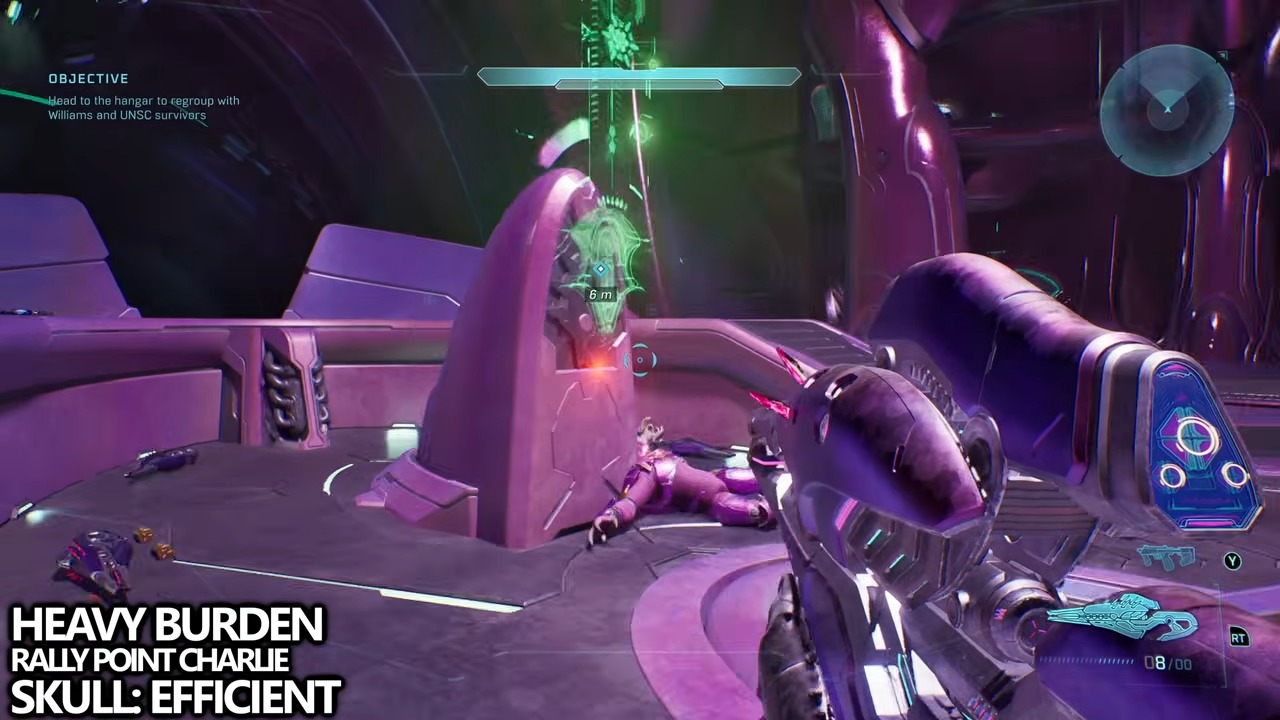
Target
Efficient
- Checkpoint
- Powered gondola ride
- Landmark
- The left out-of-bounds platform in the second stop after power is restored.
Do this
- 1Restart the gondola, continue through the next stop, and watch for the following pair of side platforms.
- 2Jump to the left platform and sprint to its rear-right corner; touching the Skull records it even if you fall afterward.
Confirmation
Efficient is recorded after the final step is completed.
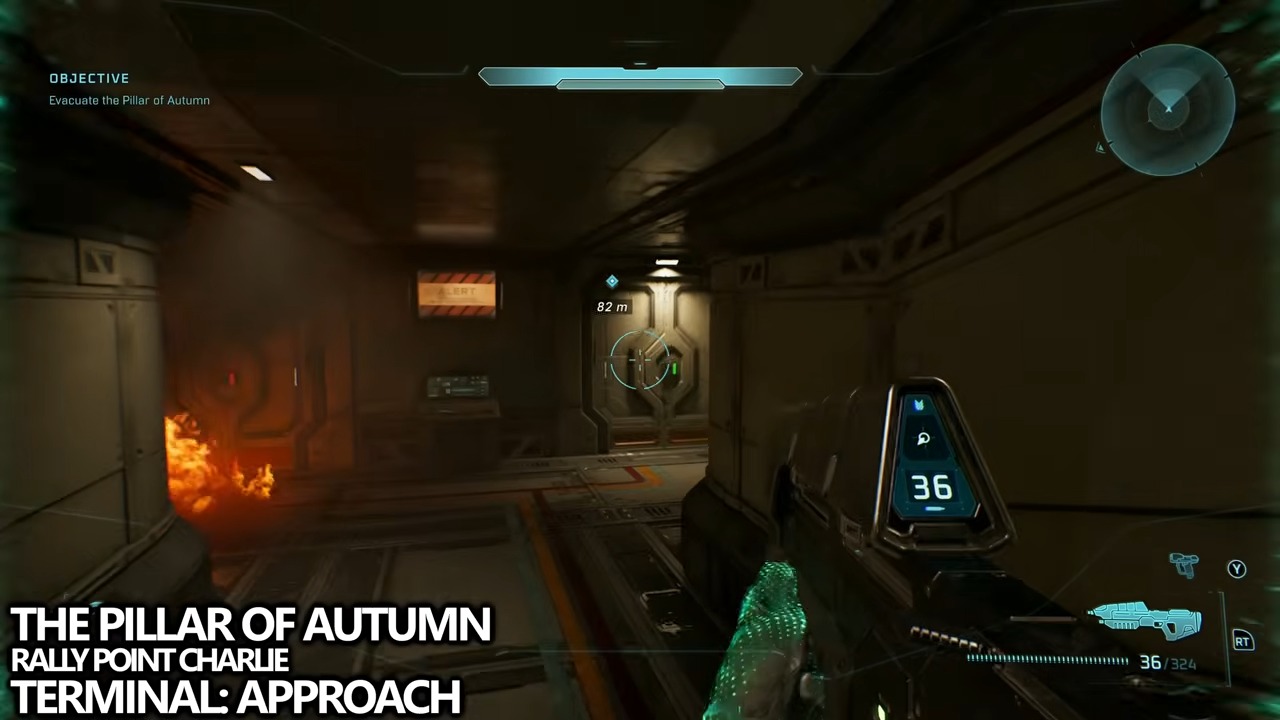
Target
Approach
- Checkpoint
- During evacuation
- Landmark
- During evacuation, leave the control room with the broken window, turn left into the room behind it, and check the rear-right corner.
Do this
- 1Leave the control room with the broken window.
- 2Turn left into the room behind it.
- 3Check the rear-right corner.
- 4Interact with the Approach Terminal at the end of the route.
Confirmation
Approach is available as described. During evacuation, leave the control room with the broken window, turn left into the room behind it, and check the rear-right corner.
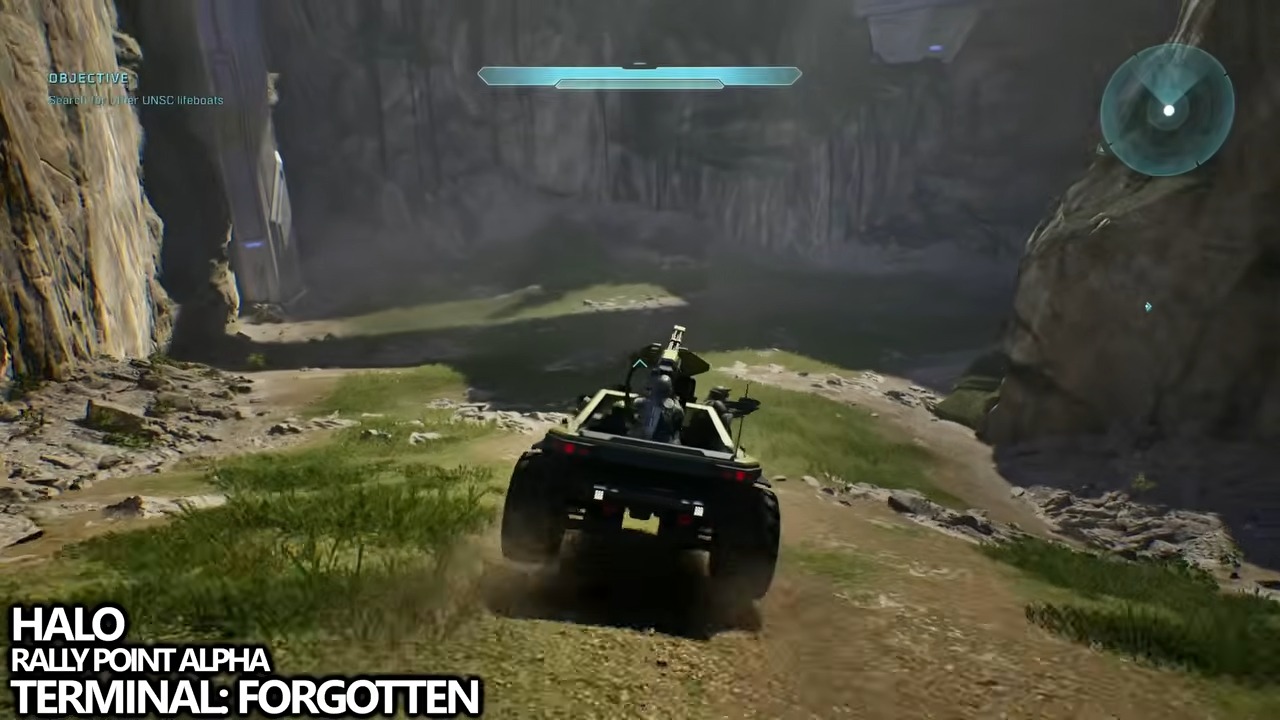
Target
Forgotten
- Checkpoint
- In the first Warthog tunnel
- Landmark
- In the first Warthog tunnel, stop after the first ramp, climb the right ledge, and lower yourself onto the hidden shelf.
Do this
- 1Stop after the first ramp.
- 2Climb the right ledge.
- 3Lower yourself onto the hidden shelf.
- 4Interact with the Forgotten Terminal at the end of the route.
Confirmation
Forgotten is available as described. In the first Warthog tunnel, stop after the first ramp, climb the right ledge, and lower yourself onto the hidden shelf.
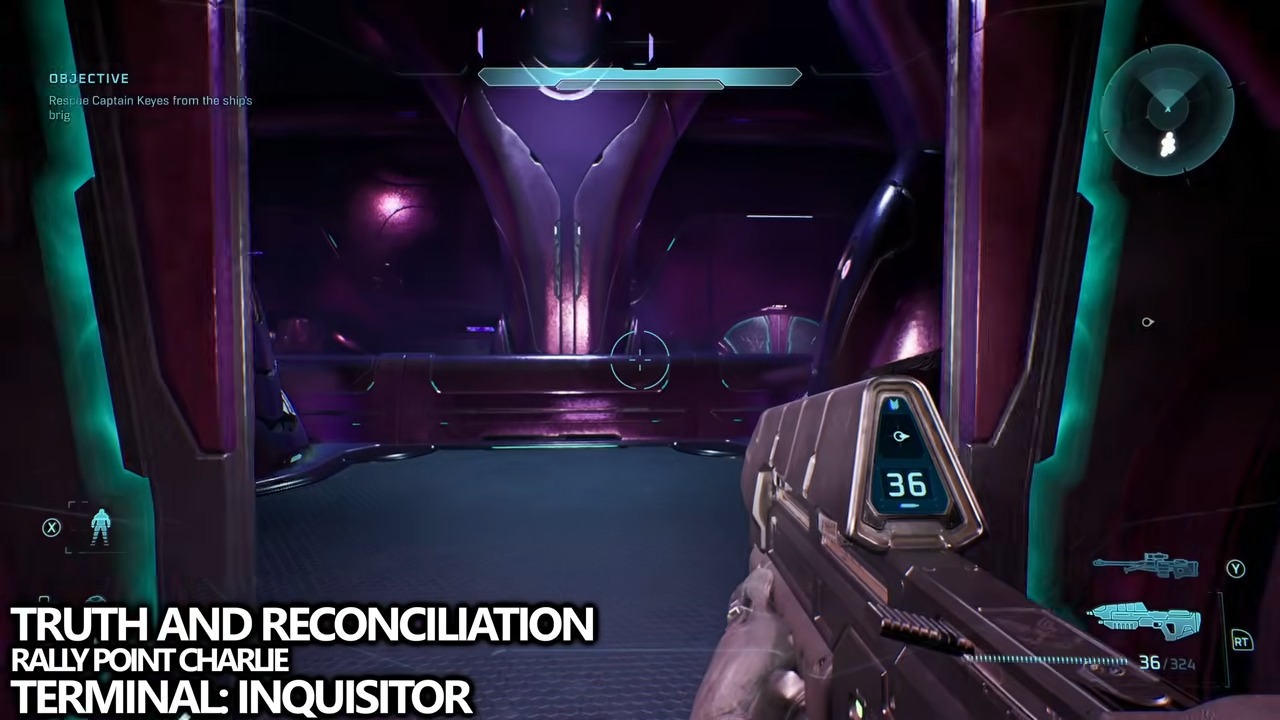
Target
Inquisitor
- Checkpoint
- On the Keyes-cell route
- Landmark
- On the Keyes-cell route, take the right-hand door, open the prison cells, and enter the cell containing the fallen Marine.
Do this
- 1Take the right-hand door.
- 2Open the prison cells.
- 3Enter the cell containing the fallen Marine.
- 4Interact with the Inquisitor Terminal at the end of the route.
Confirmation
Inquisitor is available as described. On the Keyes-cell route, take the right-hand door, open the prison cells, and enter the cell containing the fallen Marine.
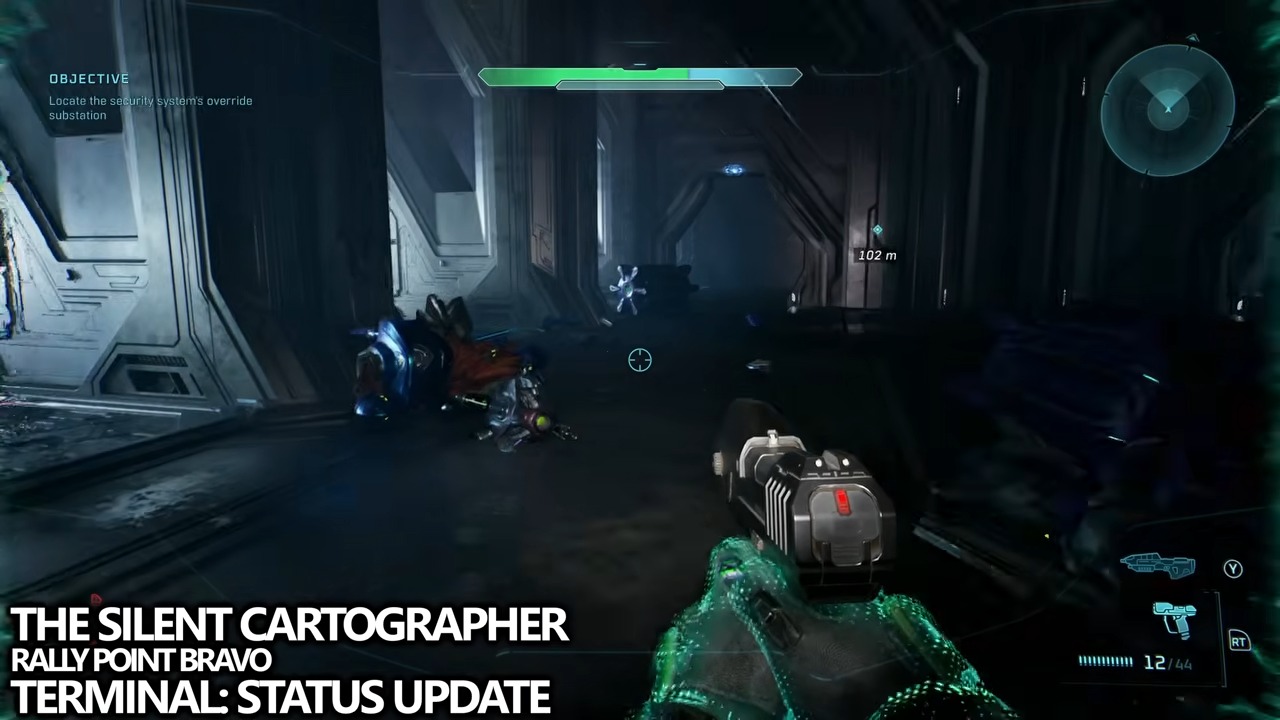
Target
Status Update
- Checkpoint
- Inside the system-override room
- Landmark
- Inside the system-override room, pass the objective device, go to the far wall, and turn around to reveal the terminal.
Do this
- 1Pass the objective device.
- 2Go to the far wall.
- 3Turn around to reveal the terminal.
- 4Interact with the Status Update Terminal at the end of the route.
Confirmation
Status Update is available as described. Inside the system-override room, pass the objective device, go to the far wall, and turn around to reveal the terminal.
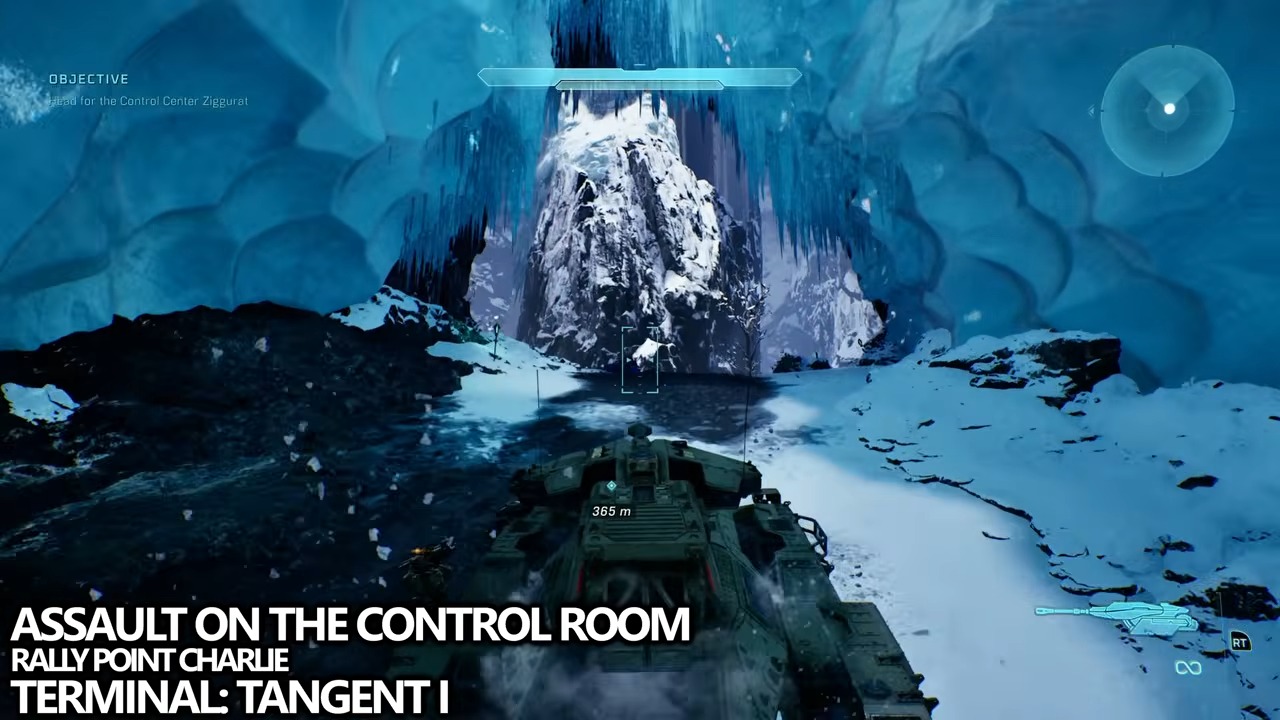
Target
Tangent I
- Checkpoint
- After the ice cave
- Landmark
- After the ice cave, enter either side of the tower, climb the interior ramp, and follow the upper walkway right.
Do this
- 1Enter either side of the tower.
- 2Climb the interior ramp.
- 3Follow the upper walkway right.
- 4Interact with the Tangent I Terminal at the end of the route.
Confirmation
Tangent I is available as described. After the ice cave, enter either side of the tower, climb the interior ramp, and follow the upper walkway right.
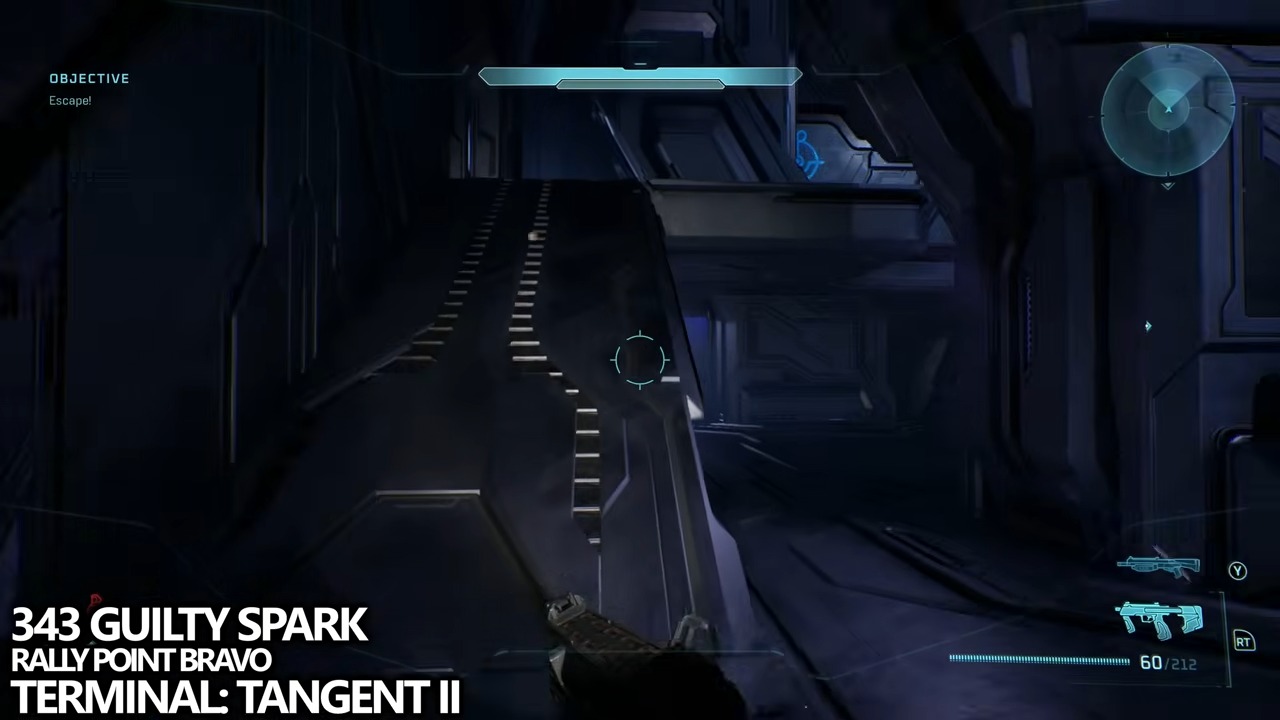
Target
Tangent II
- Checkpoint
- During the escape
- Landmark
- During the escape, cross the gap beside the light bridge into the enemy doorway, then turn right twice at the end of the narrow hall.
Do this
- 1Cross the gap beside the light bridge into the enemy doorway.
- 2Turn right twice at the end of the narrow hall.
- 3Interact with the Tangent II Terminal at the end of the route.
Confirmation
Tangent II is available as described. During the escape, cross the gap beside the light bridge into the enemy doorway, then turn right twice at the end of the narrow hall.
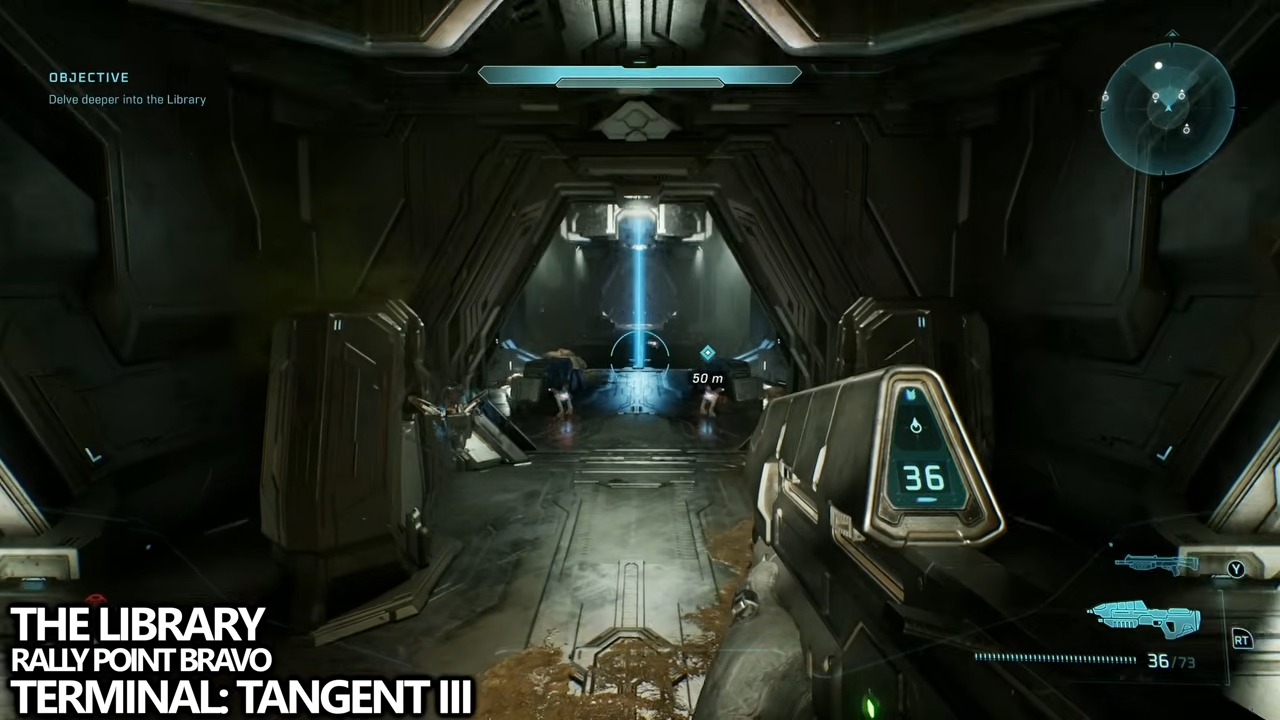
Target
Tangent III
- Checkpoint
- After the Pop Skull door opens
- Landmark
- After the Pop Skull door opens, use the left console, clear the biomass blocking the wall opening, and crawl through.
Do this
- 1Use the left console.
- 2Clear the biomass blocking the wall opening.
- 3Crawl through.
- 4Interact with the Tangent III Terminal at the end of the route.
Confirmation
Tangent III is available as described. After the Pop Skull door opens, use the left console, clear the biomass blocking the wall opening, and crawl through.
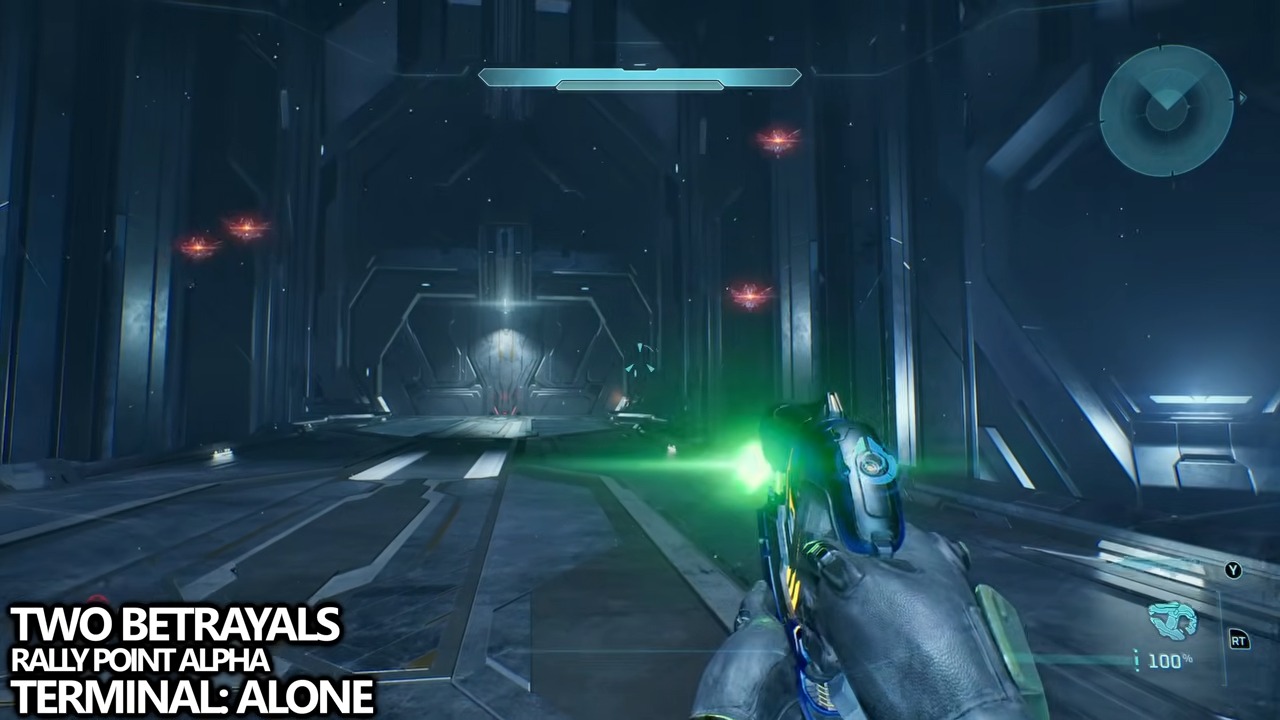
Target
Alone
- Checkpoint
- Immediately after gaining control
- Landmark
- Immediately after gaining control, turn around and circle to the opposite side of the starting ring.
Do this
- 1Turn around and circle to the opposite side of the starting ring.
- 2Interact with the Alone Terminal at the end of the route.
Confirmation
Alone is available as described. Immediately after gaining control, turn around and circle to the opposite side of the starting ring.
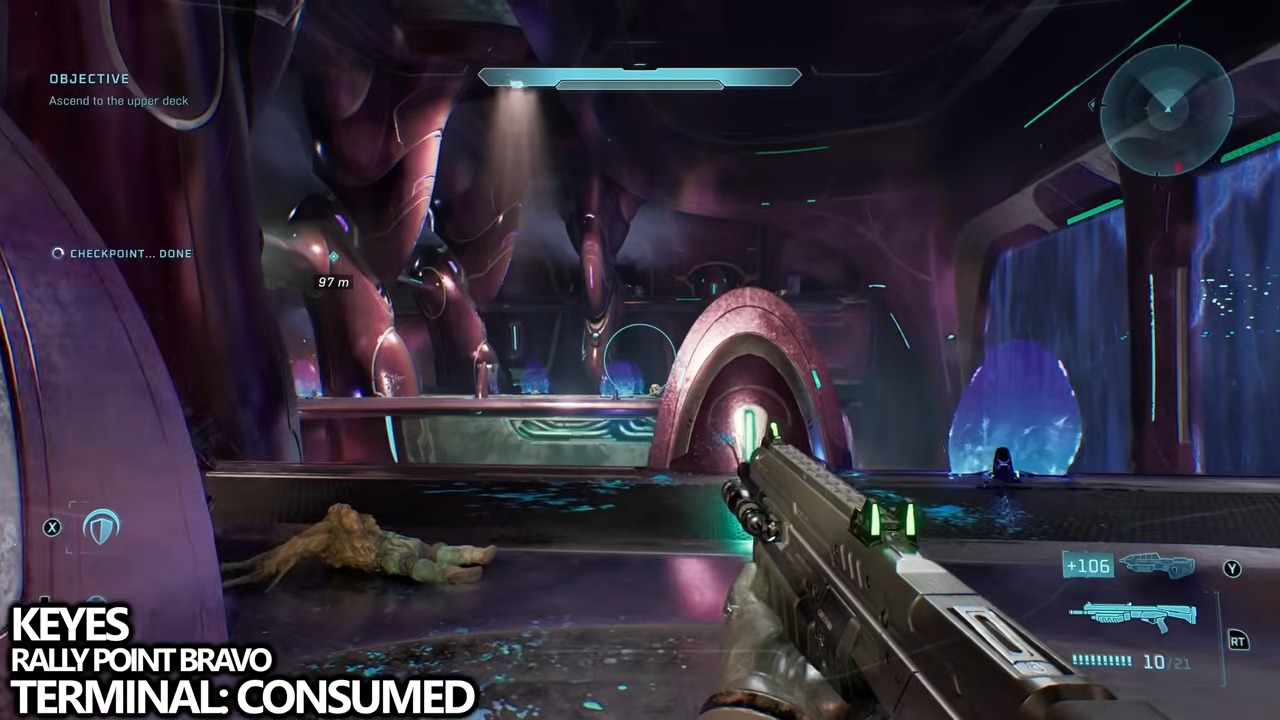
Target
Consumed
- Checkpoint
- From the shuttle-bay entrance
- Landmark
- From the shuttle-bay entrance, take the left door, then follow the corridor sequence left, left, right, left.
Do this
- 1Take the left door.
- 2Follow the corridor sequence left.
- 3Left.
- 4Right.
- 5Left.
- 6Interact with the Consumed Terminal at the end of the route.
Confirmation
Consumed is available as described. From the shuttle-bay entrance, take the left door, then follow the corridor sequence left, left, right, left.
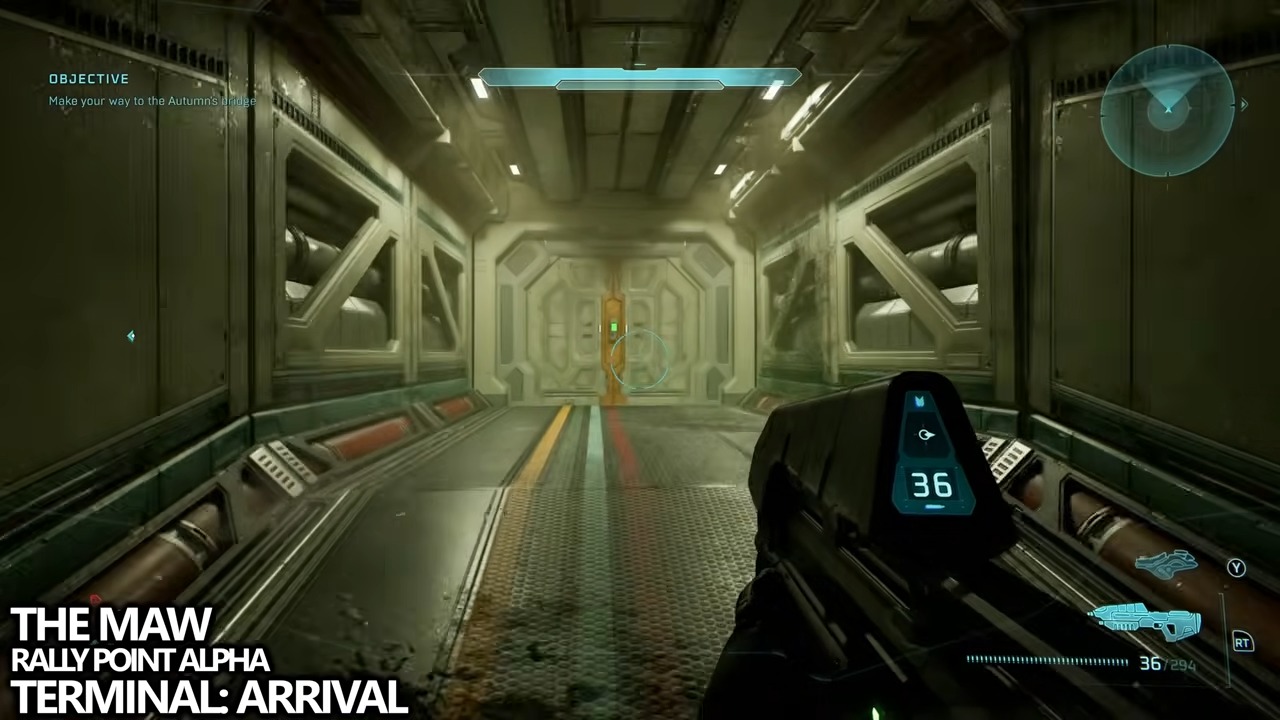
Target
Arrival
- Checkpoint
- On the objective route
- Landmark
- On the objective route, enter the fire-lit mess hall and check the right side beyond the rows of tables.
Do this
- 1Enter the fire-lit mess hall and check the right side beyond the rows of tables.
- 2Interact with the Arrival Terminal at the end of the route.
Confirmation
Arrival is available as described. On the objective route, enter the fire-lit mess hall and check the right side beyond the rows of tables.
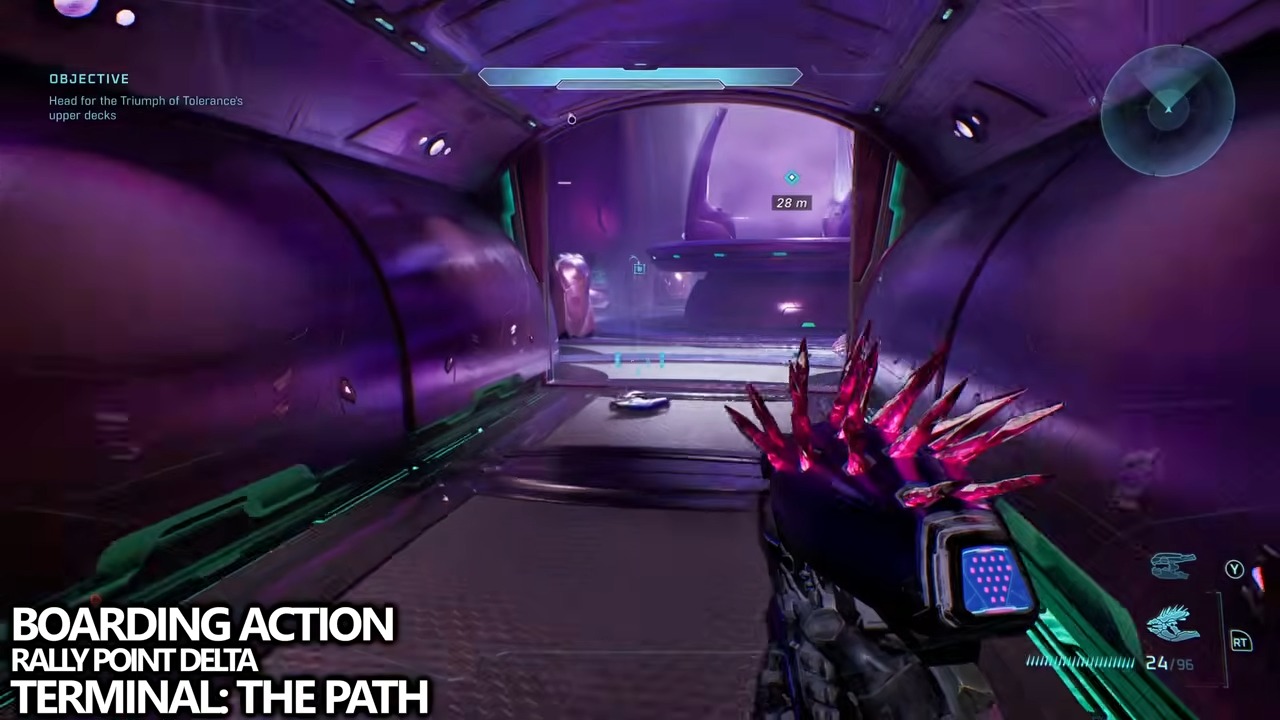
Target
The Path
- Checkpoint
- Ride the lift immediately after Leadhead
- Landmark
- Ride the lift immediately after Leadhead, turn left at the top, use the rear-corner door, and check the right wall.
Do this
- 1Turn left at the top.
- 2Use the rear-corner door.
- 3Check the right wall.
- 4Interact with the The Path Terminal at the end of the route.
Confirmation
The Path is available as described. Ride the lift immediately after Leadhead, turn left at the top, use the rear-corner door, and check the right wall.
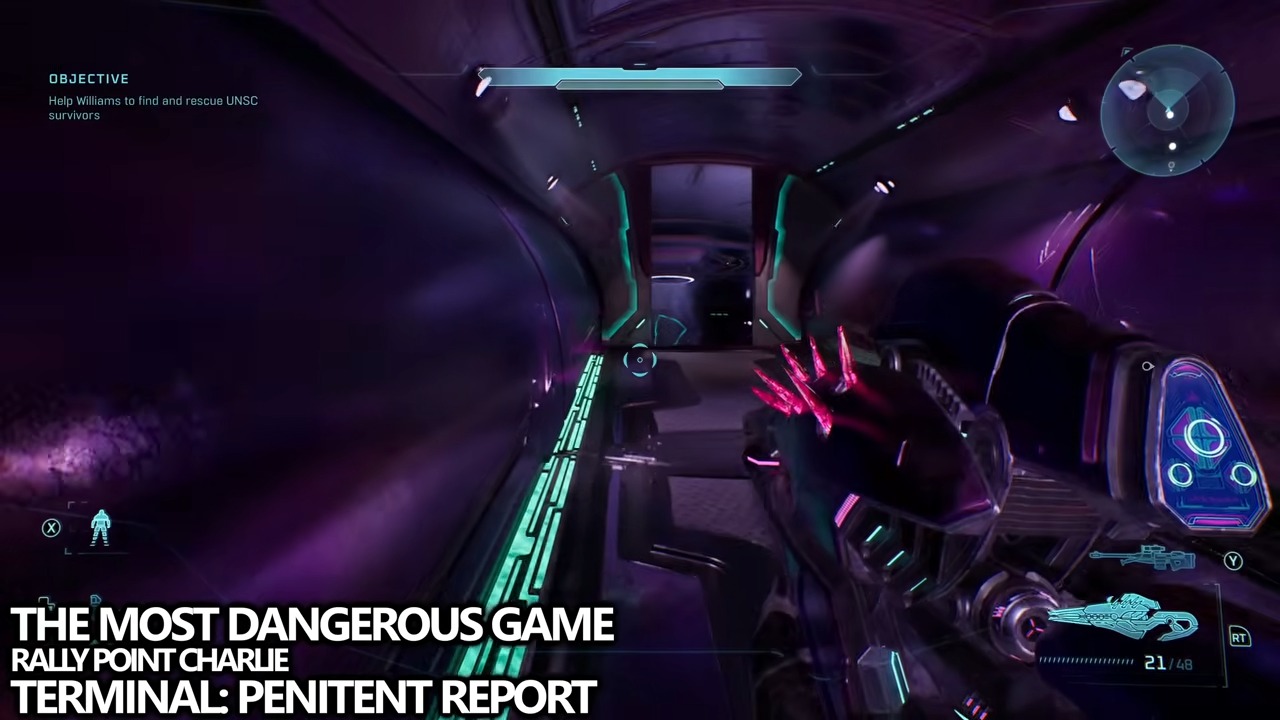
Target
Penitent Report
- Checkpoint
- After freeing the Marines
- Landmark
- After freeing the Marines, find the room with pink windows and take the right-hand door into the terminal room.
Do this
- 1Find the room with pink windows and take the right-hand door into the terminal room.
- 2Interact with the Penitent Report Terminal at the end of the route.
Confirmation
Penitent Report is available as described. After freeing the Marines, find the room with pink windows and take the right-hand door into the terminal room.
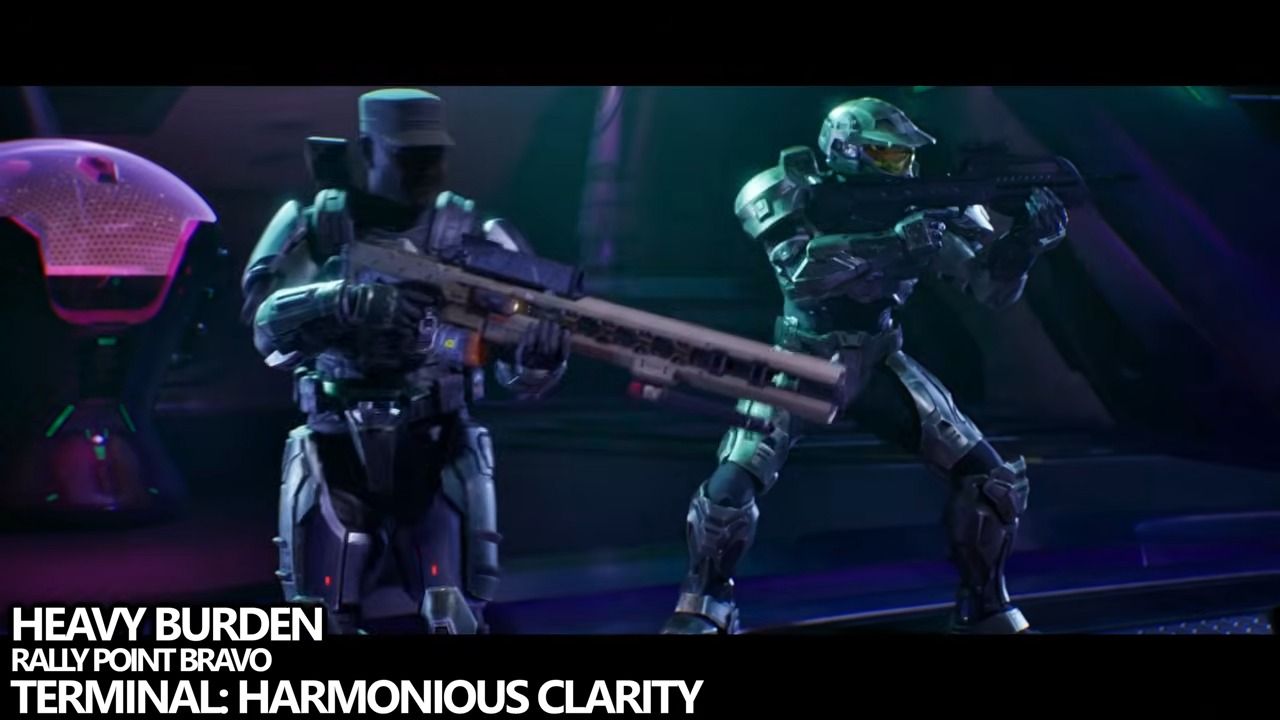
Target
Harmonious Clarity
- Checkpoint
- In the planet-hologram room
- Landmark
- In the planet-hologram room, take either rear door, continue to the final room, and search its left side.
Do this
- 1Take either rear door.
- 2Continue to the final room.
- 3Search its left side.
- 4Interact with the Harmonious Clarity Terminal at the end of the route.
Confirmation
Harmonious Clarity is available as described. In the planet-hologram room, take either rear door, continue to the final room, and search its left side.