
Quick answer
Open Settings and use the Accessibility tab for the screen reader, global text scale, and subtitles; use the Bindings screen to remap controls; and use Gameplay for crosshair options and up to four custom difficulty presets. Each preset tunes damage resistance, shield recharge rate, damage modifier, melee damage modifier, and ammo.
Guide briefing
Halo Campaign Evolved Accessibility Settings Guide
Work through the accessibility options the source reviews: a screen reader that narrates menus and in-game HUD, full control remapping, independent global text and subtitle sizing, crosshair and HUD adjustments, and four custom difficulty presets with five tunable control factors.
Before you start
- — Halo Campaign Evolved installed and launched to the Settings menu
- — A mission loaded if you want to confirm the screen reader's in-game HUD prompts
Applies to
- — Players who want a full walkthrough of the accessibility options on PlayStation 5, Xbox, and PC
- — Disabled players and anyone who needs larger text, spoken HUD, remapped controls, or an easier difficulty
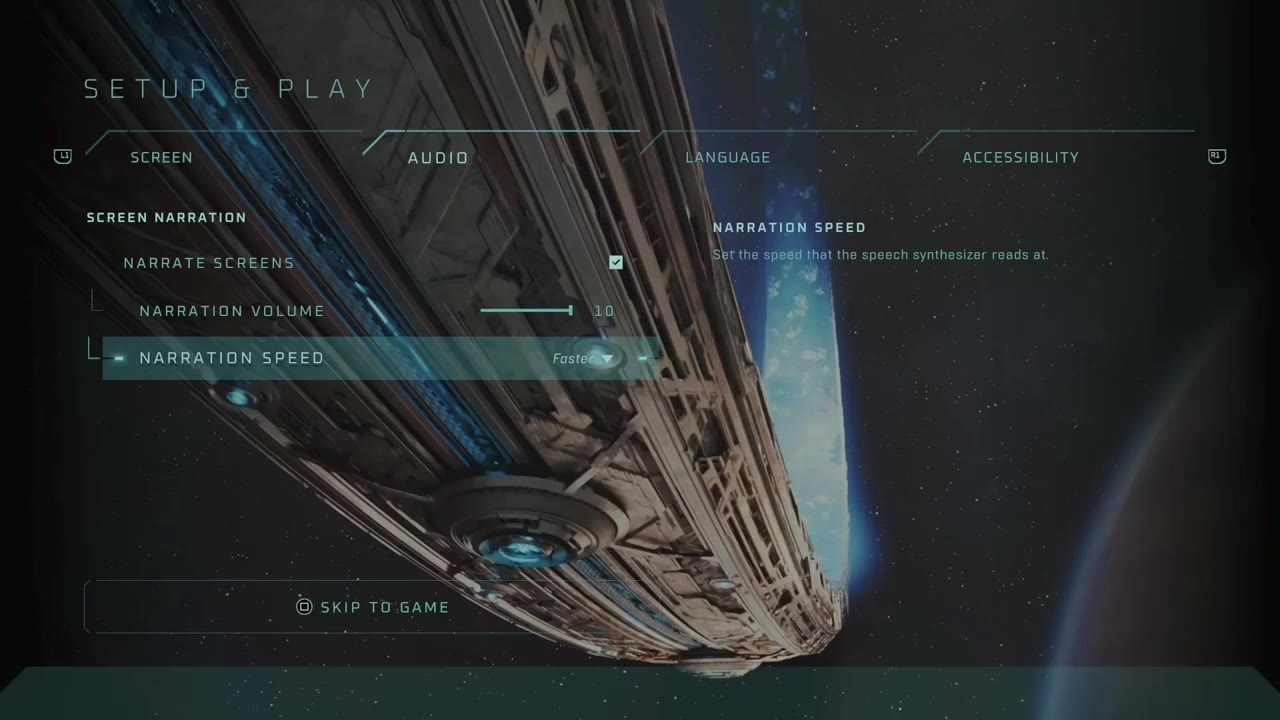
Screen reader narrates menus and in-game HUD
The source confirms the screen reader is back and does more than read menus: it also reads in-game HUD text that pops up, including the prompt to pick up a new weapon, updates when a checkpoint loads, and the new objective when it changes. The reader's volume and speed can be adjusted.
How it works
- Open Settings and switch to the Accessibility tab, then enable the screen narration option.
- Confirm it reads menu items, then start a mission and check that it announces weapon-pickup prompts, checkpoint loads, and new objectives.
- If the reader is too fast or too quiet, open its volume and speed controls and retest the same prompt.
Source boundary: The source notes the reader covers certain HUD text but is not a full subtitle system; environmental lines such as Grunt or Brute banter are not captioned.
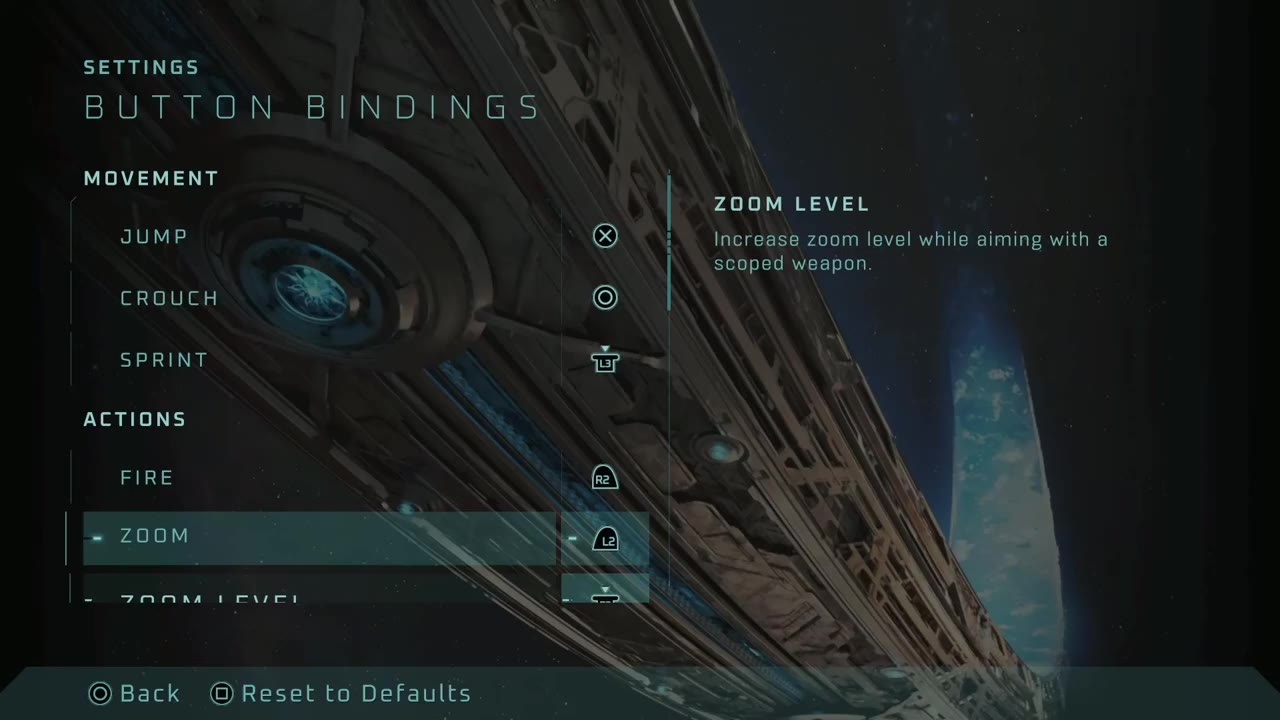
Remap controls
The source highlights full control remapping: every movement and action binding can be reassigned. The bindings screen lists actions such as jump, crouch, sprint, and fire, so players can move any input to a comfortable position.
How it works
- Open Settings and select the Bindings screen.
- Choose the action to change, such as jump, crouch, sprint, or fire, and assign the new input.
- Save the change and test the new binding in a mission before relying on it.
Source boundary: Remapping changes only the input assignment; the source notes the game still lacks an auto-aim or auto-targeting assist, so aiming itself is not automated.
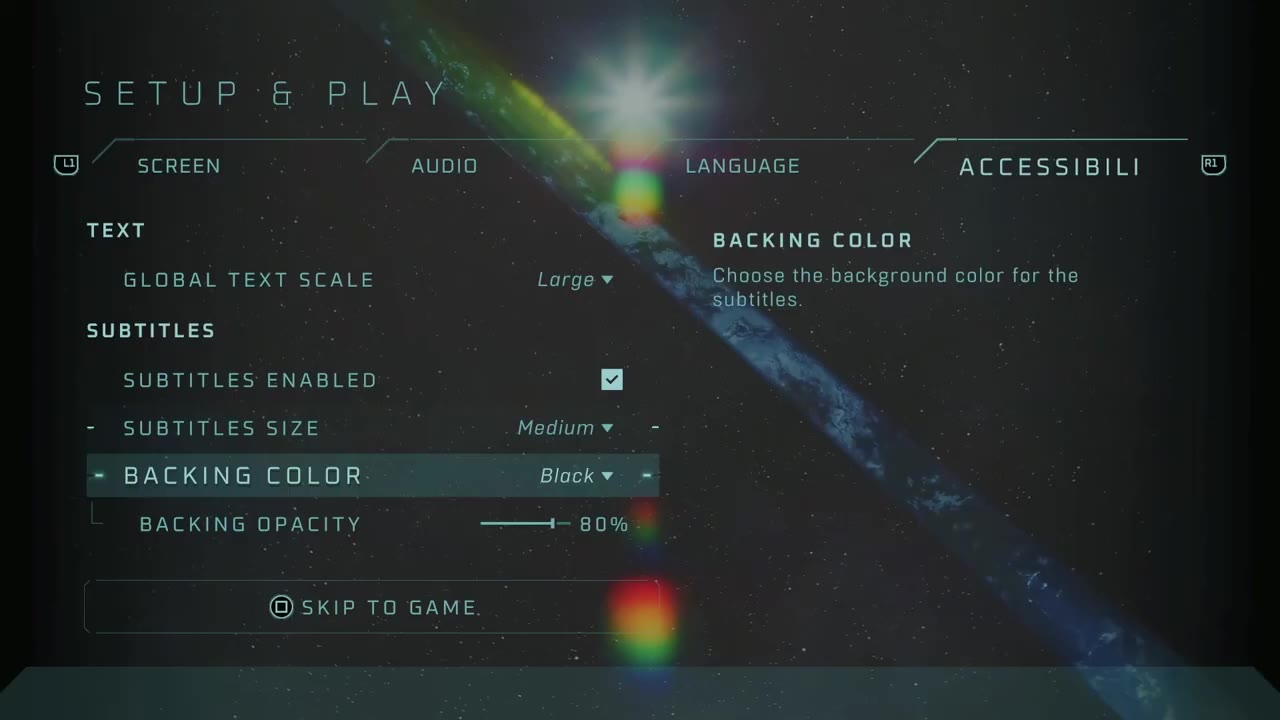
Set global text size and subtitle size independently
The source explains that the game's global text can be scaled up, and that subtitles can be sized separately or matched to the global text. The screen also exposes subtitle enable, subtitle size, backing color, and backing opacity.
How it works
- Open Settings and go to the Accessibility tab, then raise the global text scale (for example to Large).
- Open the subtitles section and set the subtitle size on its own, or match it one-to-one with the global text size.
- Optionally choose a backing color and backing opacity for subtitles so they stay readable over bright scenes.
Source boundary: The two sizes are independent, so a larger global text scale does not automatically enlarge subtitles; set both if you need both larger.
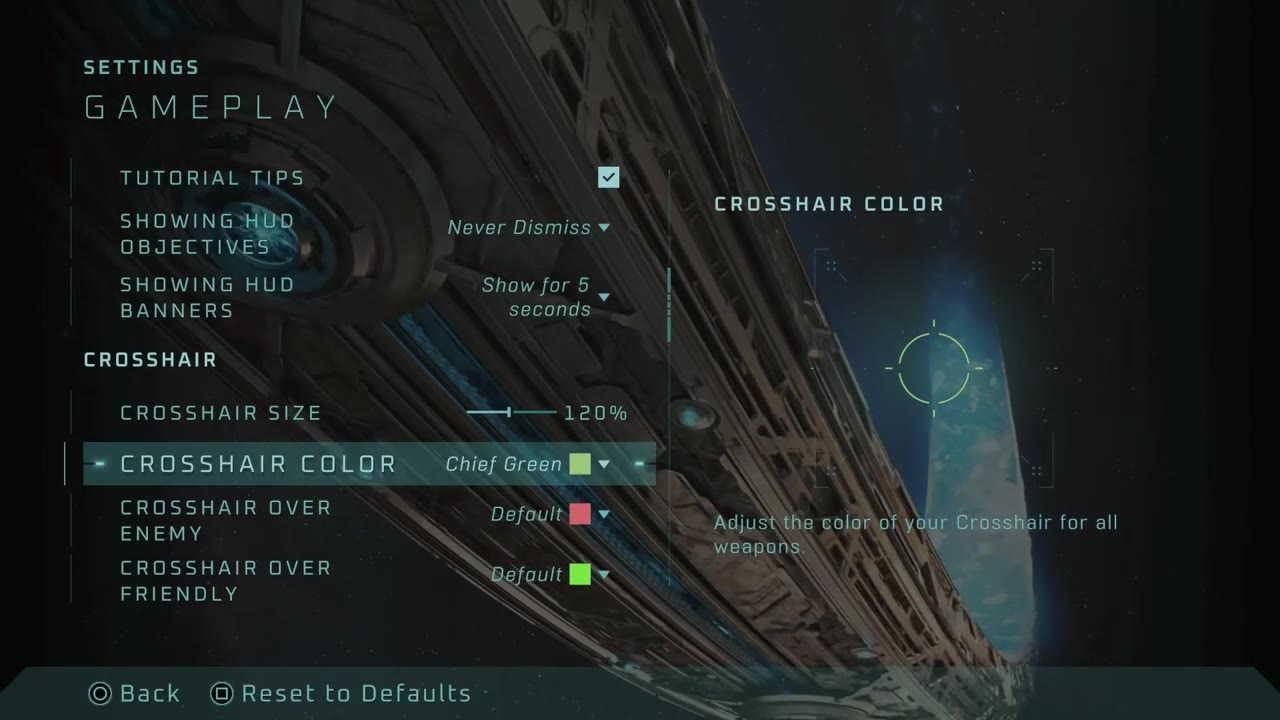
Adjust crosshair color, size, and HUD banners
The source notes the HUD and interface are large by default and that players can further adjust color and targeting markers. The gameplay screen exposes crosshair color, crosshair size, and separate crosshair markers over enemies and friendlies, plus how long objective and HUD banners stay on screen.
How it works
- Open Settings and go to the Gameplay tab, then find the crosshair options.
- Change the crosshair color, size, and the enemy/friendly crosshair markers to make targets easier to see.
- Adjust the objective and HUD banner display duration if on-screen text disappears too quickly.
Source boundary: The source describes these as color and reticle adjustments rather than a dedicated high-contrast mode, which is not present.
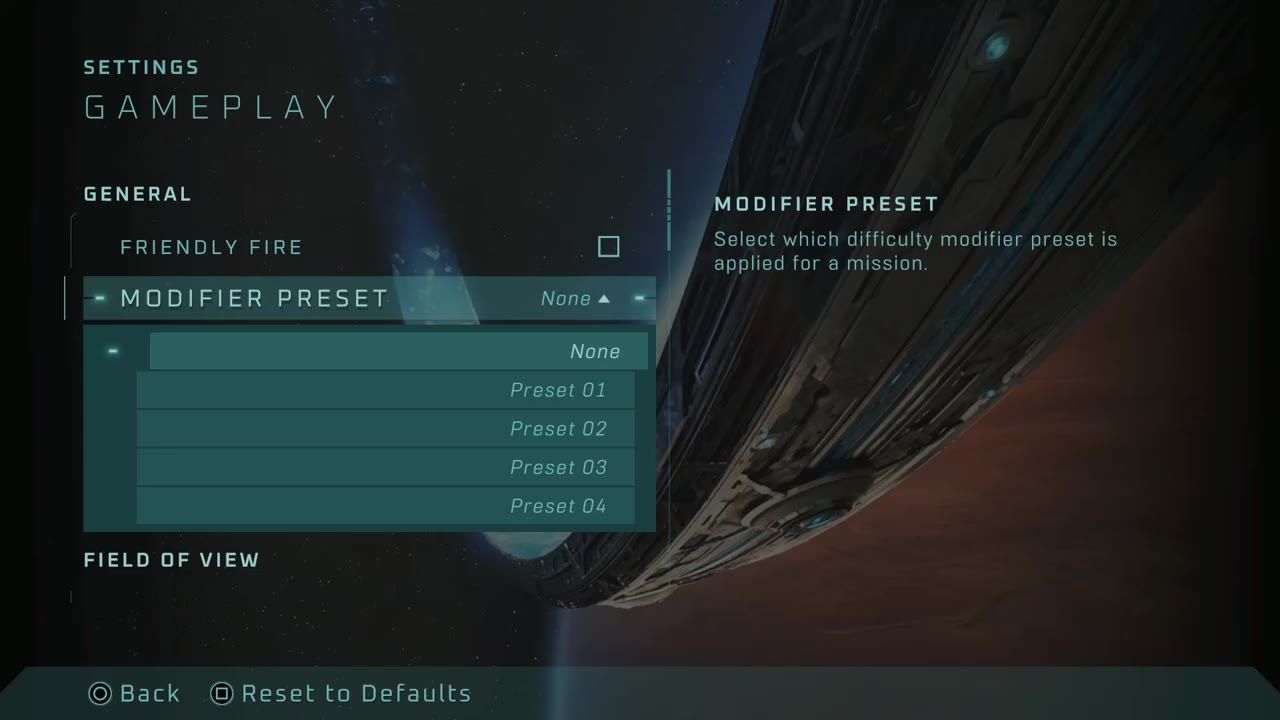
Save up to four custom difficulty presets
The source calls the difficulty presets the standout addition: you can create four custom presets instead of a single difficulty, then switch between them for solo, co-op, or Remix runs. The general gameplay screen also exposes the modifier preset selector and friendly fire, alongside field of view.
How it works
- Open Settings and go to Gameplay, then choose the modifier preset selector.
- Create a preset for a specific use, such as a comfortable solo run or a co-op run, and save it.
- To switch presets, back out to the menu, select the other preset, and re-enter; the game saves your position so you do not restart the mission.
Source boundary: The source notes you cannot change the preset during gameplay; you must back out to the menu, which reloads the instance with the new modifiers.
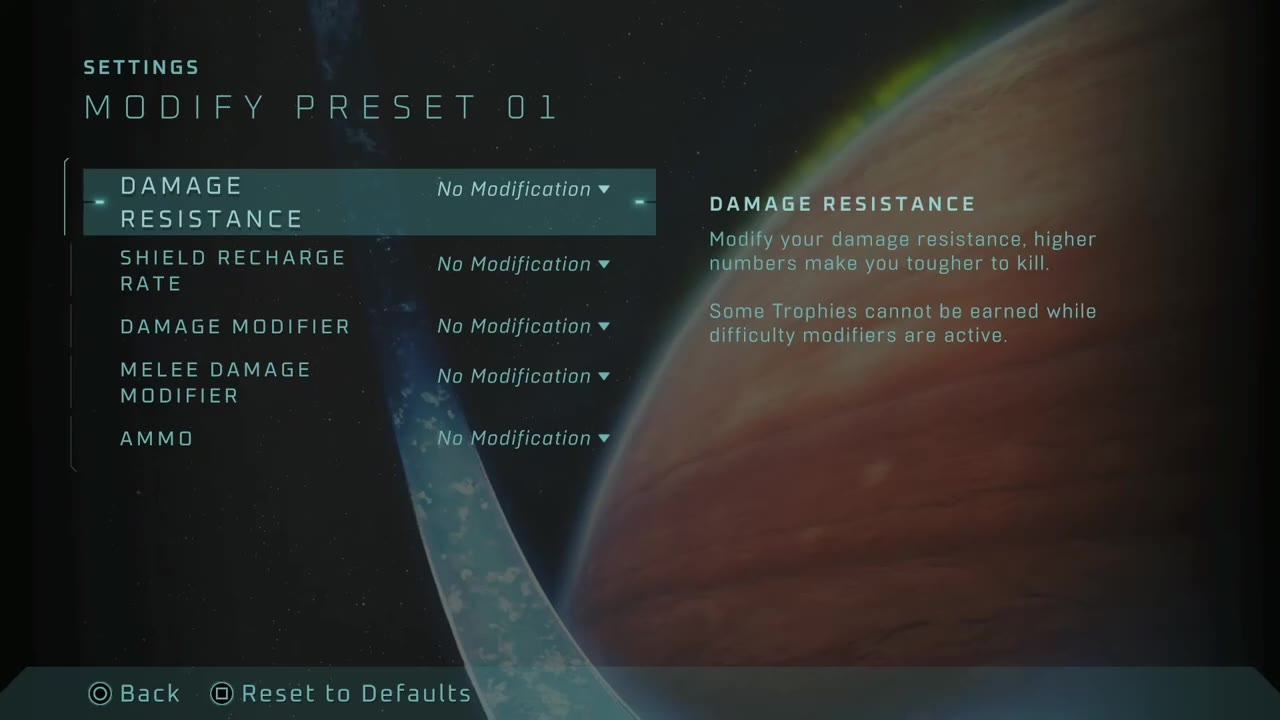
Tune the five preset control factors
The source explains that each preset exposes five control factors: damage resistance, shield recharge rate, damage modifier, melee damage modifier, and ammo. Damage resistance controls how much you can take, the modifiers add damage, and ammo controls how much you carry.
How it works
- Open a preset and review its five factors: damage resistance, shield recharge rate, damage modifier, melee damage modifier, and ammo.
- Raise damage resistance to survive longer, or raise the damage modifier to deal more damage.
- Adjust melee damage and ammo to taste, then save the preset and test it in a mission.
Source boundary: These factors tune the run but do not replace skill or targeting; the source still found some sections demanding even with adjustments.